
Turning a Day Hike on the Earnslaw Burn Track into a Challenging Adventure!
22/12/18 ~ 25/12/18
Introduction
The Earnslaw Burn Track
The Earnslaw Burn track* is a track of medium popularity near Glenorchy, an hour west of Queenstown. It would be more popular, however, it is quite challenging due to the rugged terrain, both in the forest and the tussock marsh basin of the glacial valley. It’s popular as a day hike, which can take between 8-12 hours (depending on how far you decide to hike towards the end of the valley).
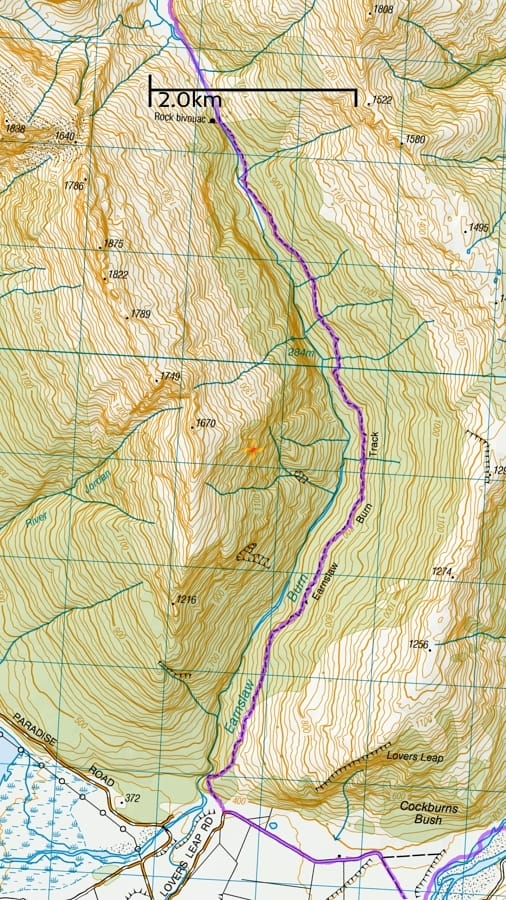
However, many also do it as an overnight hike, as there is a convenient rock bivy straight after the forest section (two thirds into the valley). Alternatively, there are several flat areas to set up a tent as well. Tent camping in front of Earnslaw Glacier at Camp 2 (see map) is what i’d recommend for more of a challenge! It should also be noted, that this is typically a walk in, walk out the same way hike. The trail is marked all the way until the end of the forest, and offers no navigational difficulty the entire way.
* Burn in New Zealand and Scotland refers to a river or stream, usually in a valley.

Getting There
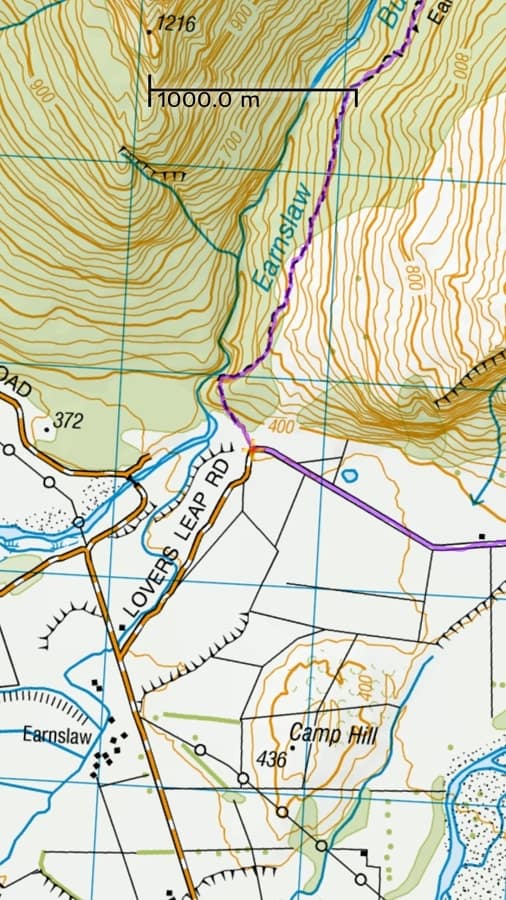
To get to the Earnslaw Burn Track trailhead, you first have to head towards Diamond Lake from Glenorchy. There is a small dirt road called Lovers Leap Rd on the right side before you cross the Earnslaw Burn. 800m down the road and you reach a corner – this is the where the trailhead begins. You need to pull off on the grass as there is no carpark or sign due to it being private property initially. You might make out the large orange triangle in the trees.
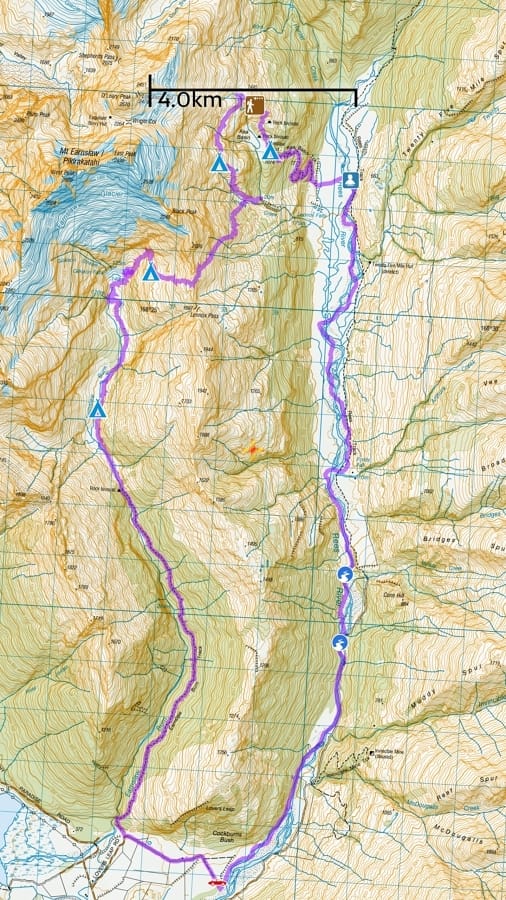
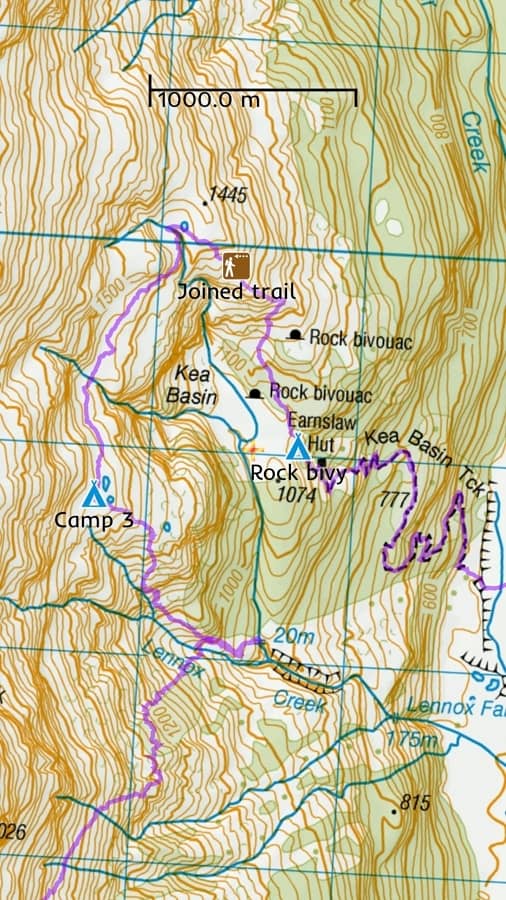
The Earnslaw – Kea Basin Loop
This particular hike i basically made up to add some adventure and remoteness to a semi-well known hike, and be able to spend a few more days out in nature. The trip took me 4 days, but you could make it 3 or 5 days easily. You could do this as purely a hiking trip, and hike down alongside the Rees.
However, I chose to take my packraft and raft down the Rees back to my car (parked by the river). The route I chose was largely made up as i went, as the terrain was quite rugged and unpredictable. The Earnslaw – Kea Basin Loop is not a marked or cairned route at all – only the Earnslaw Burn, Rees River and Kea Basin individual tracks are marked.
Challenges
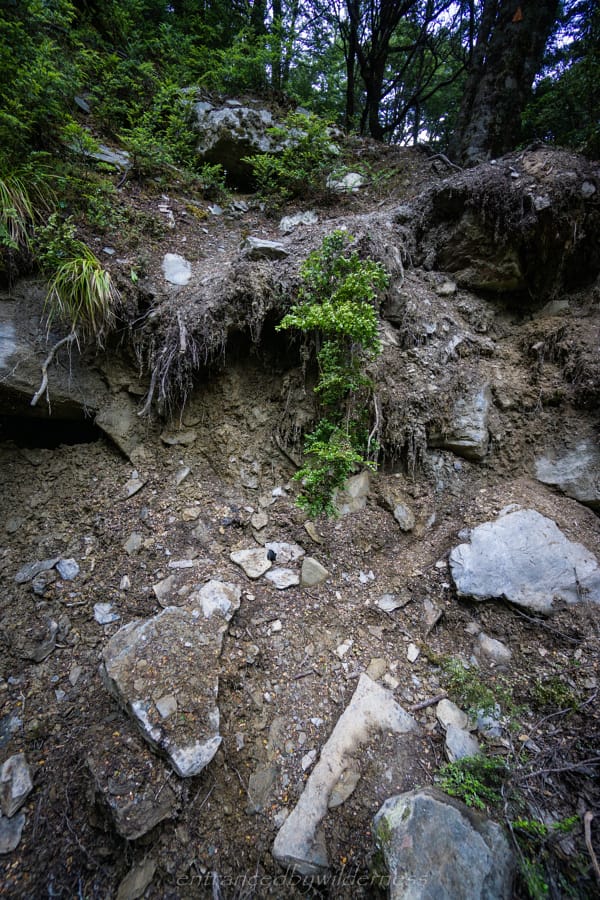
This was one of the most challenging hikes I have done, and the terrain is not for the faint-hearted. In particular, the section surrounding Lennox Creek was quite technical. Navigation is essential, as reading the contours is very important, and largely how I navigated the route. The biggest challenges were: navigating unpredictable contours, climbing wet slippery slopes, tilted rock strata with no finger grips, and painful experiences with the dreaded speargrass (lots of it heading down to Lennox Creek) and another spiky shrub. This was one of those hikes I wish I had gaiters!
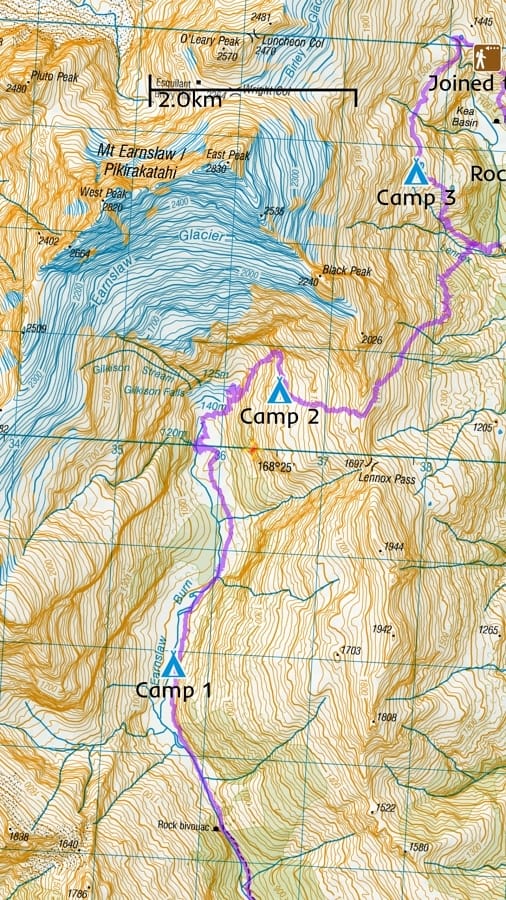
Camping Options
I camped 3 nights as follows:
Camp 1: Grass alongside the Earnslaw Burn
Alternate options: Earnslaw Rock Bivy, head of the valley (near waterfall), or bypass to camp 2 (if daylight hours are present)
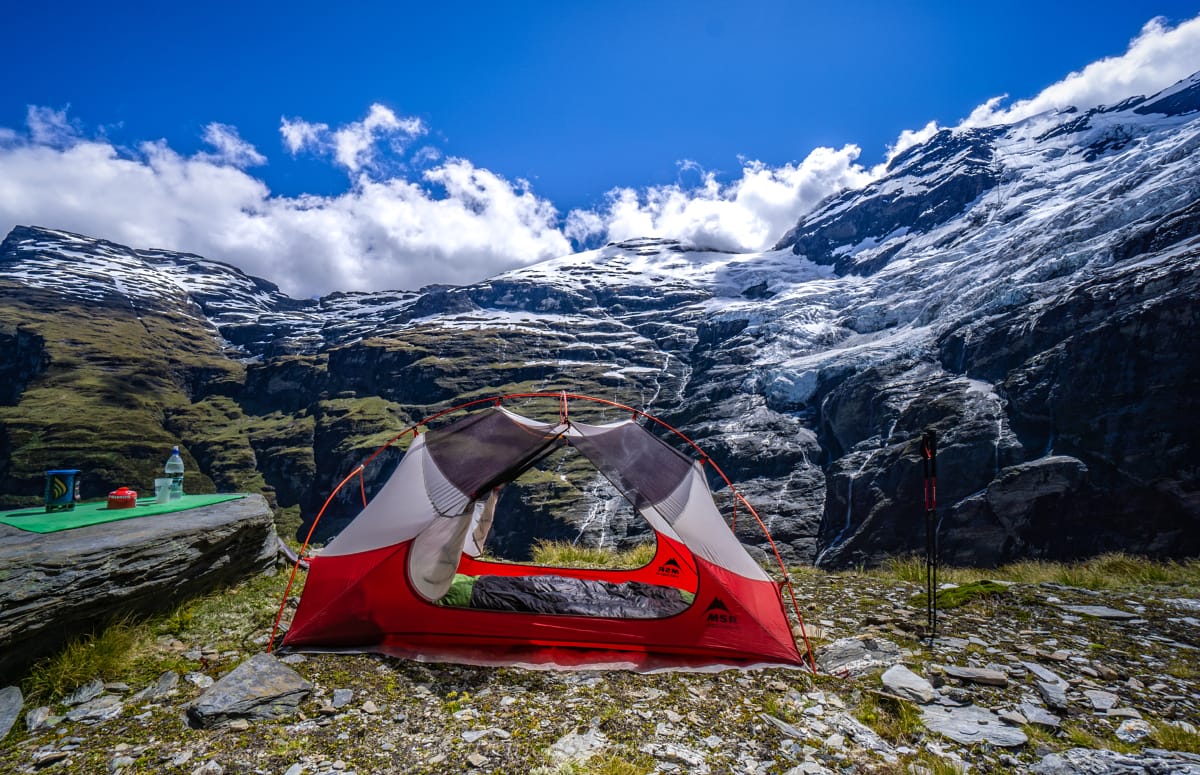
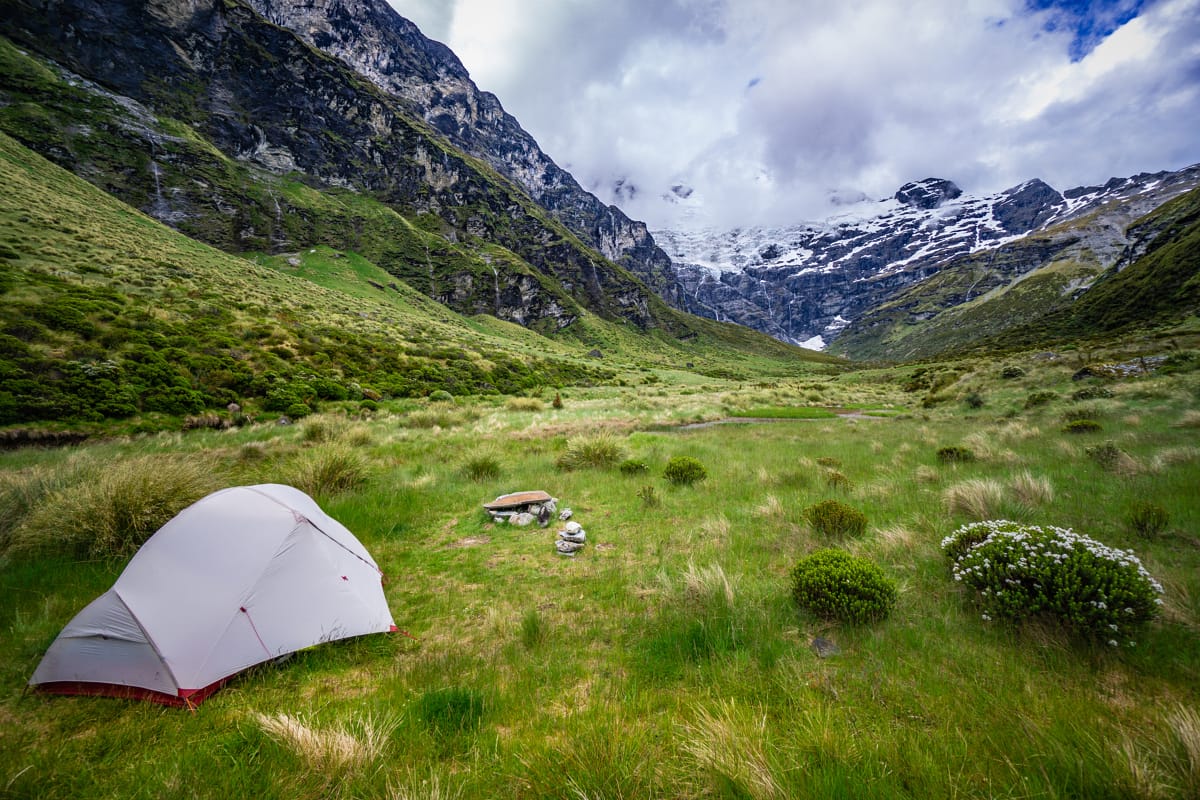
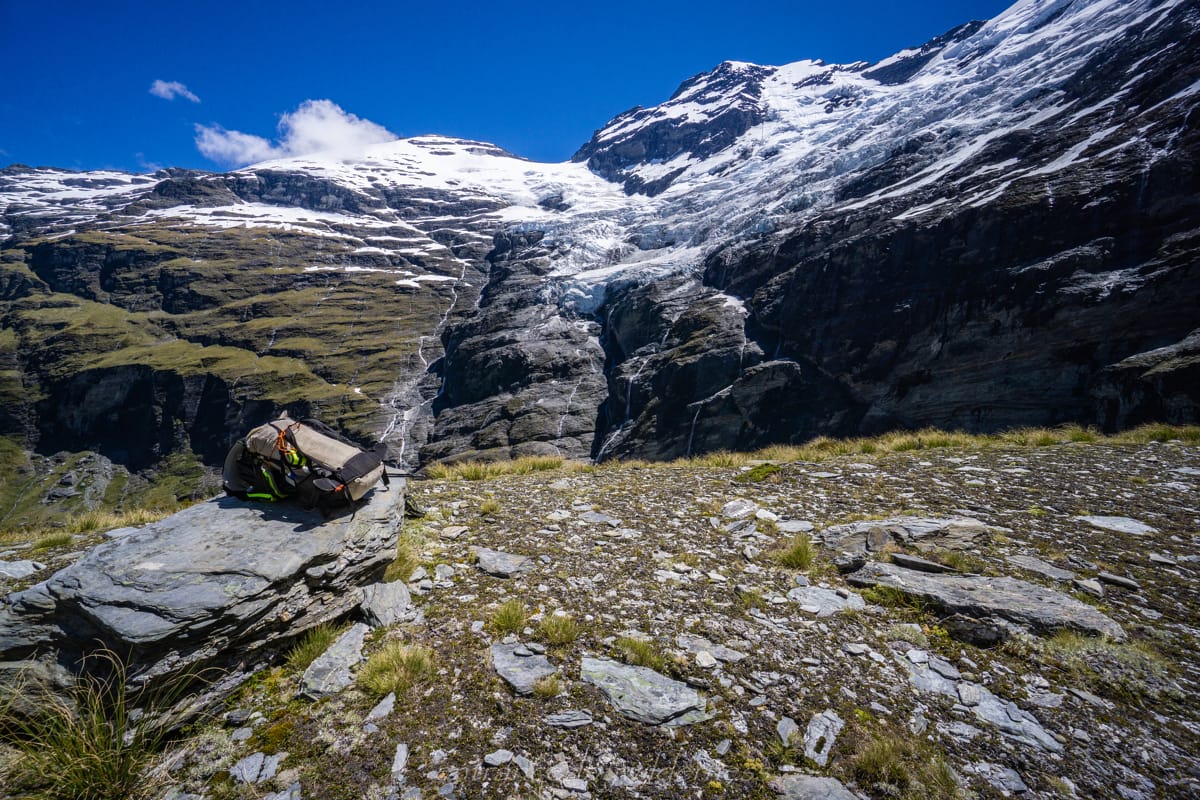
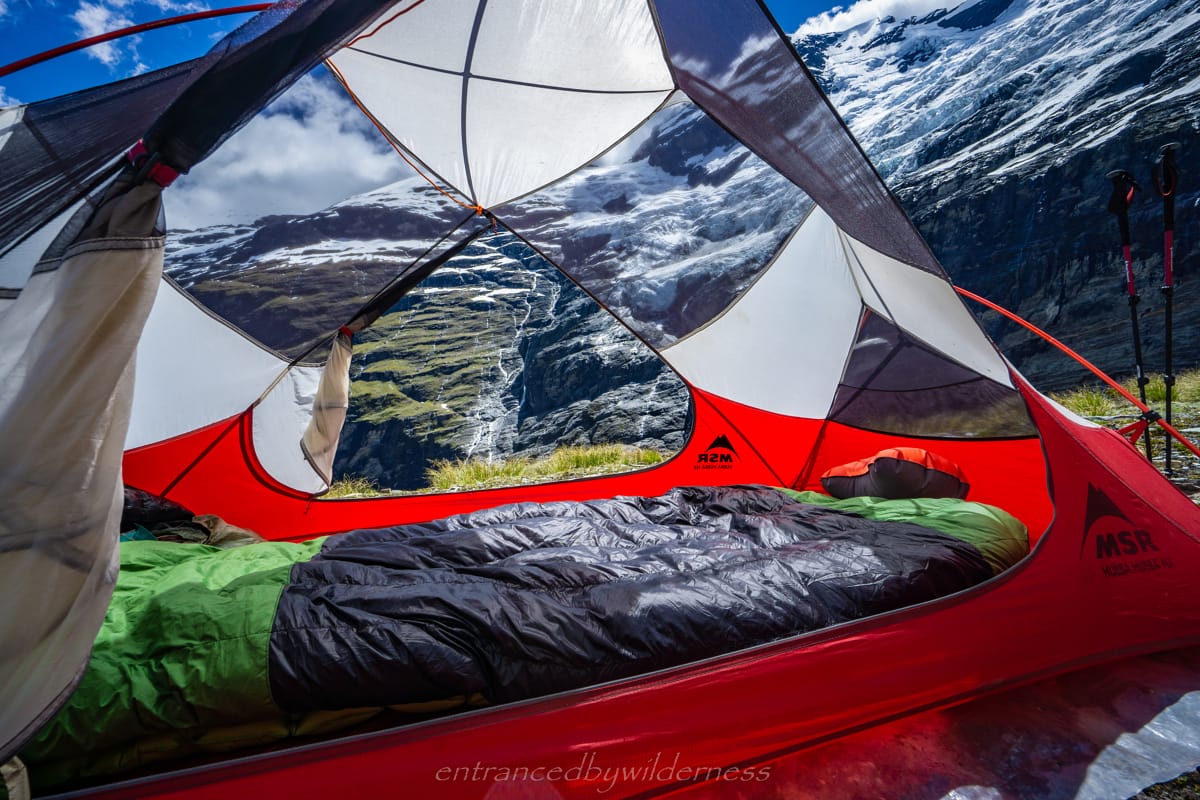
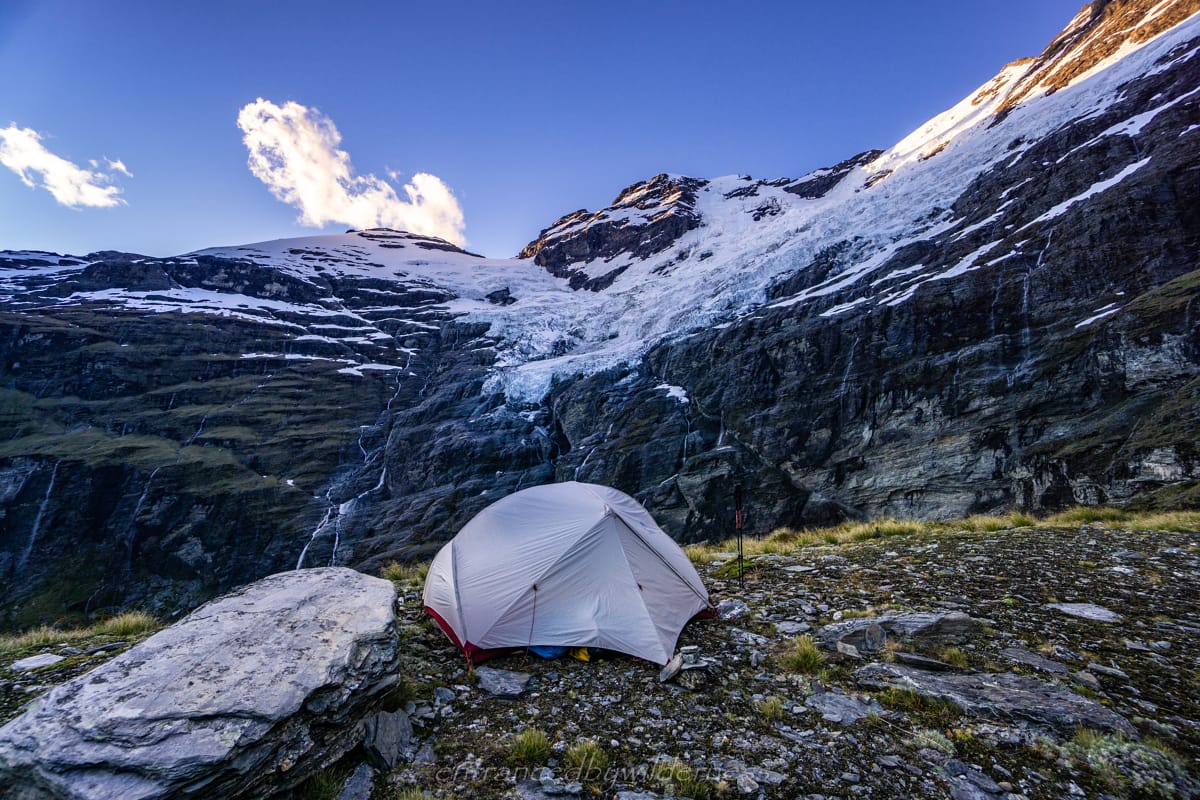
Camp 2: Rocky hill gazing over Earnslaw Glacier (Earnslaw Overwatch – see photo below)
Camp 3: Upper Kea Basin Shelf
Alternate options: Kea Basin Rock Bivy, Earnslaw Hut (the bivy is better!)
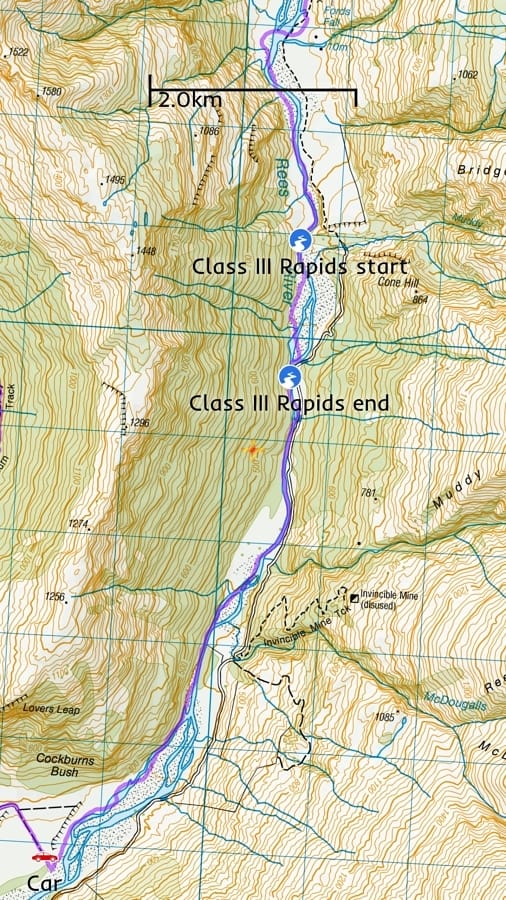
To Raft or Not to Raft?
If you do intend to raft the Rees, it should be noted that there is a Class III rapid section that is quite challenging with several drops and several small boulder gardens. I was thrown out of my raft once, right at the start of the first rapids (the most challenging part).
There is no easy portage option in this section unless you deflate and pack your raft – best to have a go! The section after the Class III rapids is an awesome Class II wave train set and I highly recommend it! The section before the Class III rapids are all relaxing Class I rapids, and offer no real challenges. There were rarely any tree strainers at all in the entire journey.
Maps
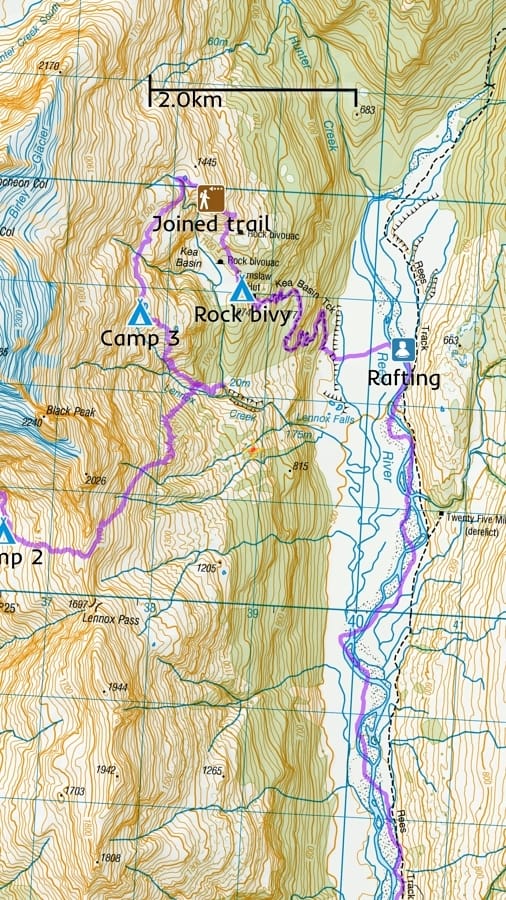

Things i’d change from my route:
- Lennox Pass ridge section – At the top of the ridge, head to the right over Lennox Pass, not where the 1700 label is. The slope was tough with downward sloped rock faces and the falling risk is high. After going over the pass, swing back to the left to the 1500m contour.
- Lennox Creek section – I went a long way down from 1500m-900m to go a long way up from 900m-1440m, on very challenging terrain! This could potentially be avoided. I was checking out the Kea Basin creek forest section to see if it was passable… it was not! Well, maybe via a hidden deer trail, but i didn’t really feel like bush-bashing. Next time, I’d try to stick to the ‘easier’ 1400/1500 contours to meet up to my 3rd campsite on the shelf. It will save you a lot of speargrass encounters too!
- (optional) Earnslaw to Lennox Pass section – I would do this section again the way I did for sure, but it had some slippery terrain and required navigating around broken off cliffs. The alternate easier option is to climb straight up to Lennox Pass (left side of the gully). I was originally going that way, but the way I went just looked more fun (and i found an epic campsite/swimming hole)!
The Hike
Photos are thumbnails – click to enlarge!
Day 1: Lovers Leap Rd to Earnslaw Burn Valley
Driving from Queenstown to the trailhead took just over an hour. The hike began with ensuring I parked in a location suitable to where I could return from the Rees River (see car icon on map). If you continue past the Earnslaw Burn trailhead corner, Lovers Leap road continues further along, and forks (right side is easier). Packing my gear and locking my car at about 3pm, I set off back up the dirt road to the trail.
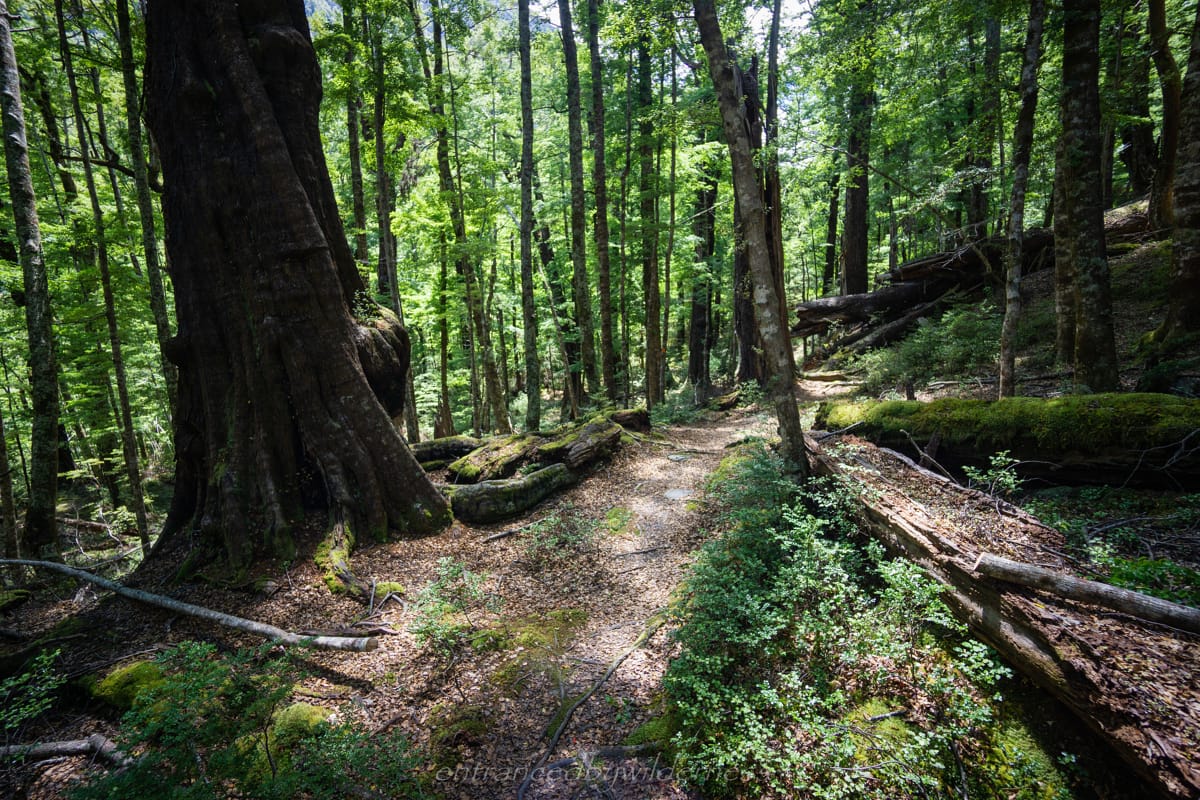
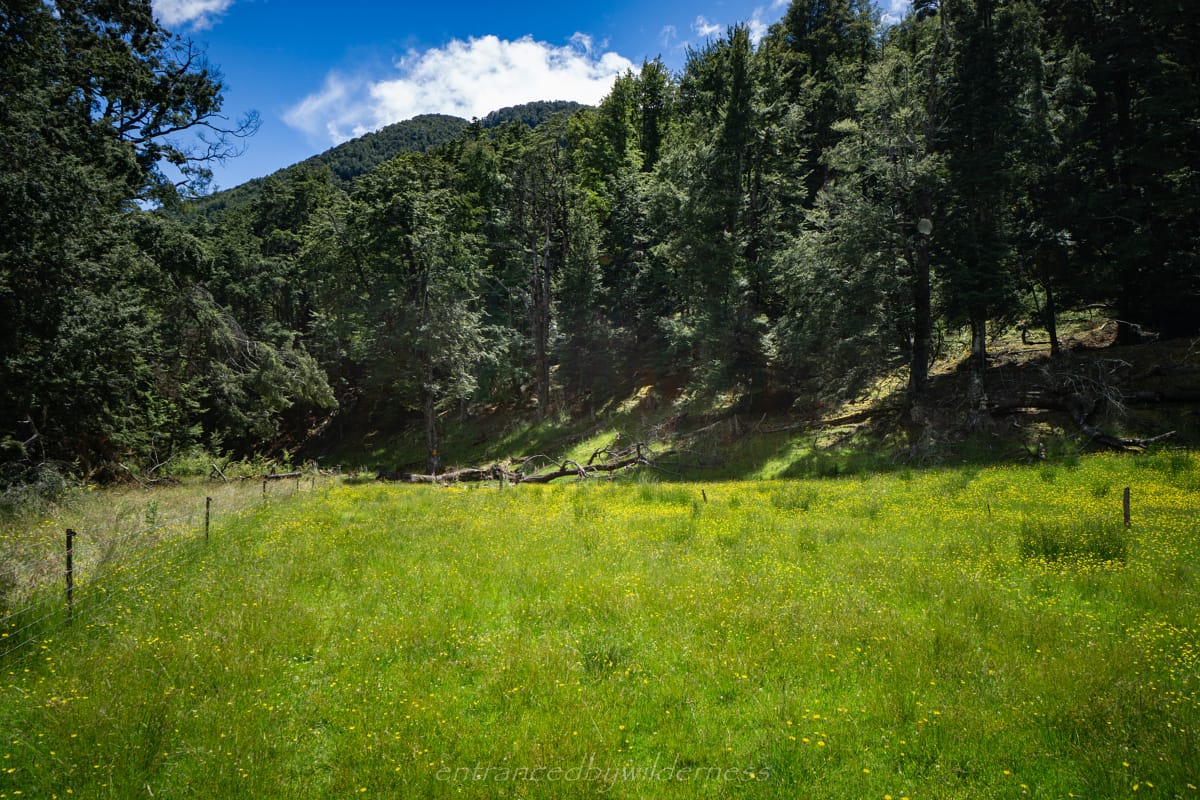
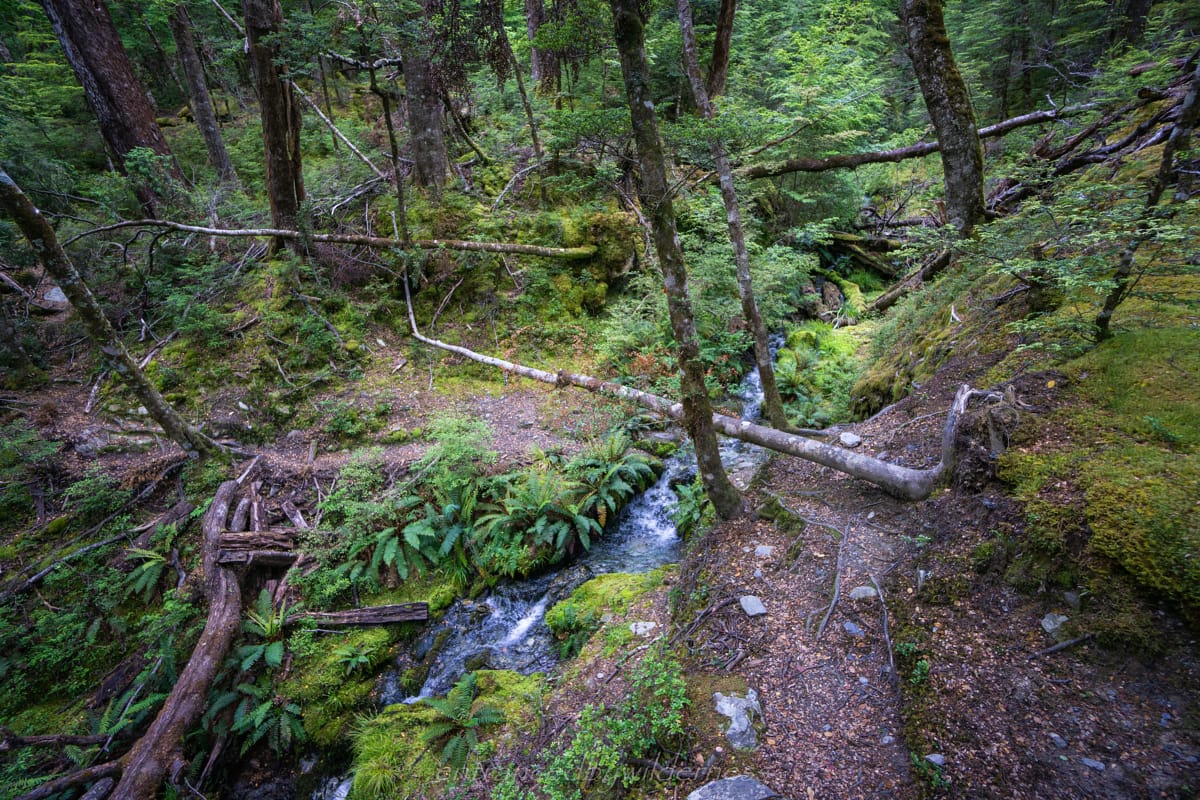
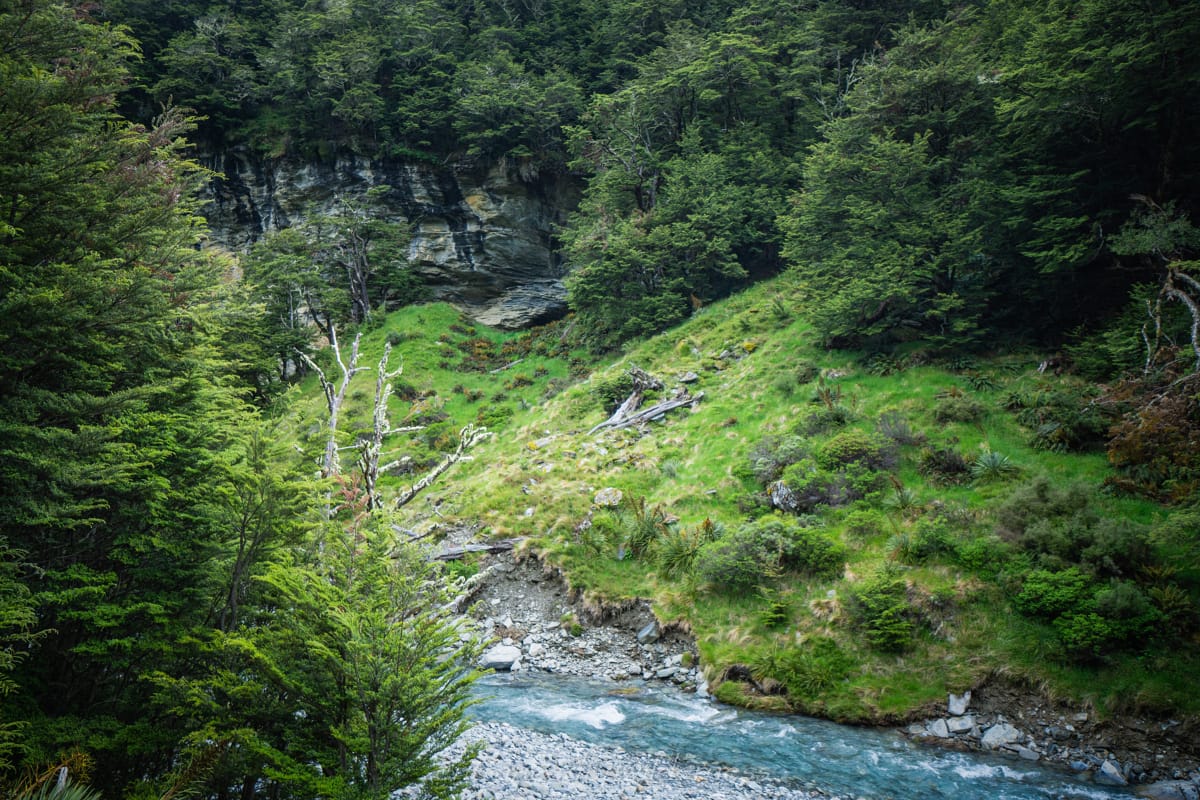
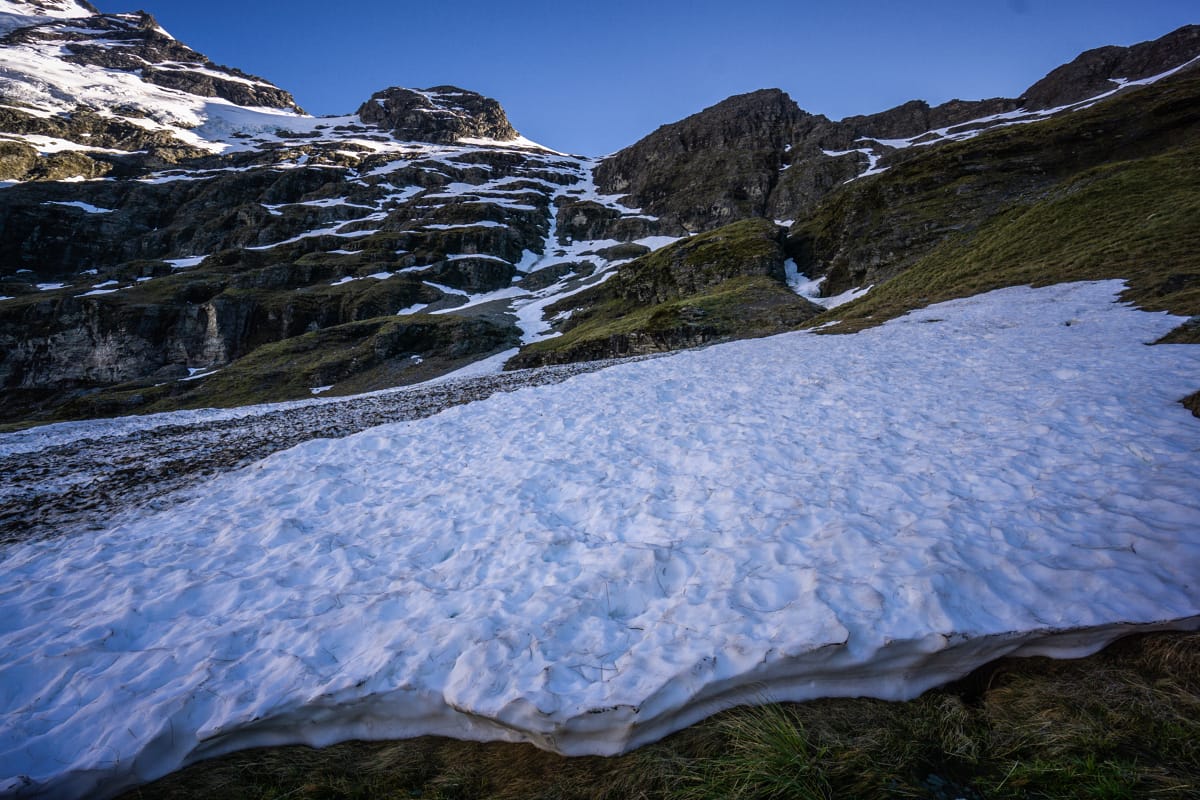
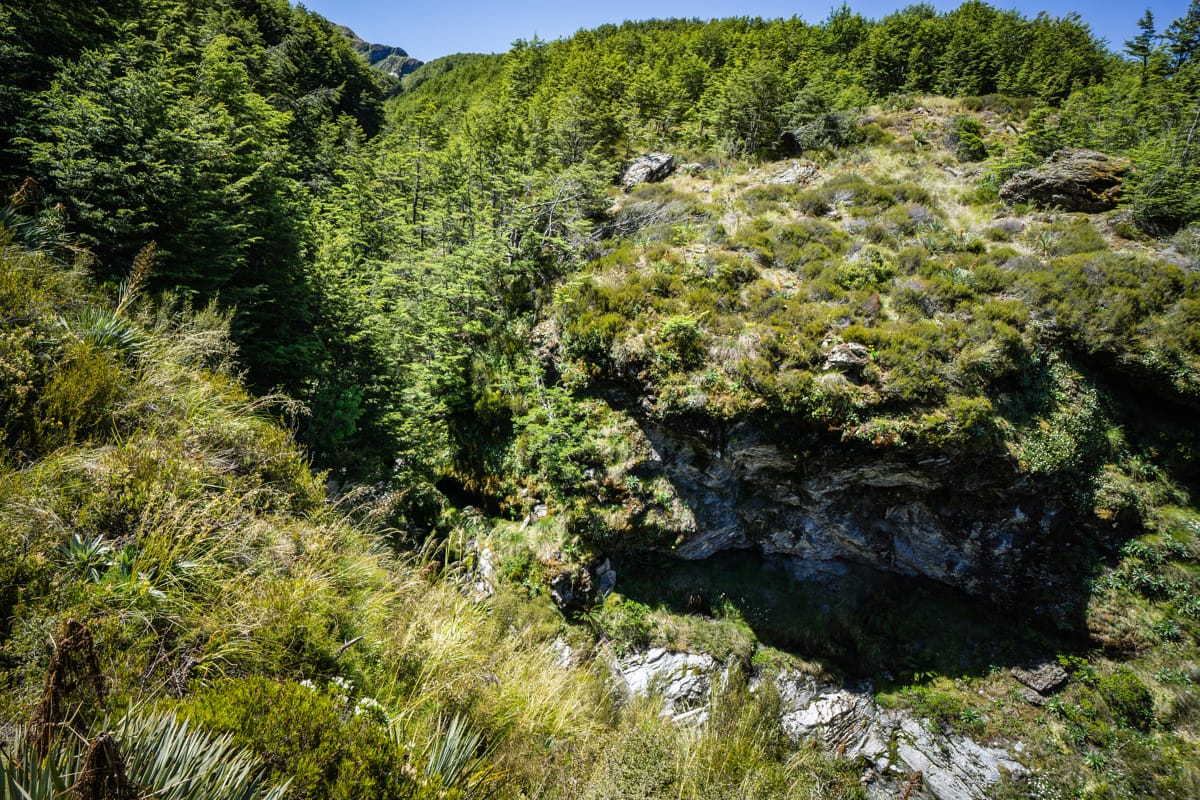
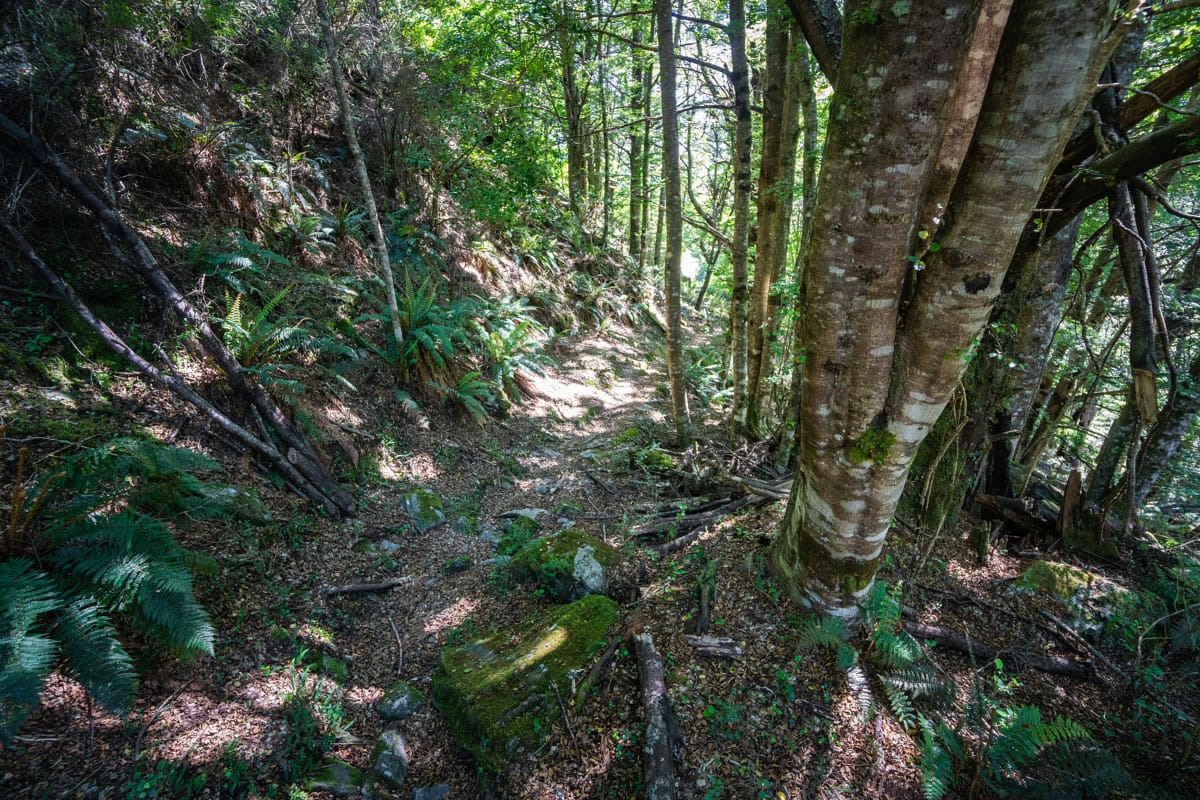
The forest hiking section of the Earnslaw Burn track is nothing really impressive. It’s quite closed in with no open views, and you’re far from the actual burn itself. It also was a laborious hike with some intermediate terrain to scramble over and around. There were a couple of small streams along the way.
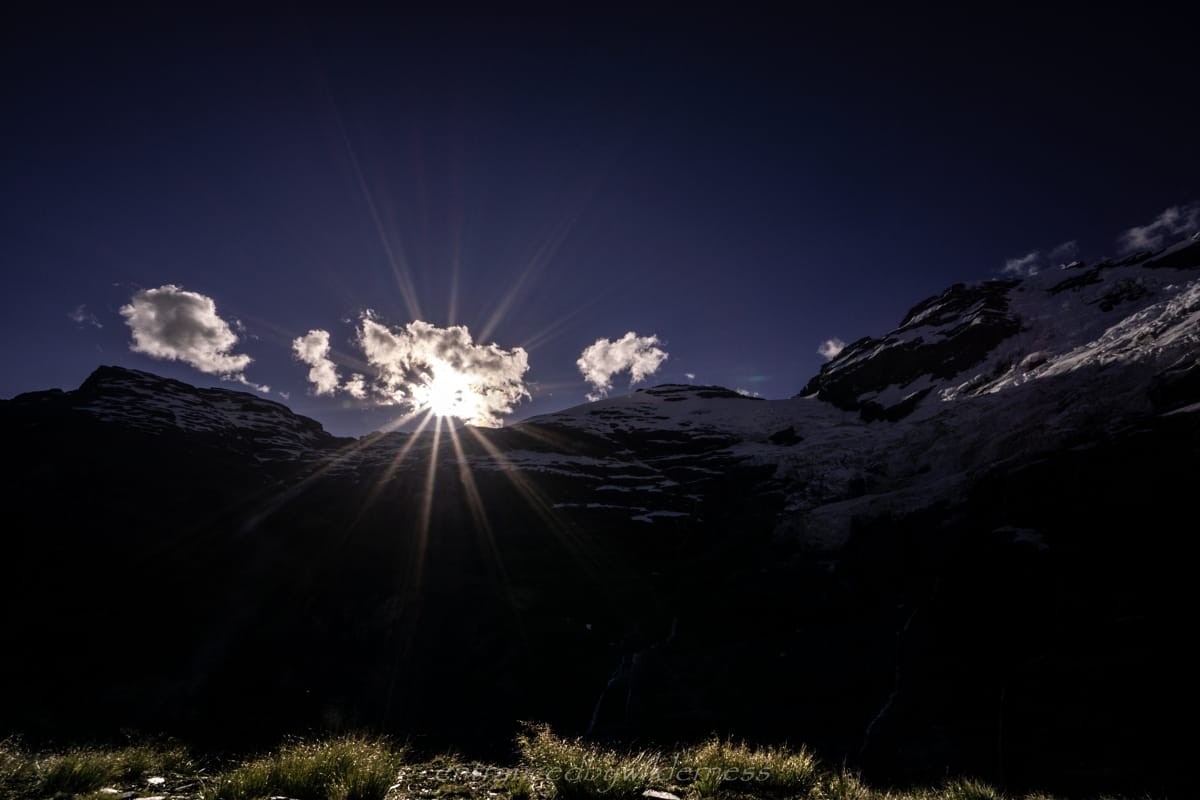
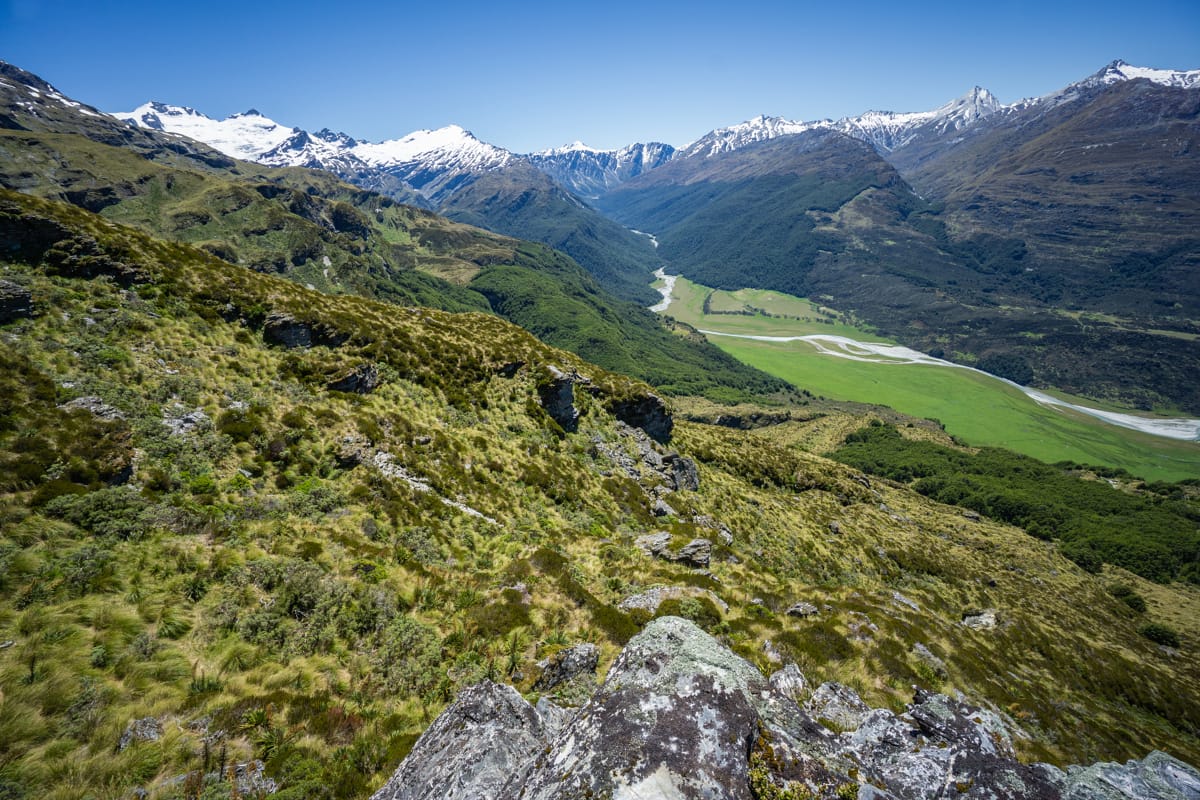
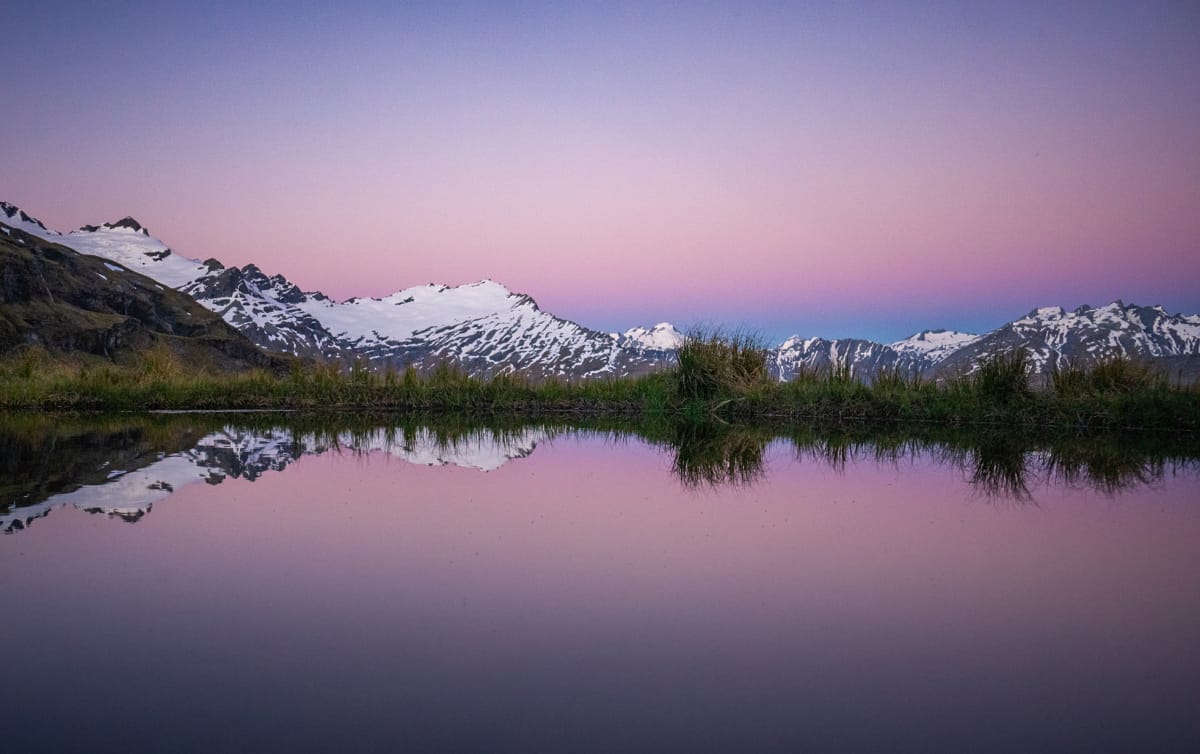
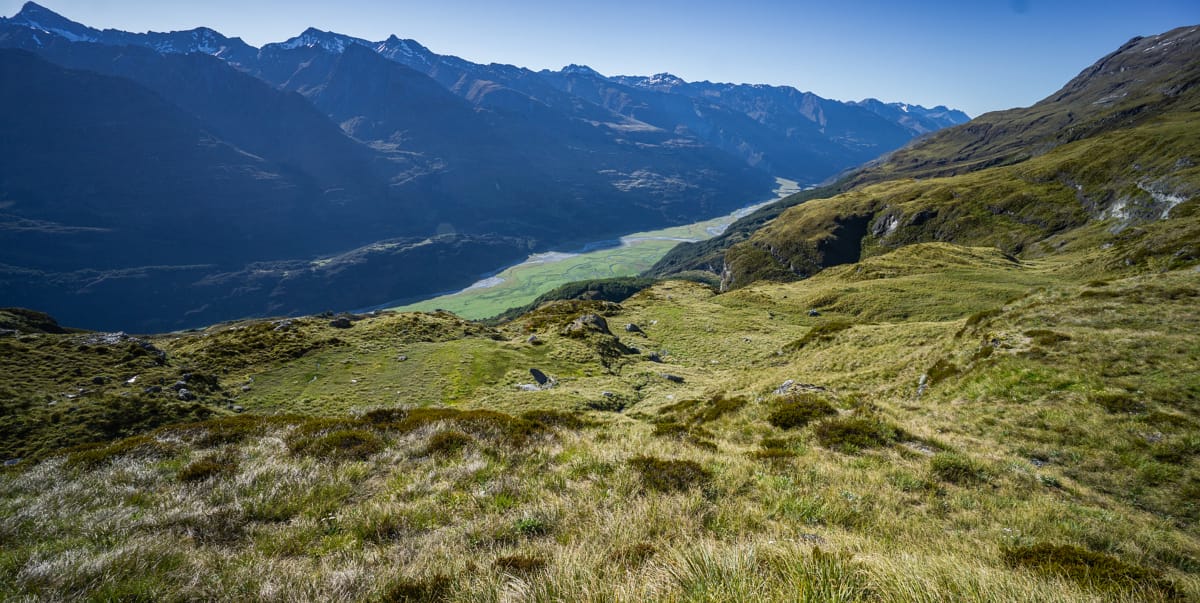
Finally breaking free from the forest, the valley sights came into view. Immediately to the left i saw where the rock bivy was located. I wanted to check it out even though I wasn’t staying there, however, I felt a bit lazy and pushed on. Looking straight at Turret Head in the distance, I became more ecstatic as the sights began to unfold.
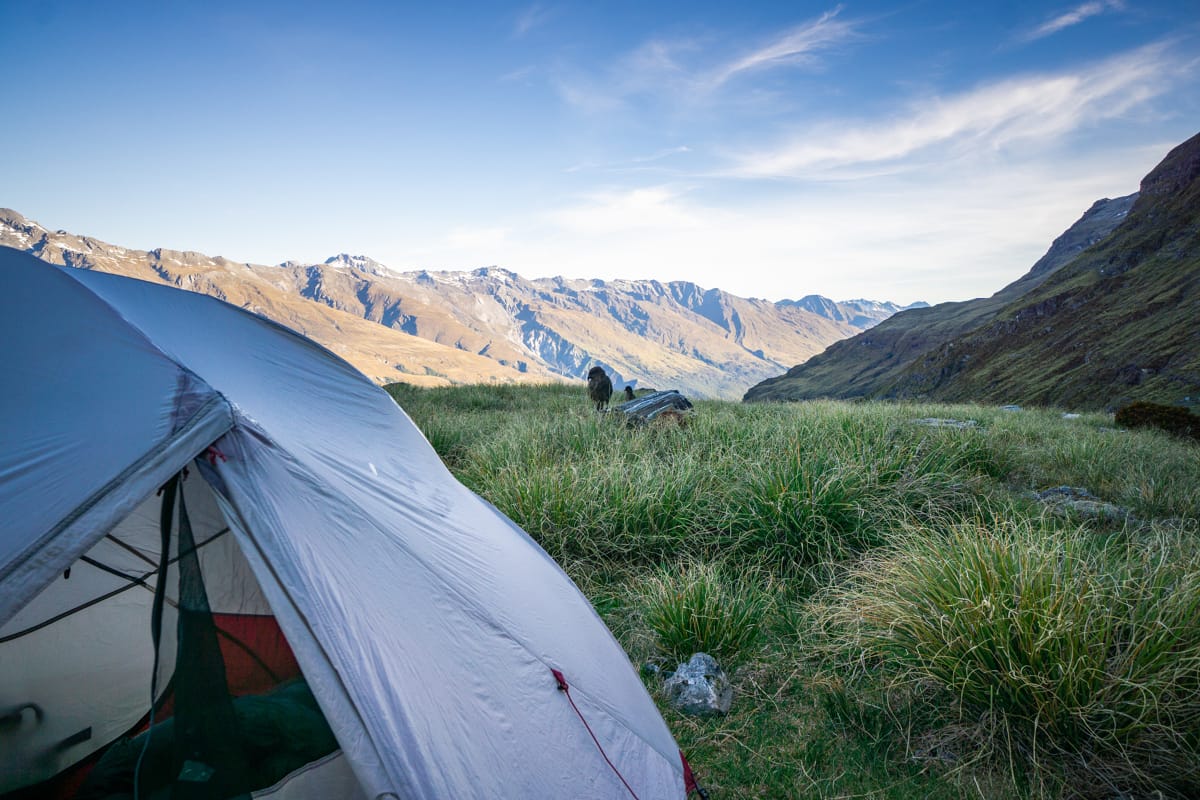
Pushing into the valley at around 5-6pm, I was now searching for a campsite. There was a nice spot shortly after coming out of the forest, but with no views of Earnslaw Glacier. However, at the base of the slope of Turret Head, there was a nice spot down the grassy hill closer to the river. I chose to camp here – not knowing if there would be any other more ideal sites coming up. It was quite an overgrown marshy area with lots of water runoff, so there weren’t always lots of options.
Day 2: Earnslaw Burn Valley to Earnslaw Overwatch
It was a calm night overall, and I slept well. Today i had made plans to head over Lennox Pass into the Rees valley side toward Kea Basin. I wasn’t sure where I would aim for not knowing the terrain, but I figured i’d find something suitable. I was pretty much directly following the Earnslaw Burn, including crossing it a few times (only shallow). A couple of infrequent helicopter tours came by throughout the day. I didn’t find them too annoying though thankfully, as it wasn’t all the time.
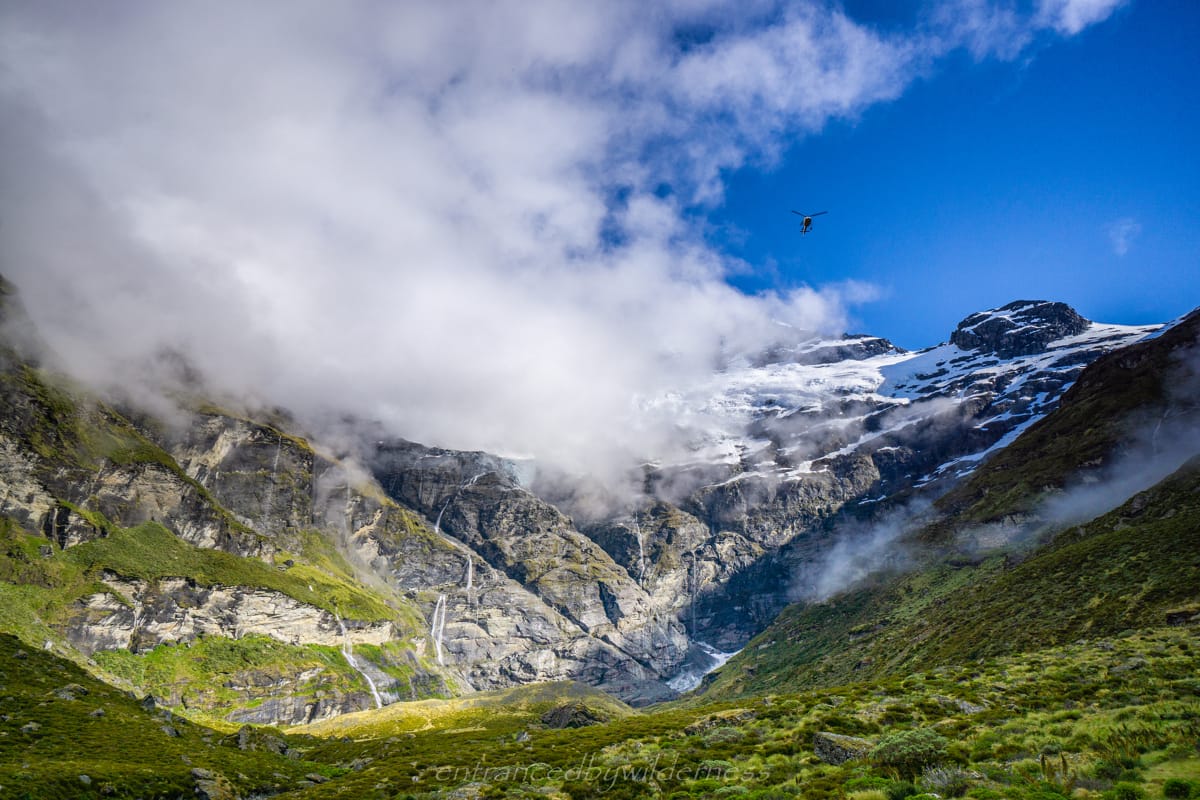

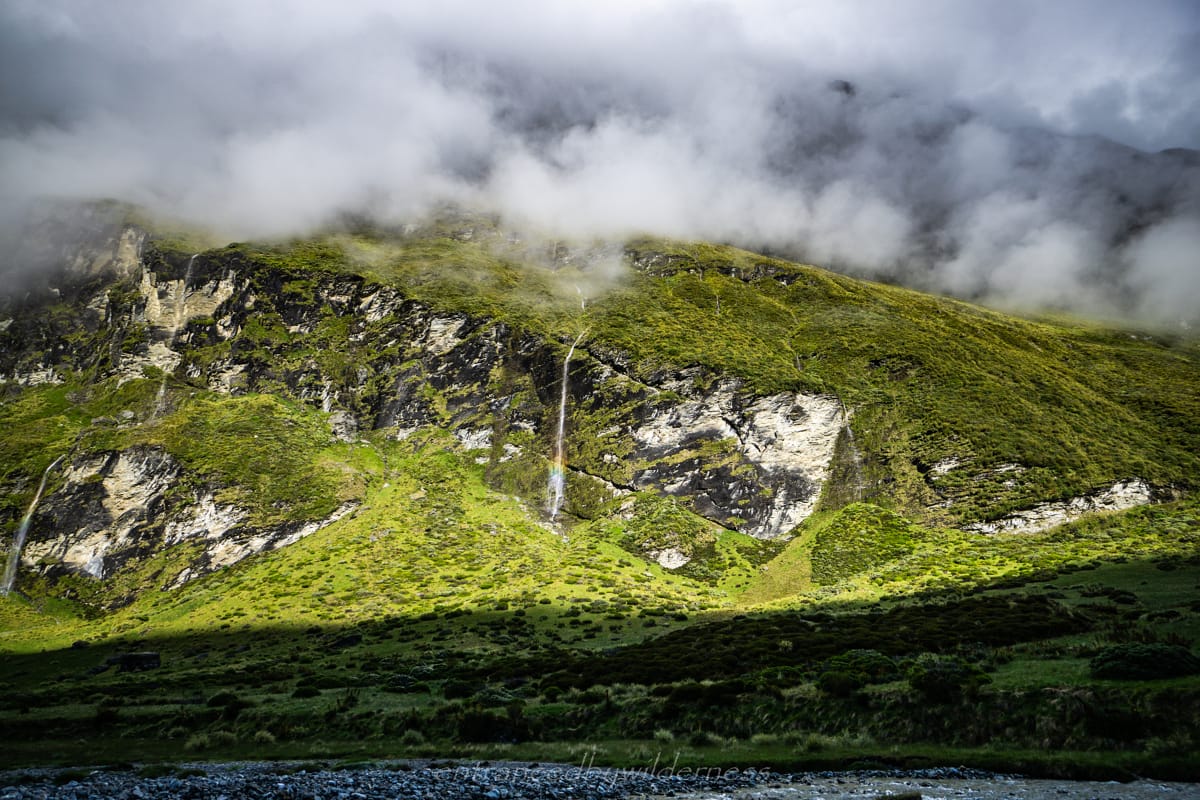
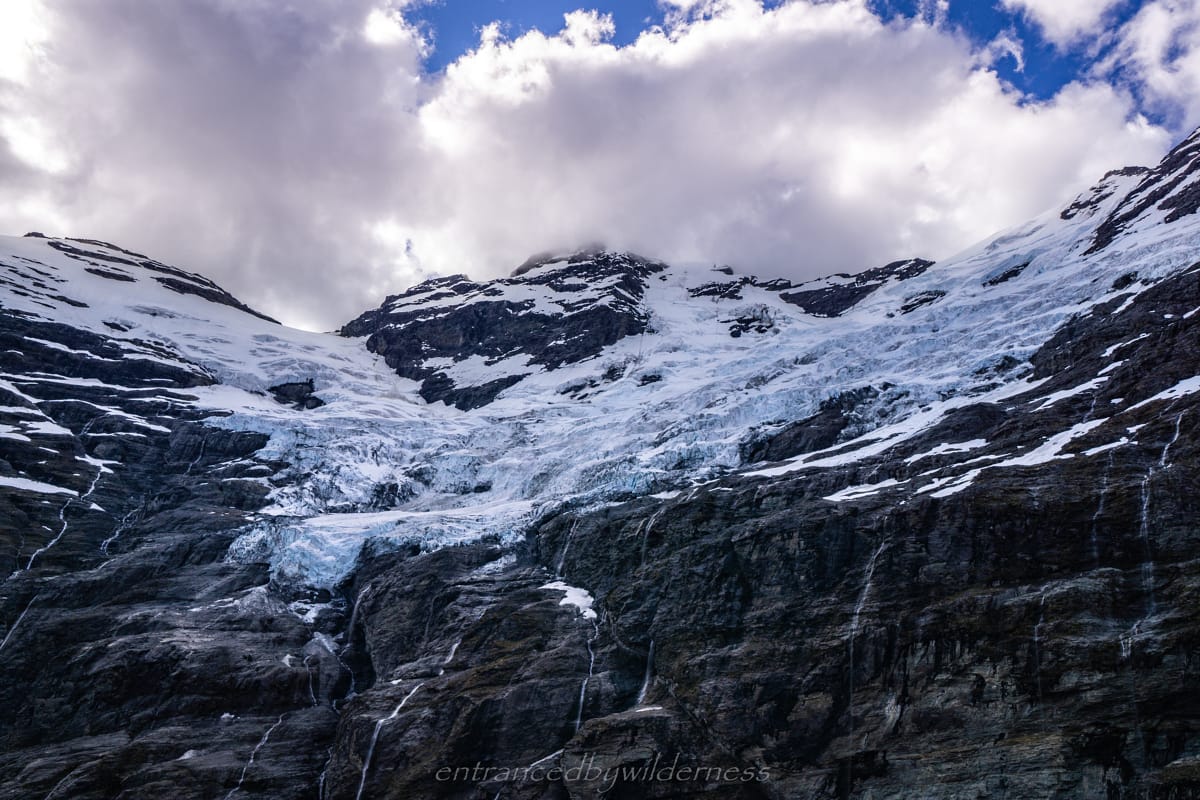
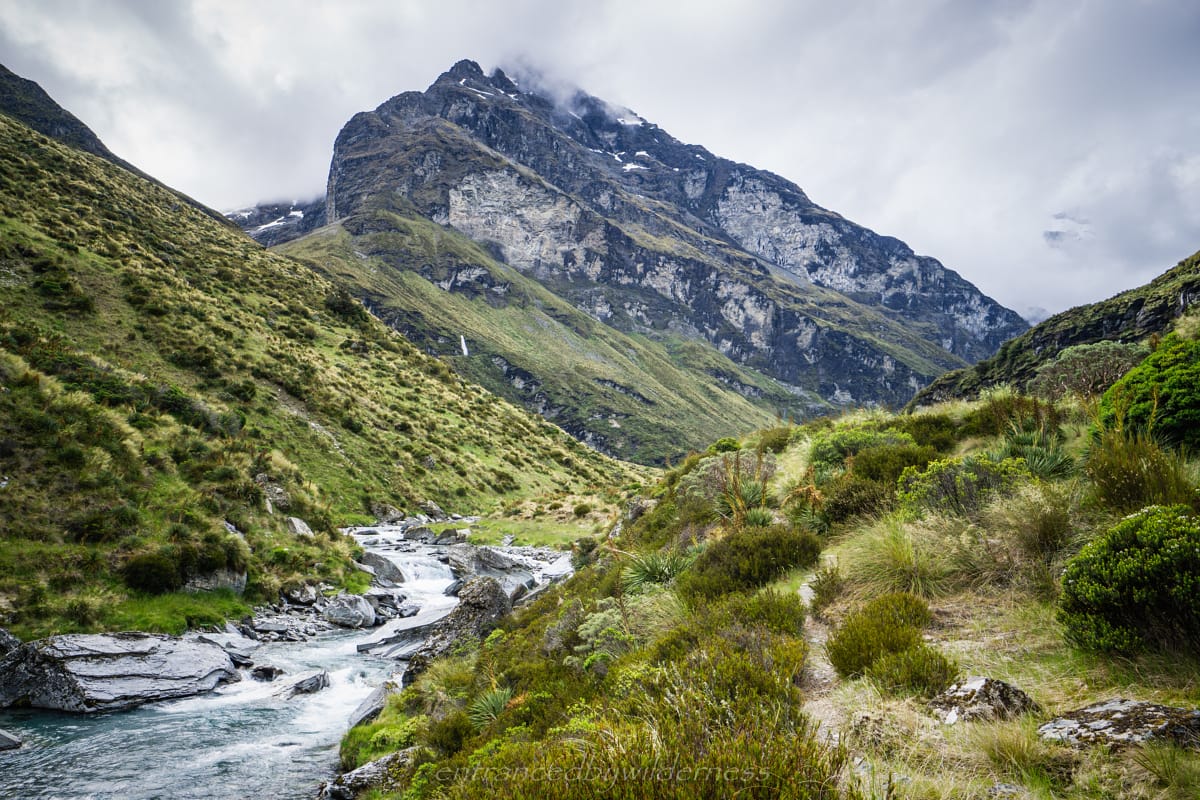
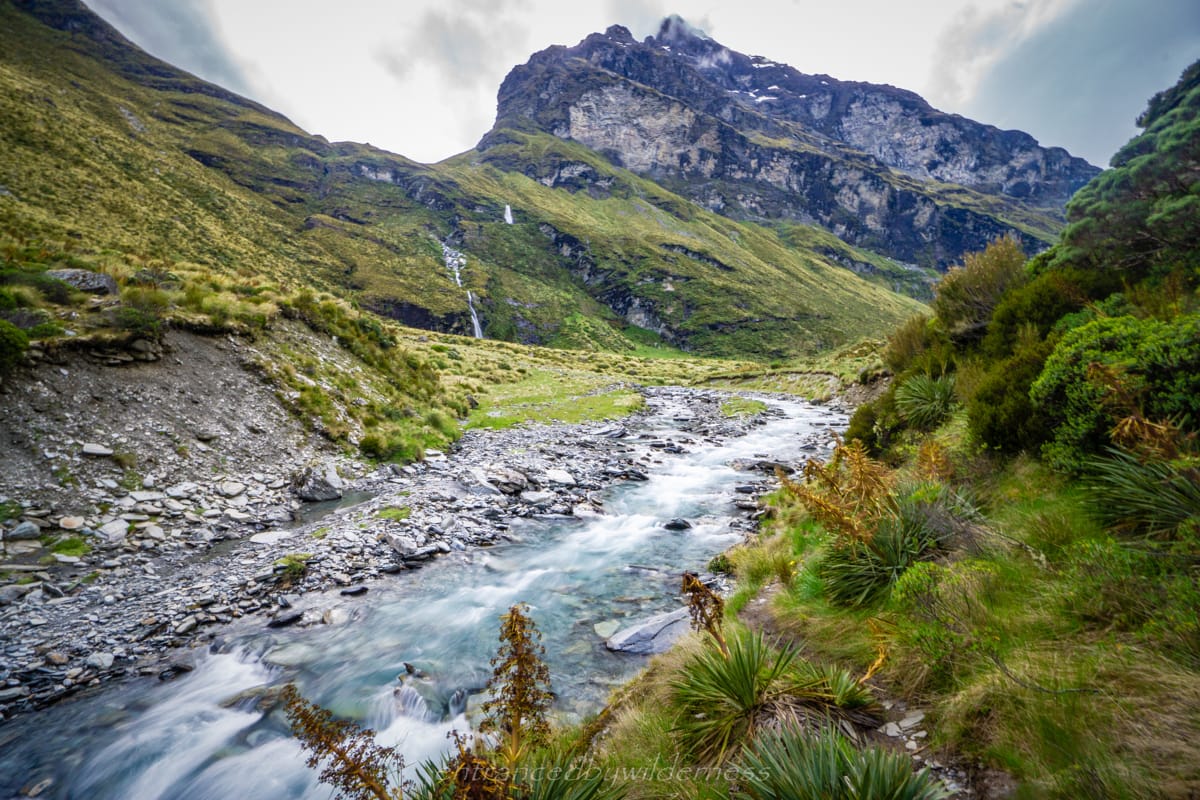
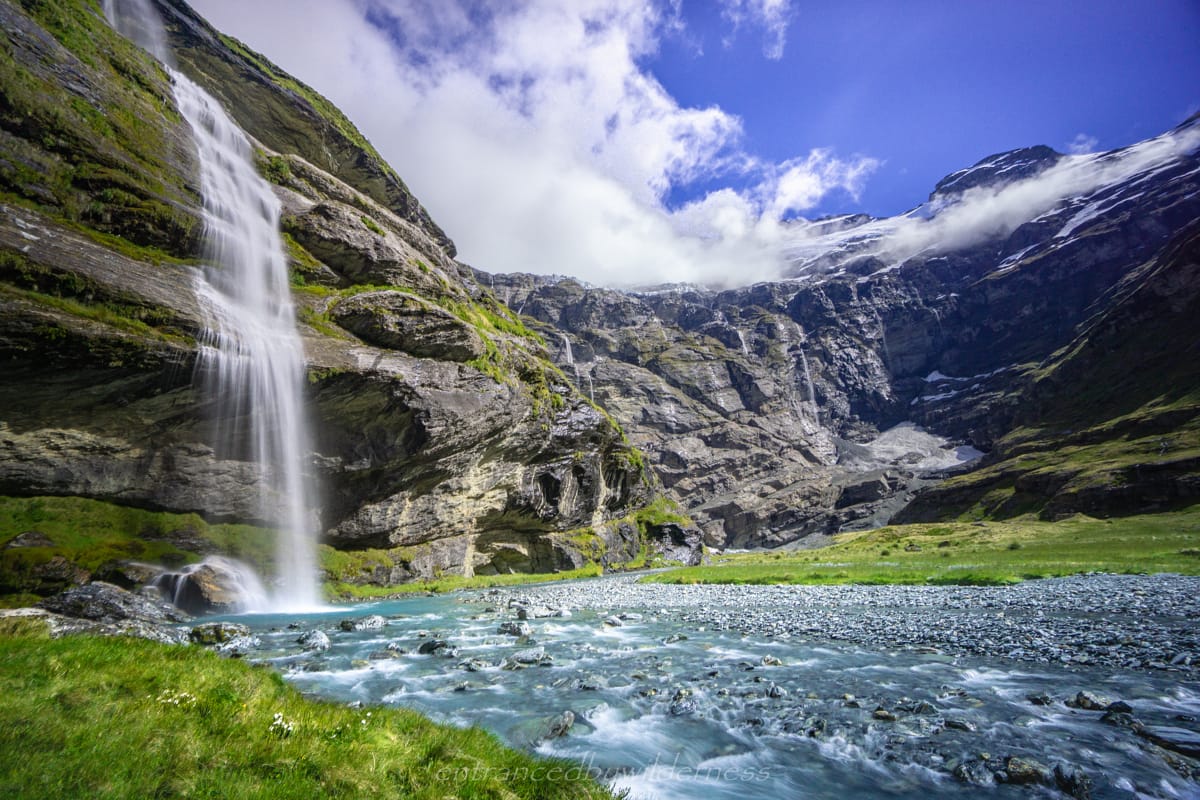
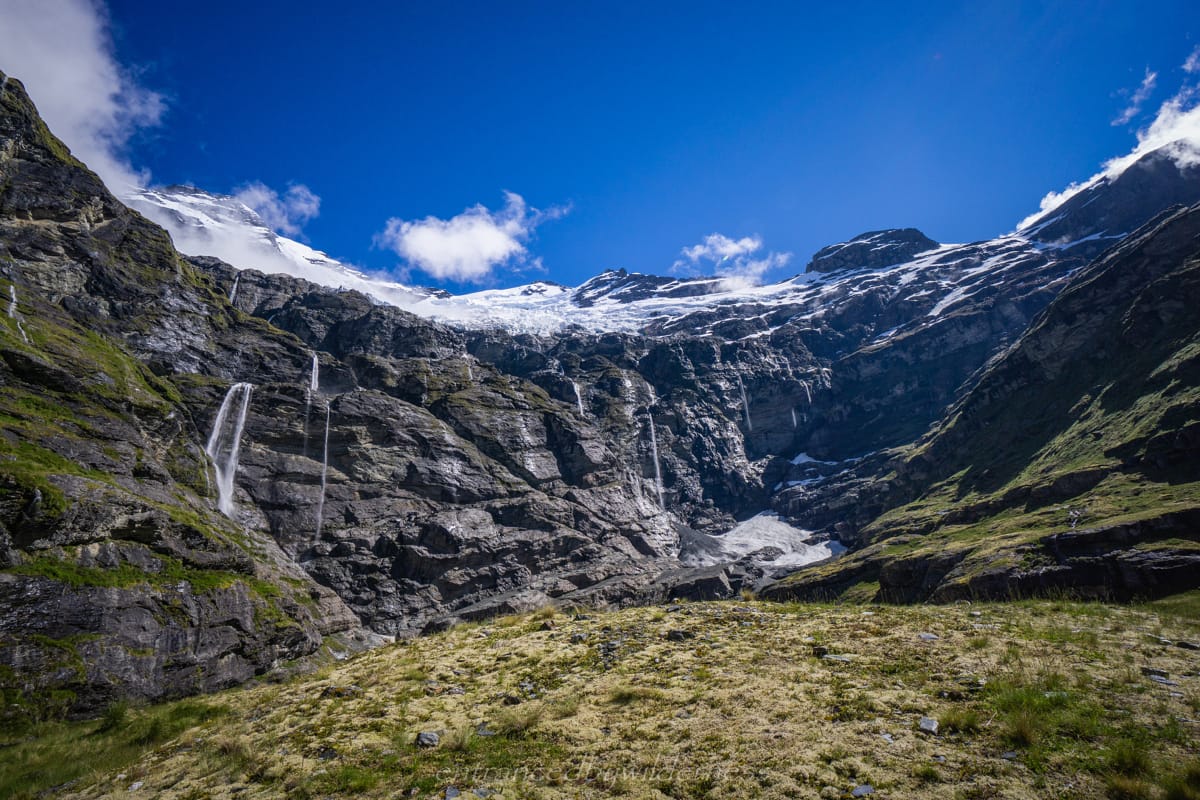
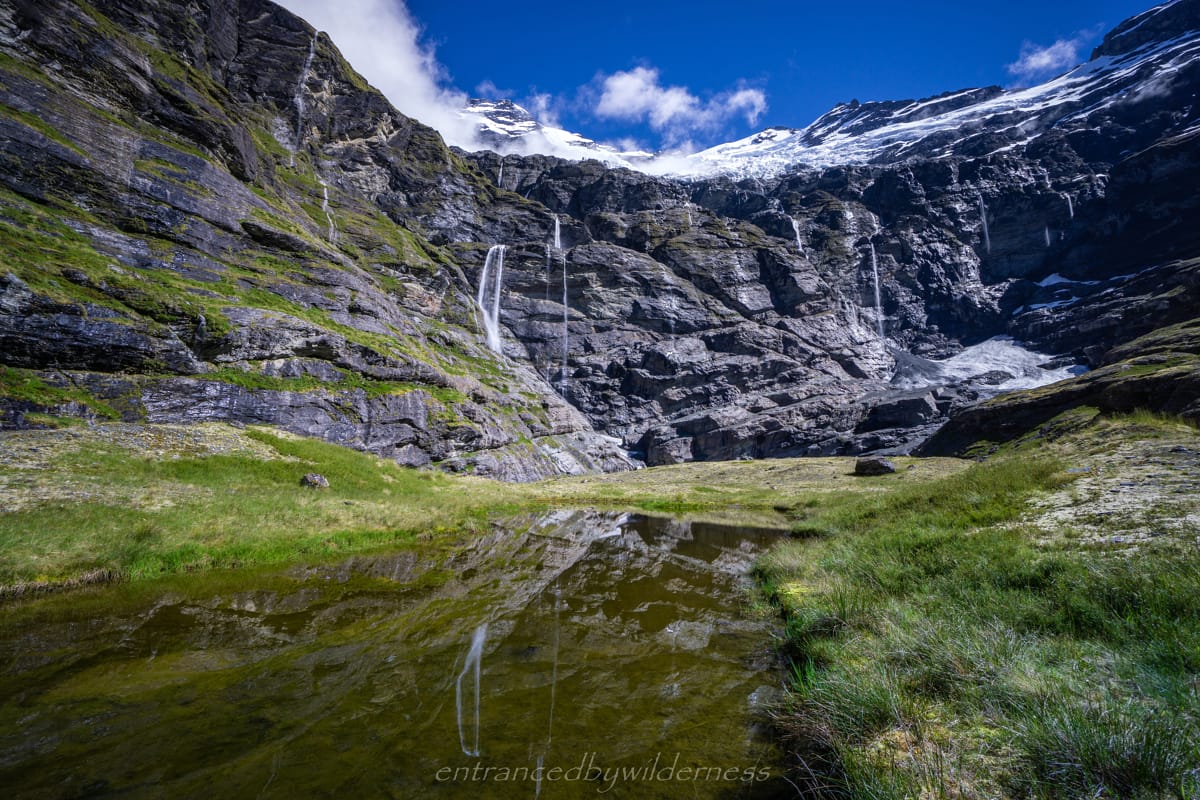
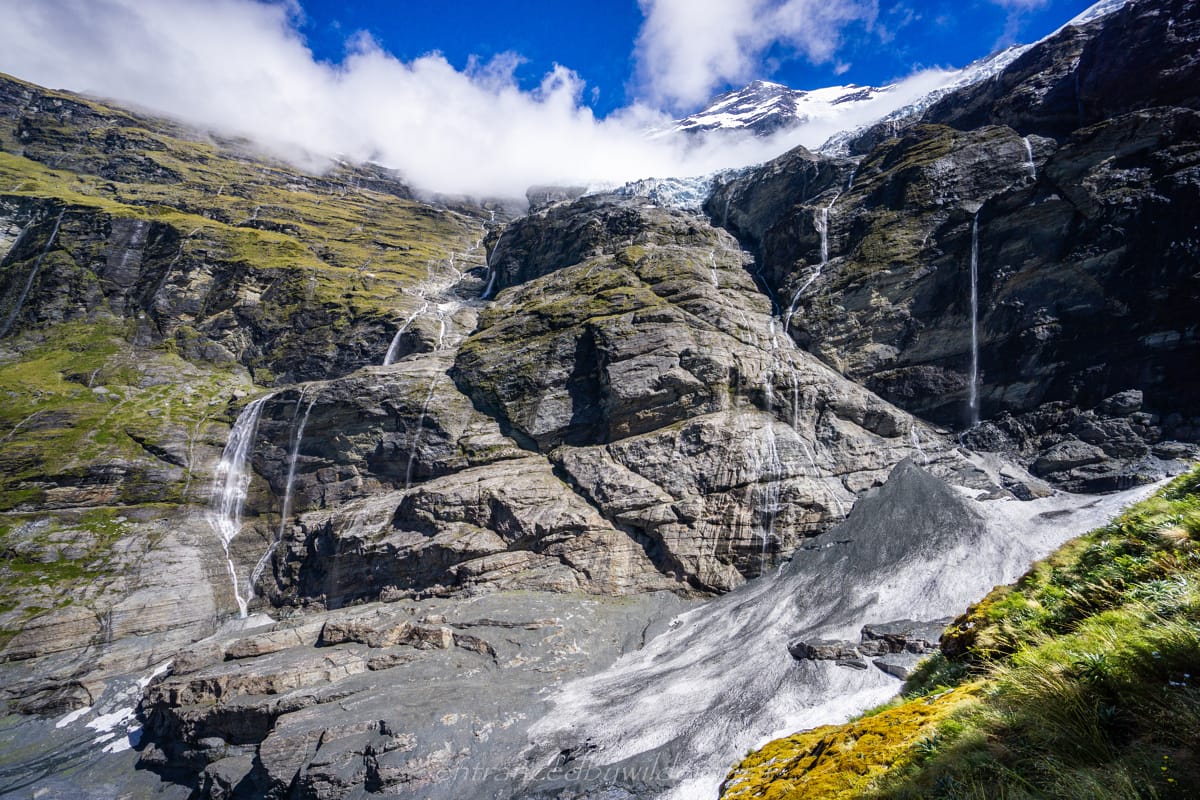
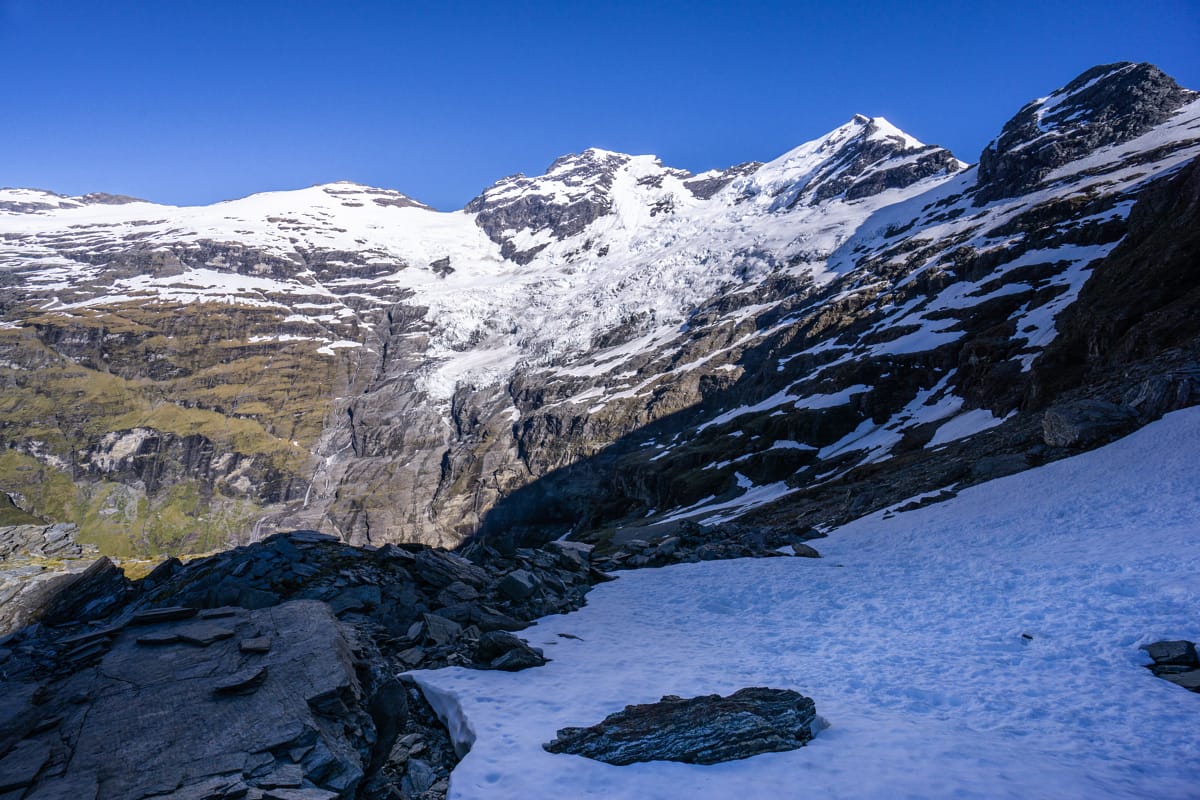
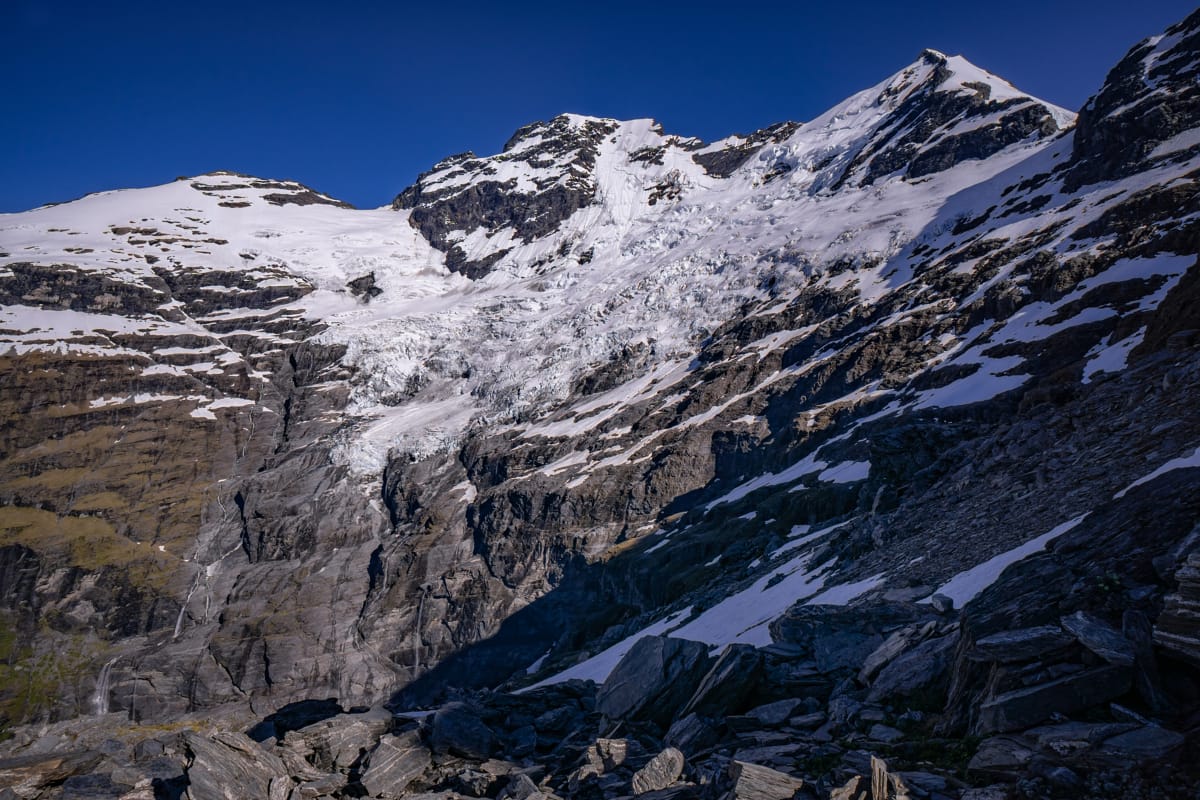
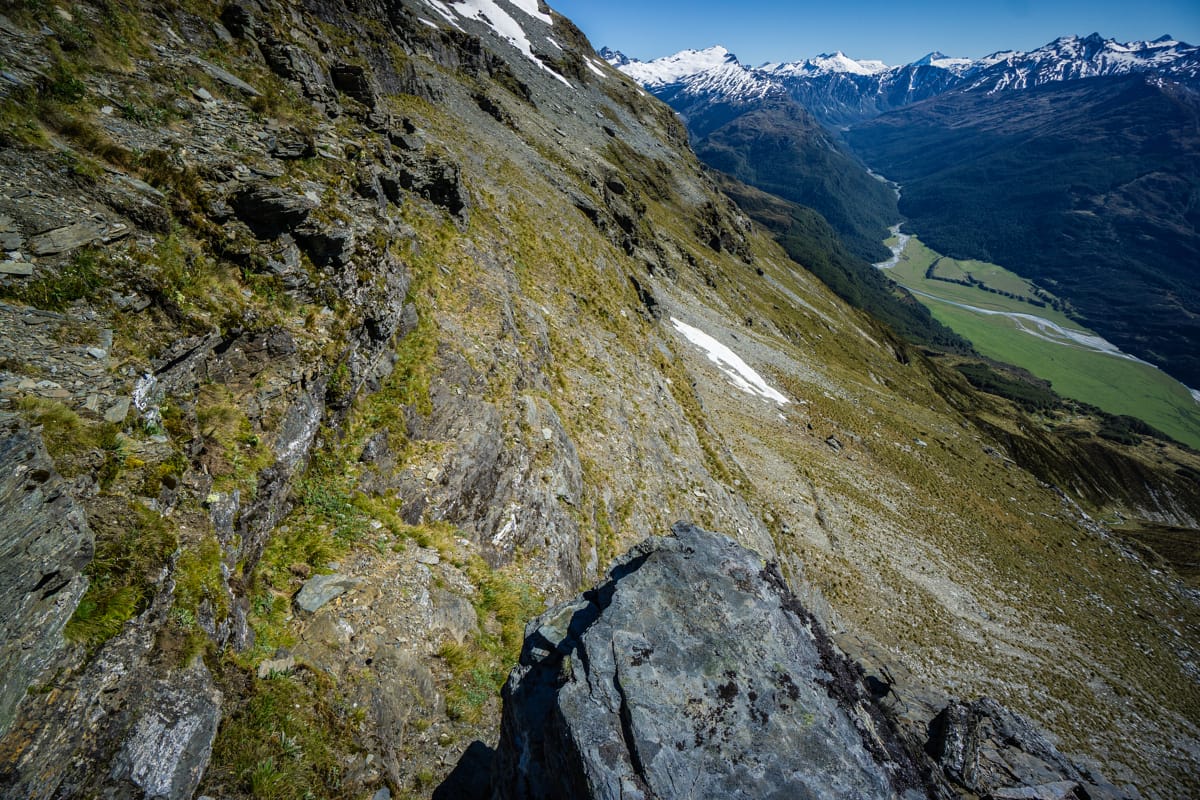
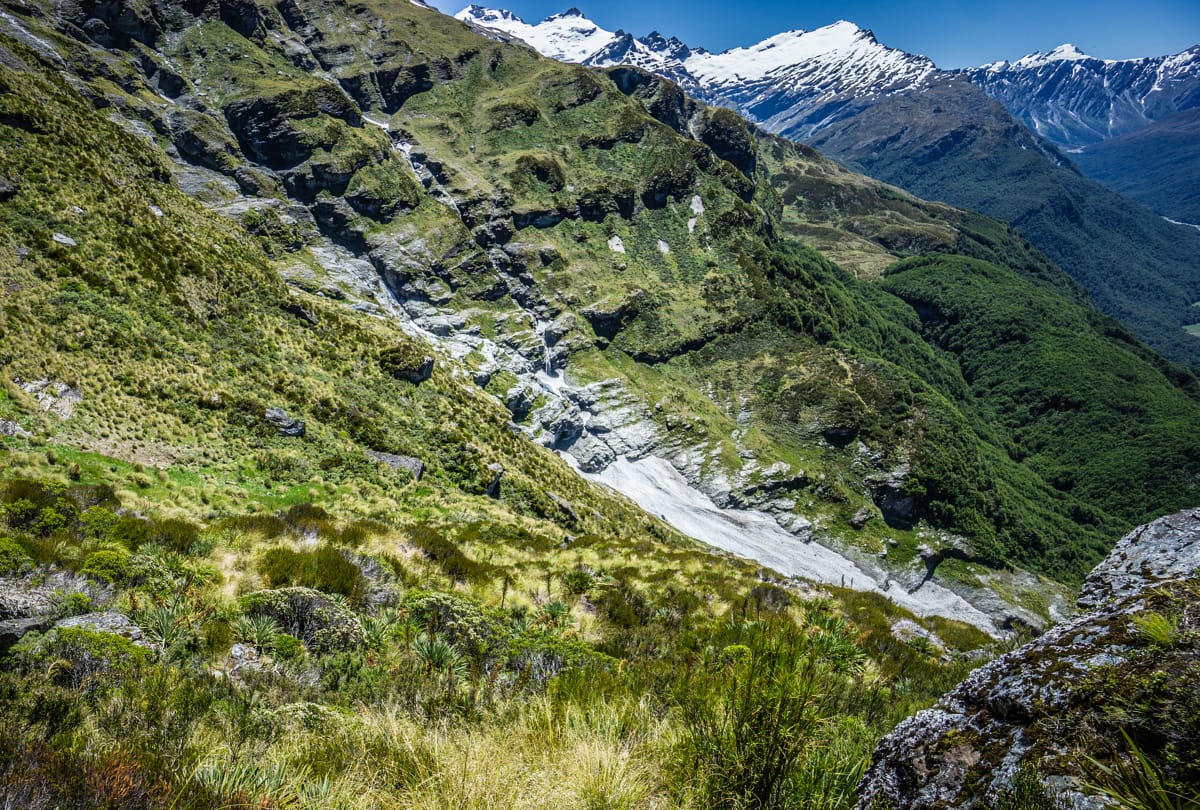
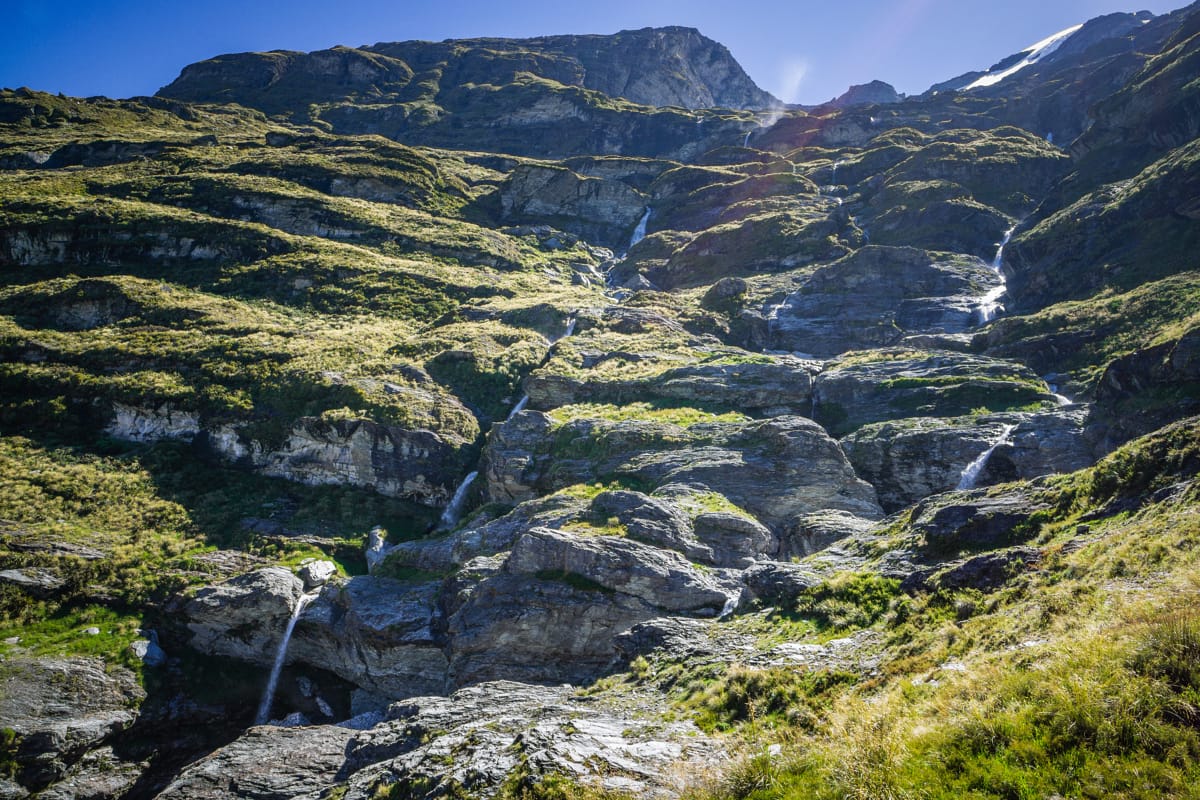
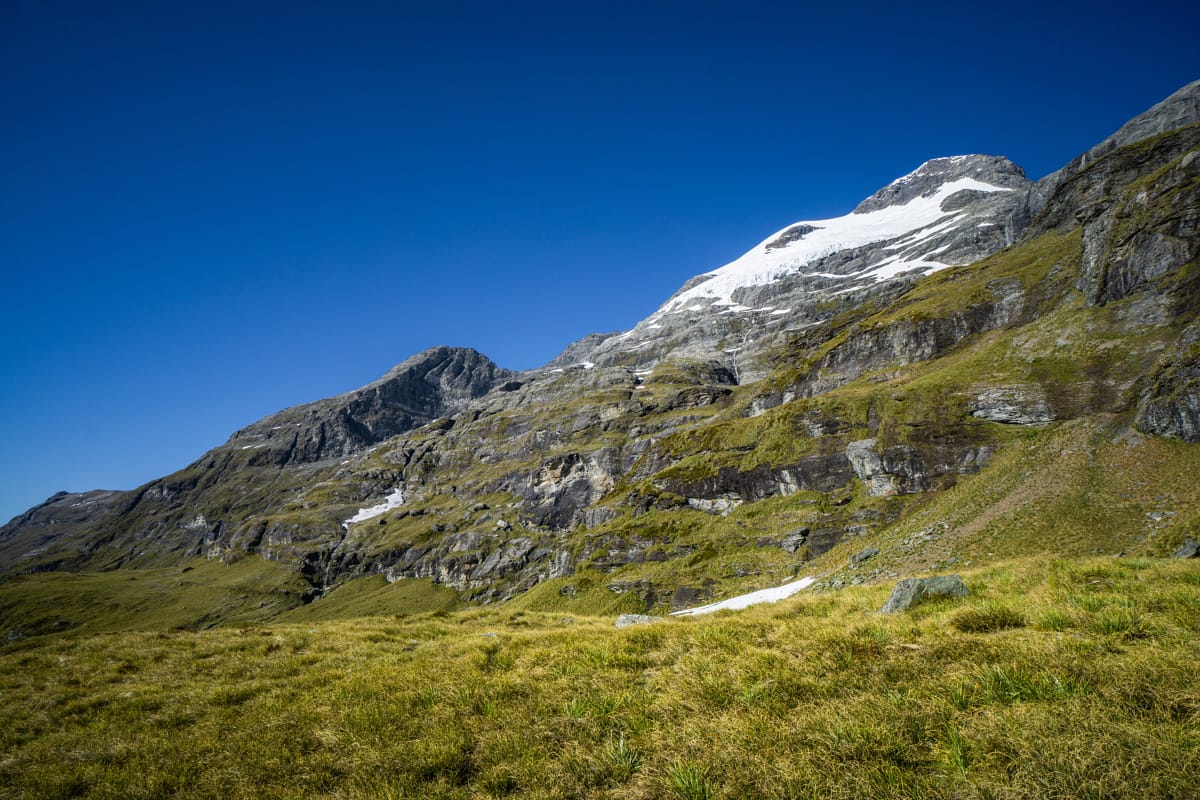
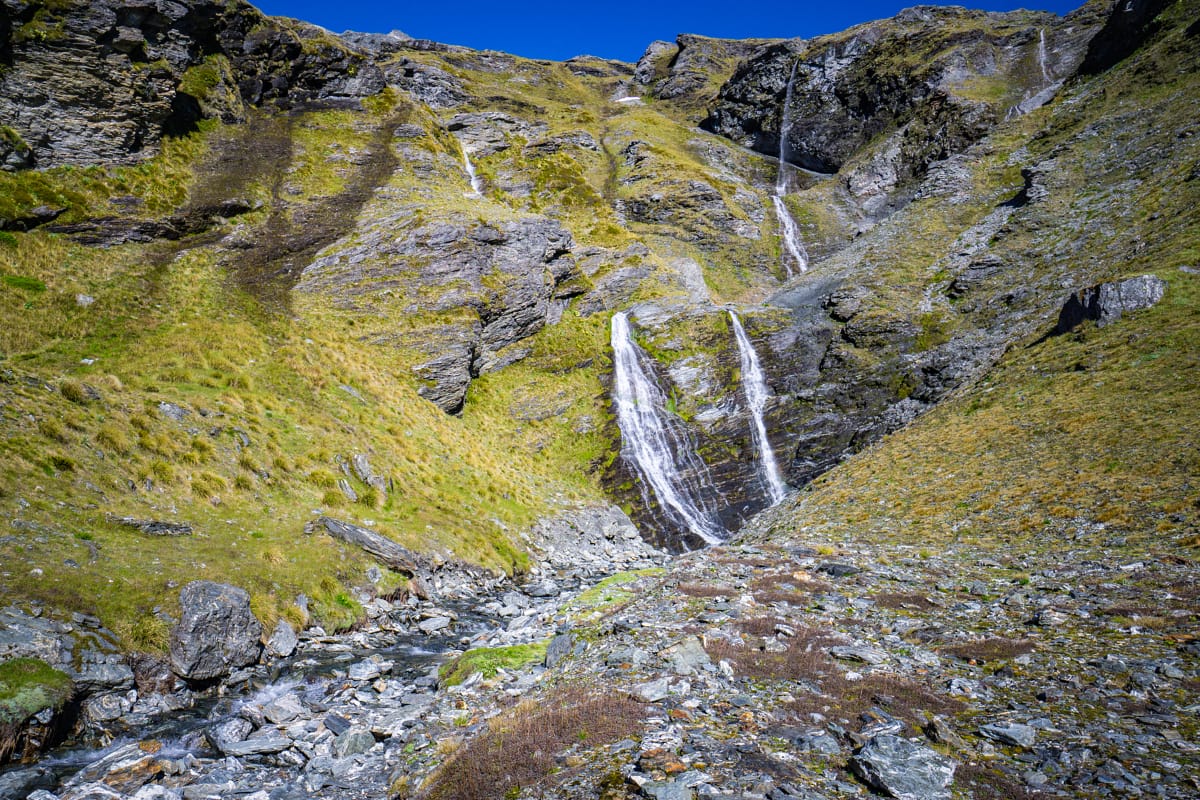
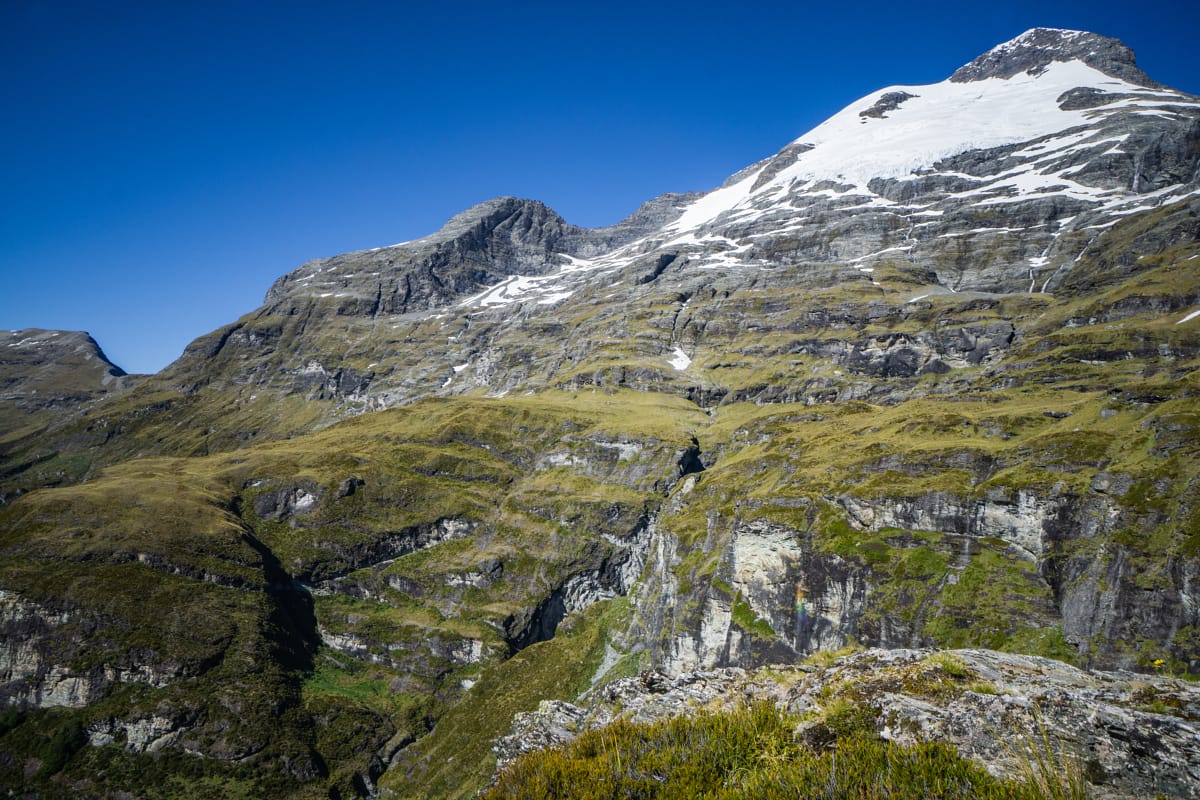
After following the marsh and river, I ventured up a small hill for some views of the valley end. It was awesome, and I stayed here savouring the views for some time. To the left was, what I decided to call ‘Turret Falls’, as it has no name. Straight ahead, the Earnslaw Glacier – although it was obscured by clouds at this point. Finally, to the right was a rugged cliff section that led towards Lennox Pass. I soon would need to navigate a route through this part. The Hobbit movie had a scene filmed on the vegetated ledge to the left of the middle photo below.
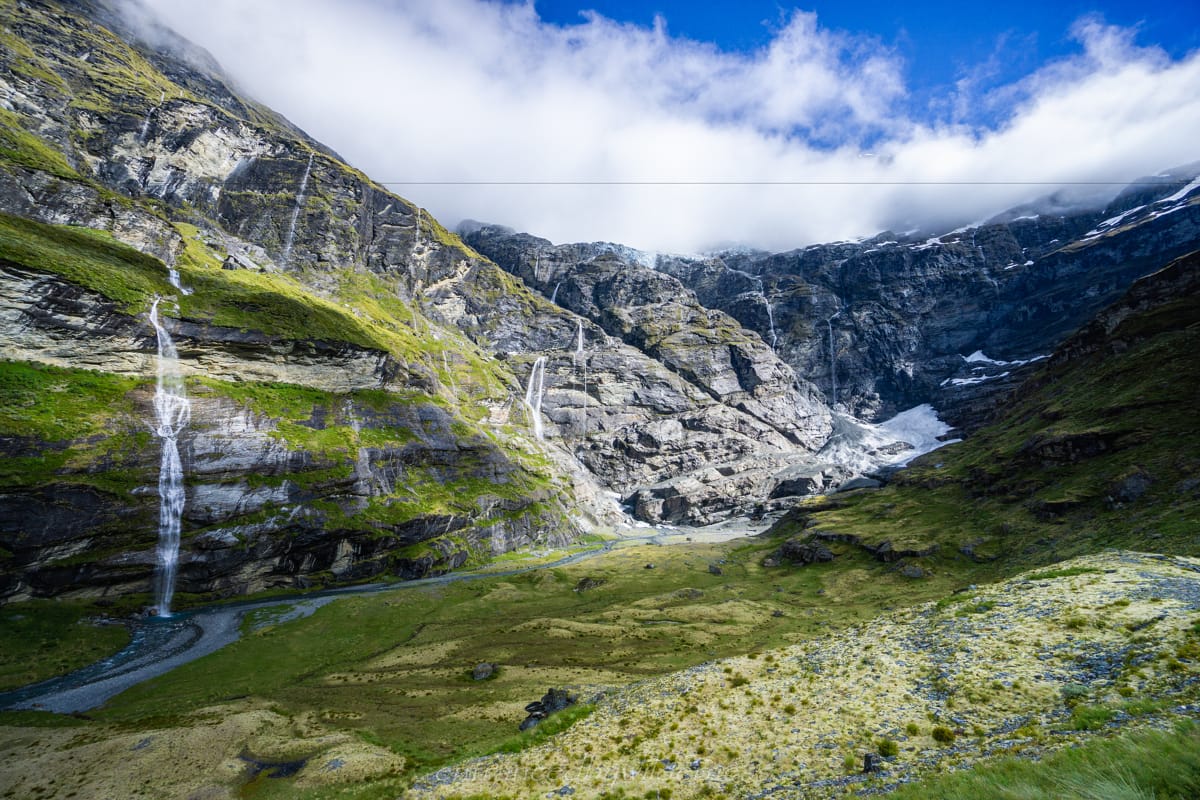
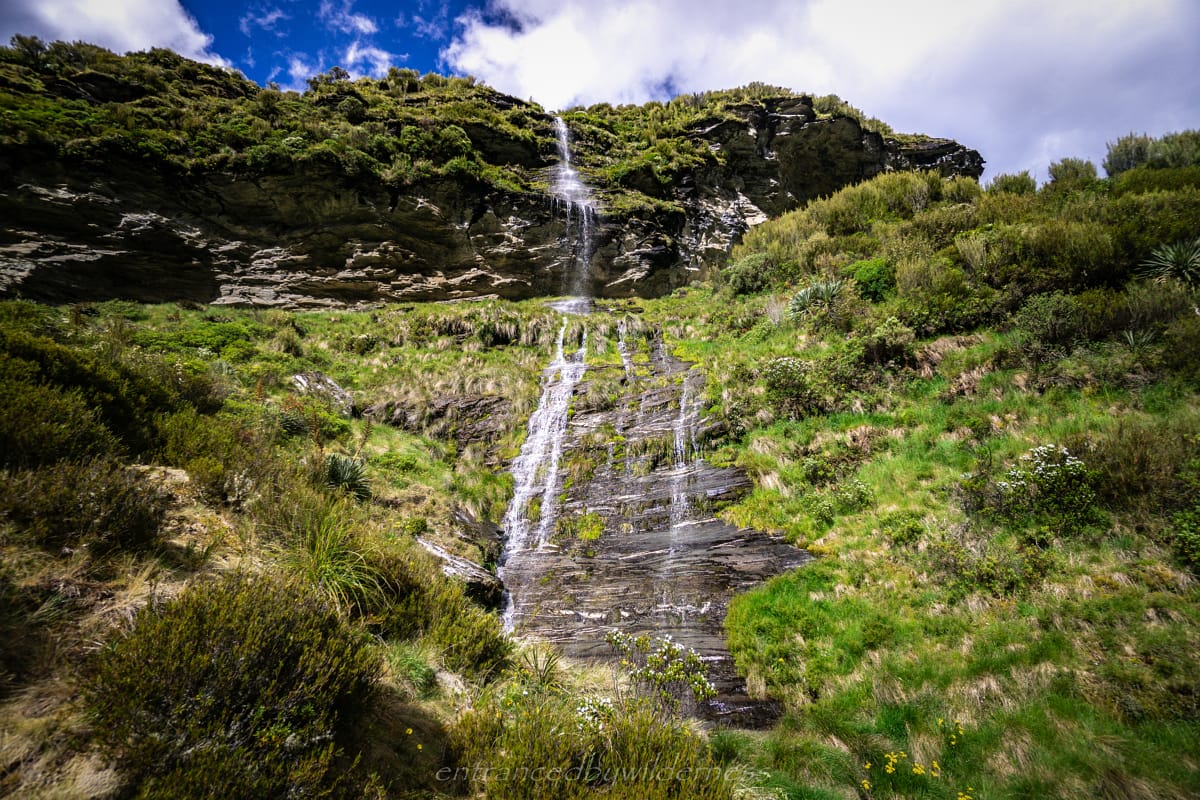
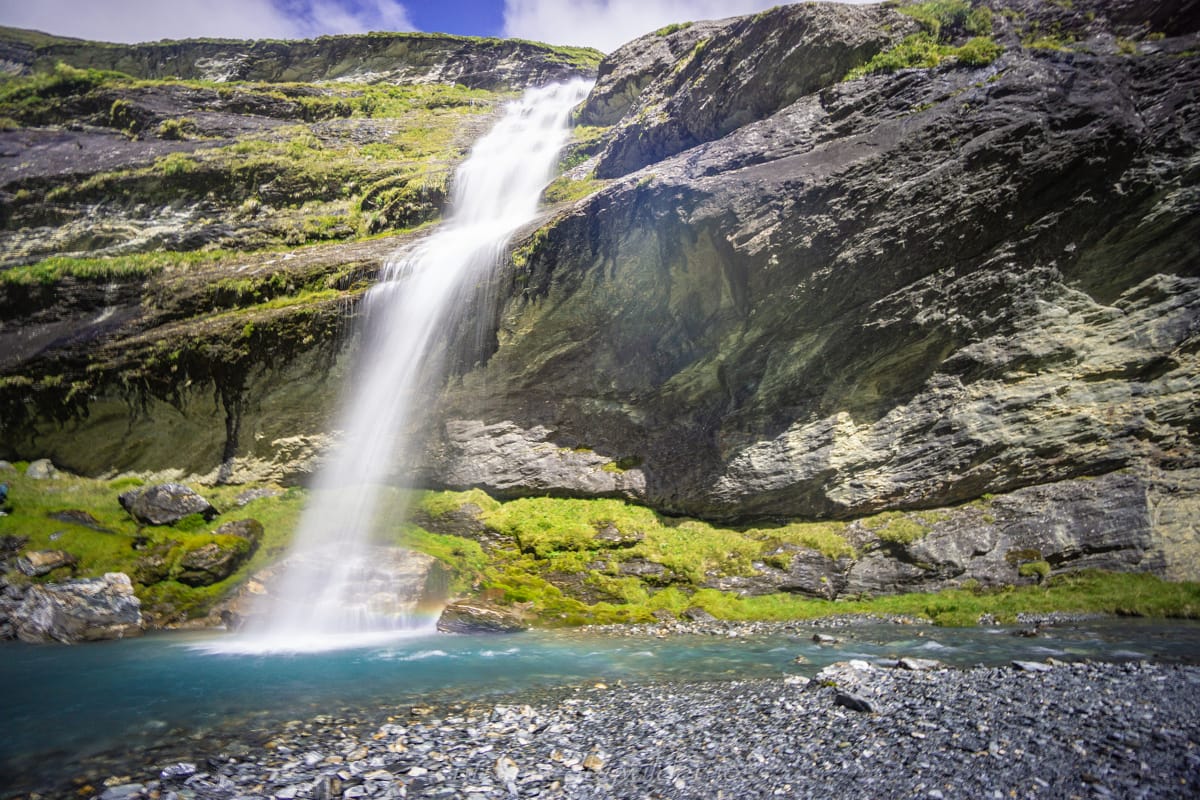
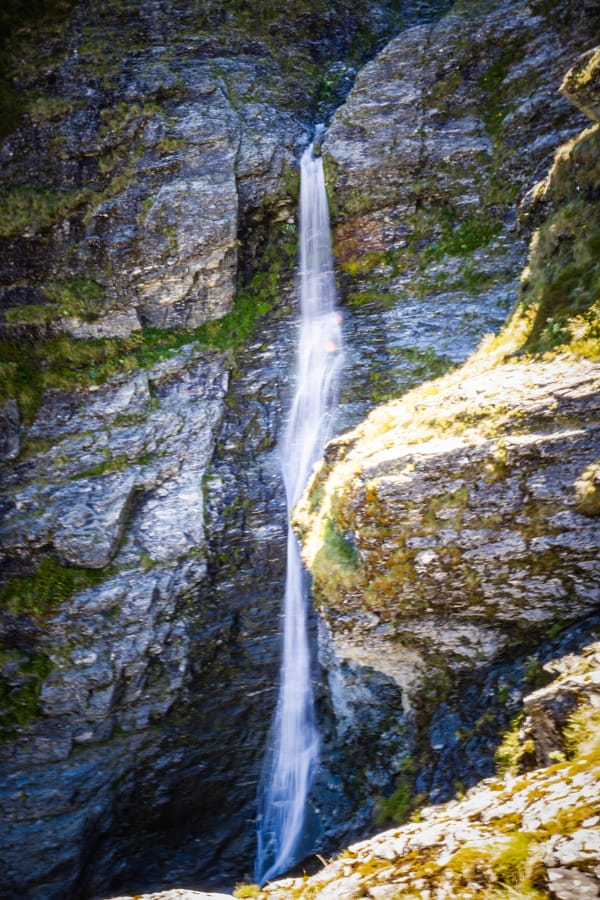
Turret Falls
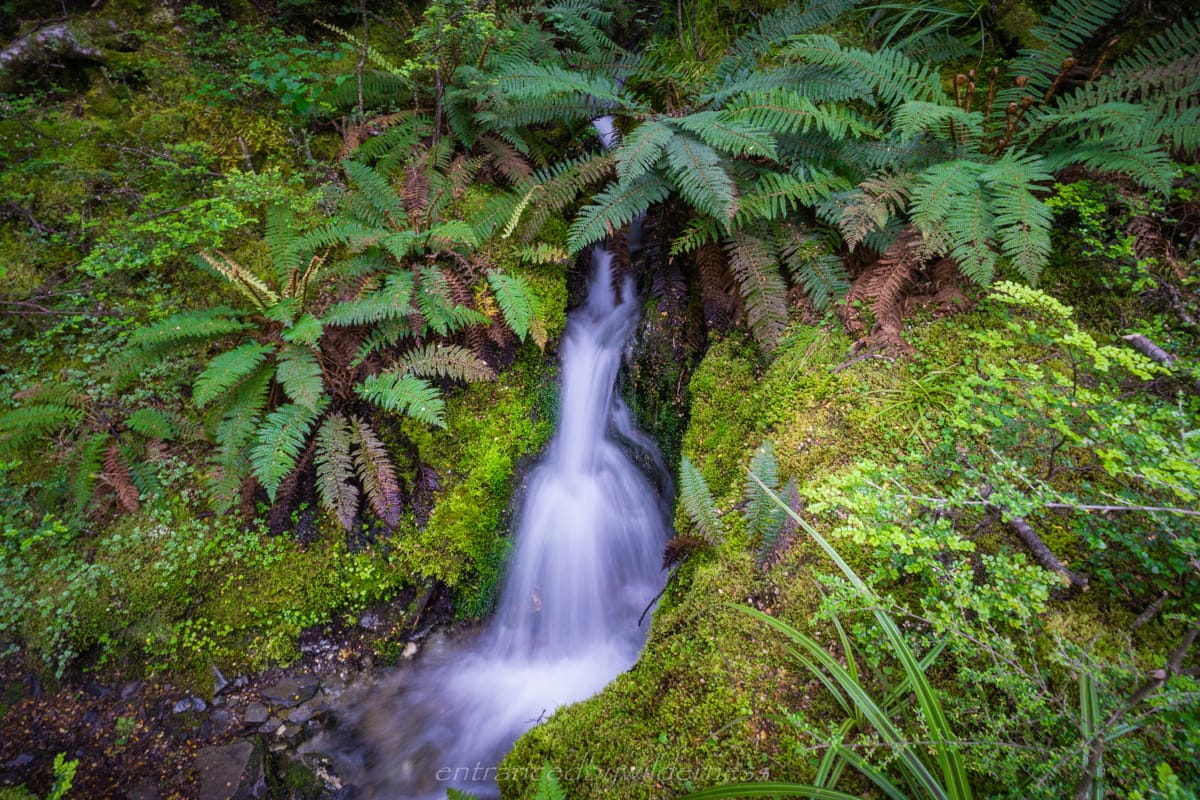
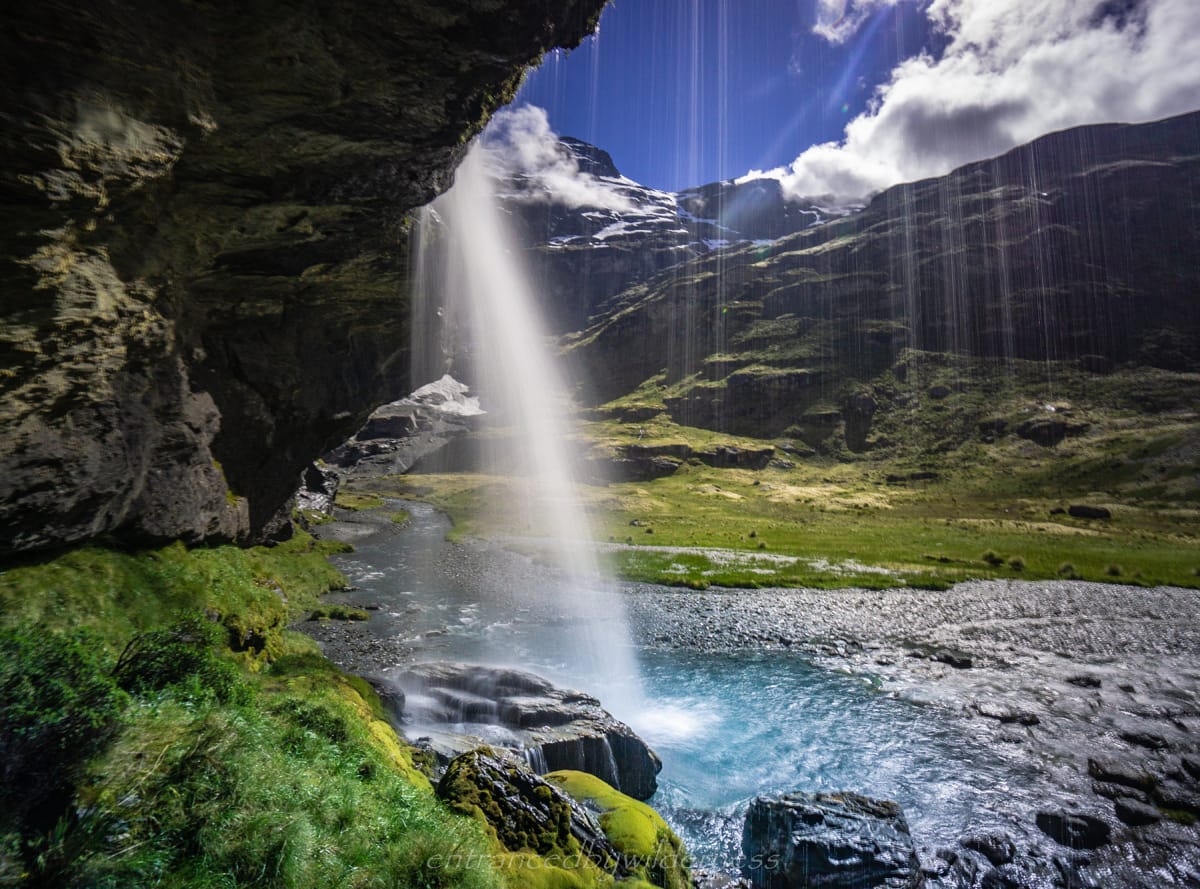
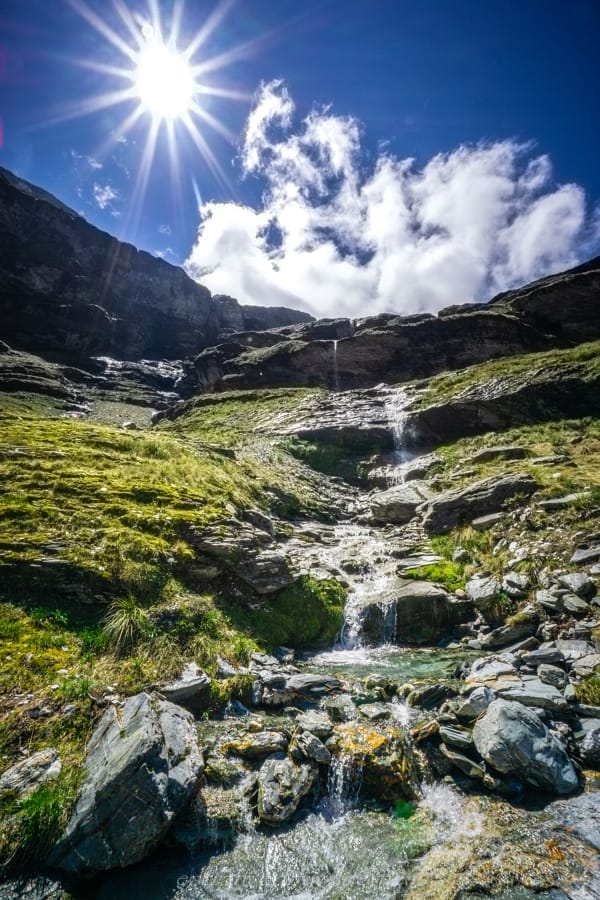
I headed towards Turret Falls, and was surprised to learn that you can actually walk behind it. It is definitely one of the most impressive waterfalls i’ve seen in New Zealand. Sure it’s not the largest by any means, but it’s just in an awesome spot and looks amazing.
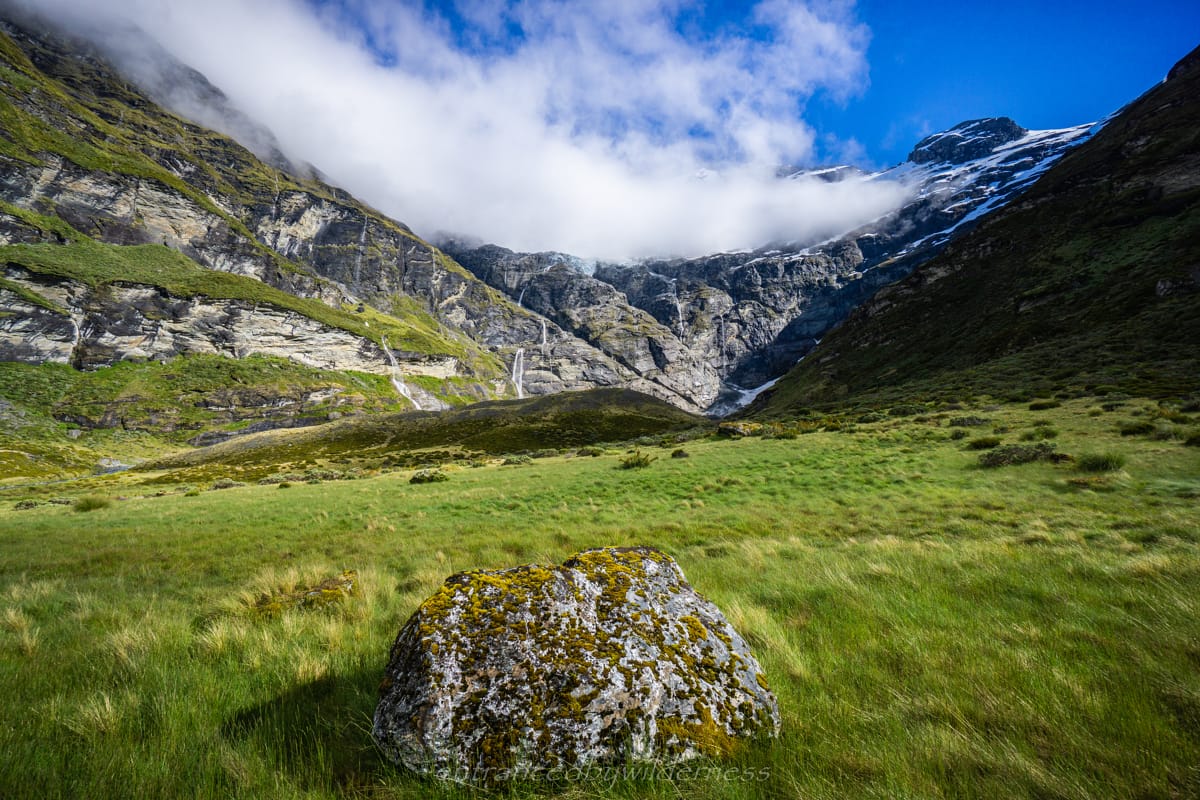
After visiting the falls, it was time to pick out a line near the bottom of the glacier to head towards Lennox Pass. It should be noted there is an easier route straight to Lennox Pass starting 1km back down the valley, but less interesting as you’re not directly in front of the glacier. Sadly, I didn’t get a great close up photo of that side of the valley to show the route.
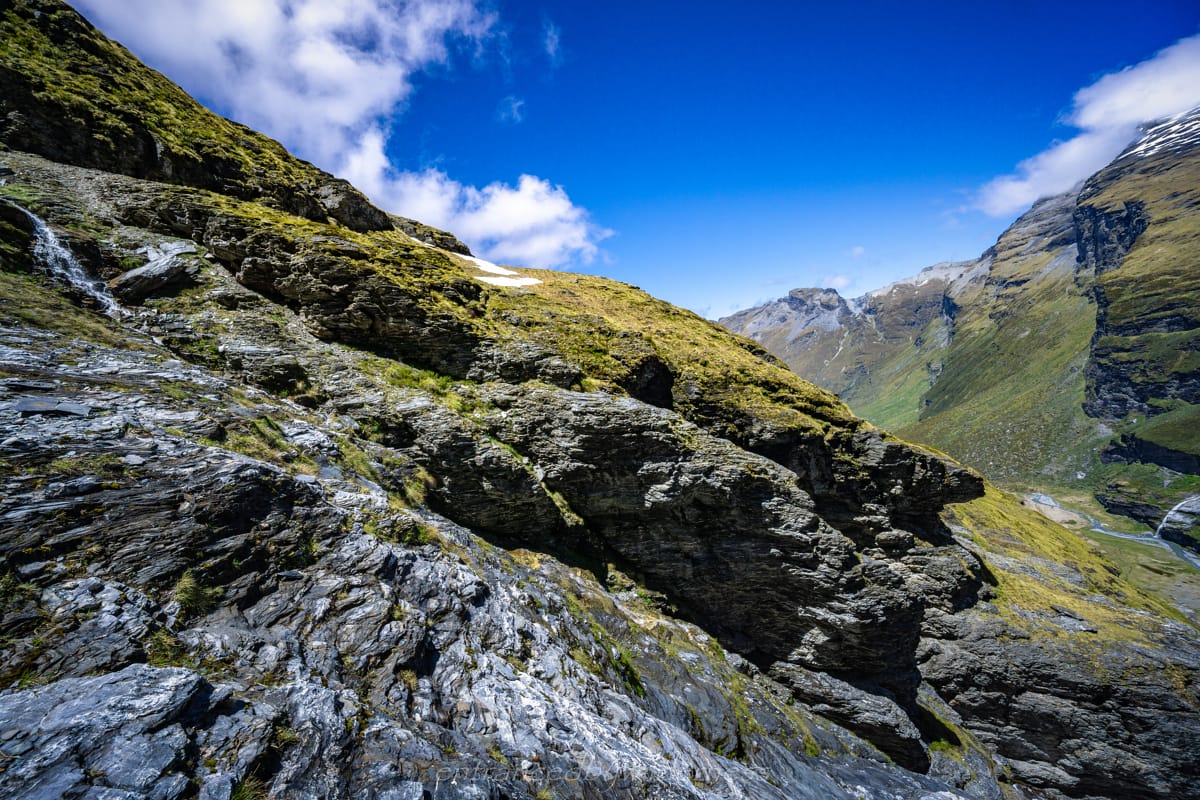
Ascending the Mountain
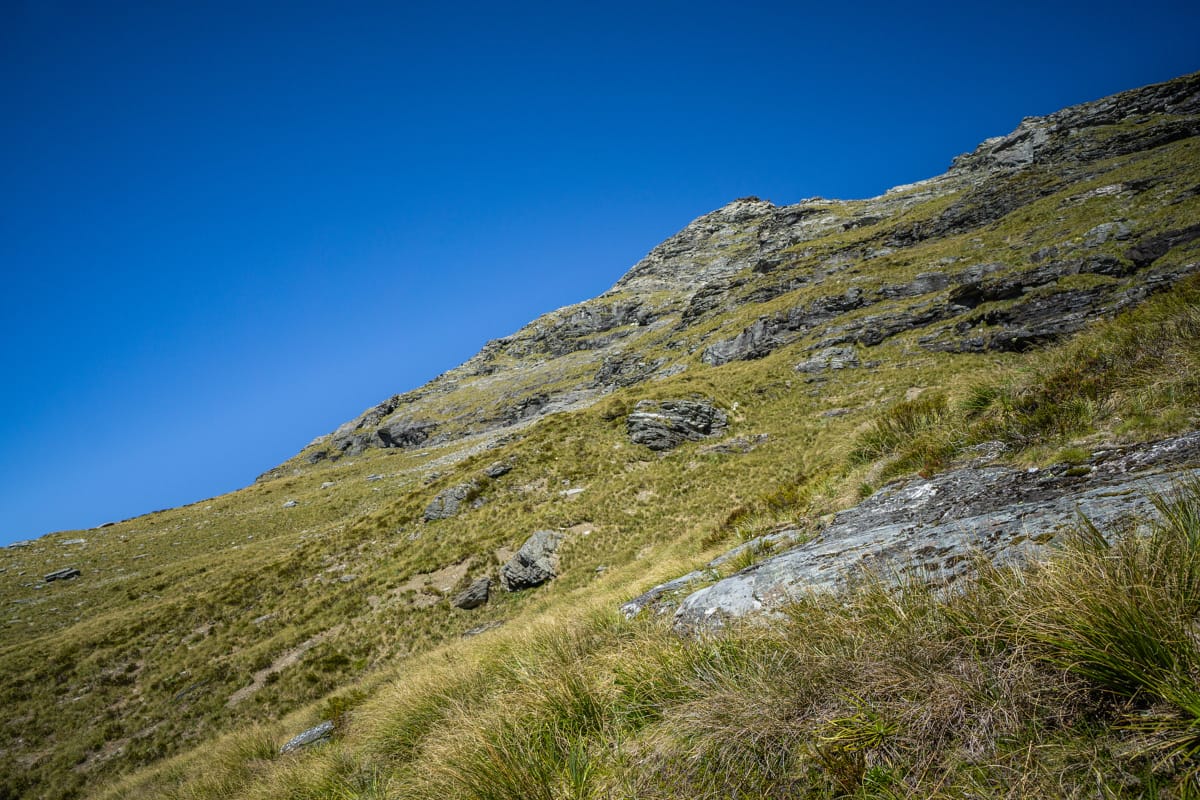
The route I chose wasn’t easy, but doable. There was an awkward jump I had to make between rocks at one point, and some slippery wet slopes to traverse, but once you reached the rocky less vegetated part, navigation was easier. The section around 1200m was a bit challenging as route finding on the vegetated cliffs was largely trial and error. Thankfully, the way I picked worked out.
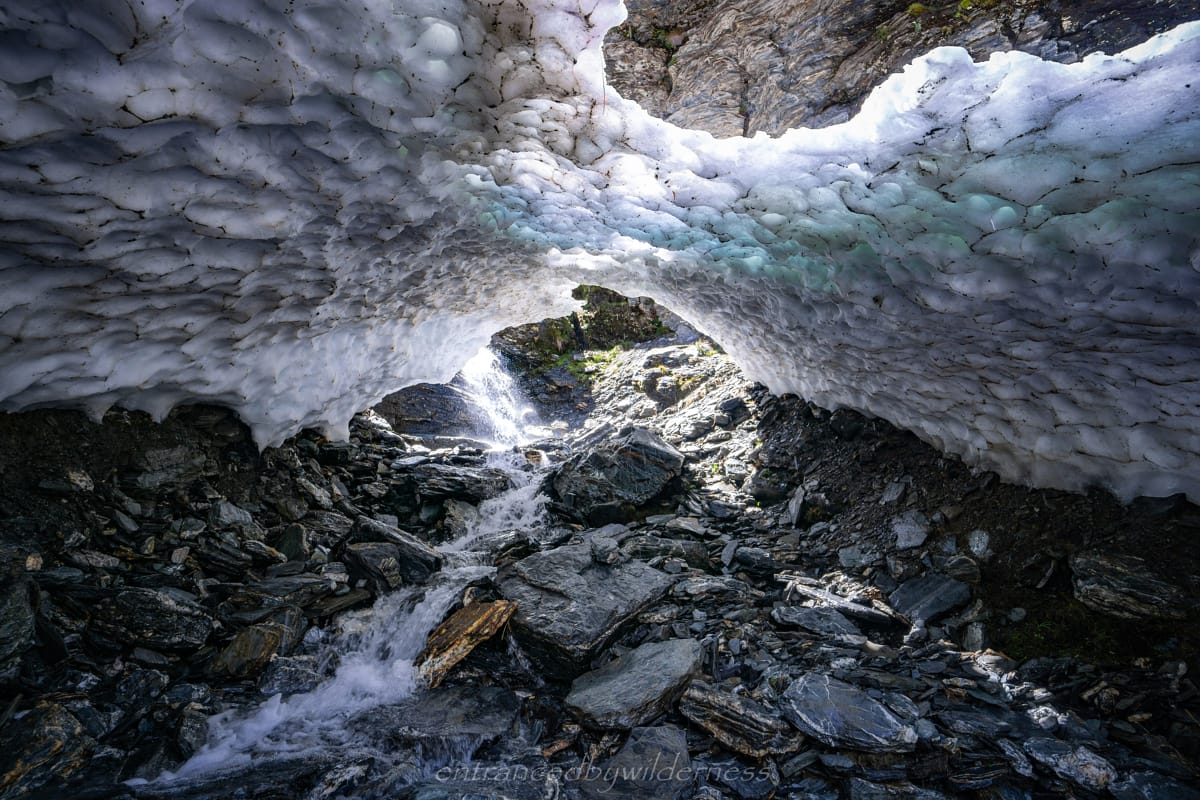
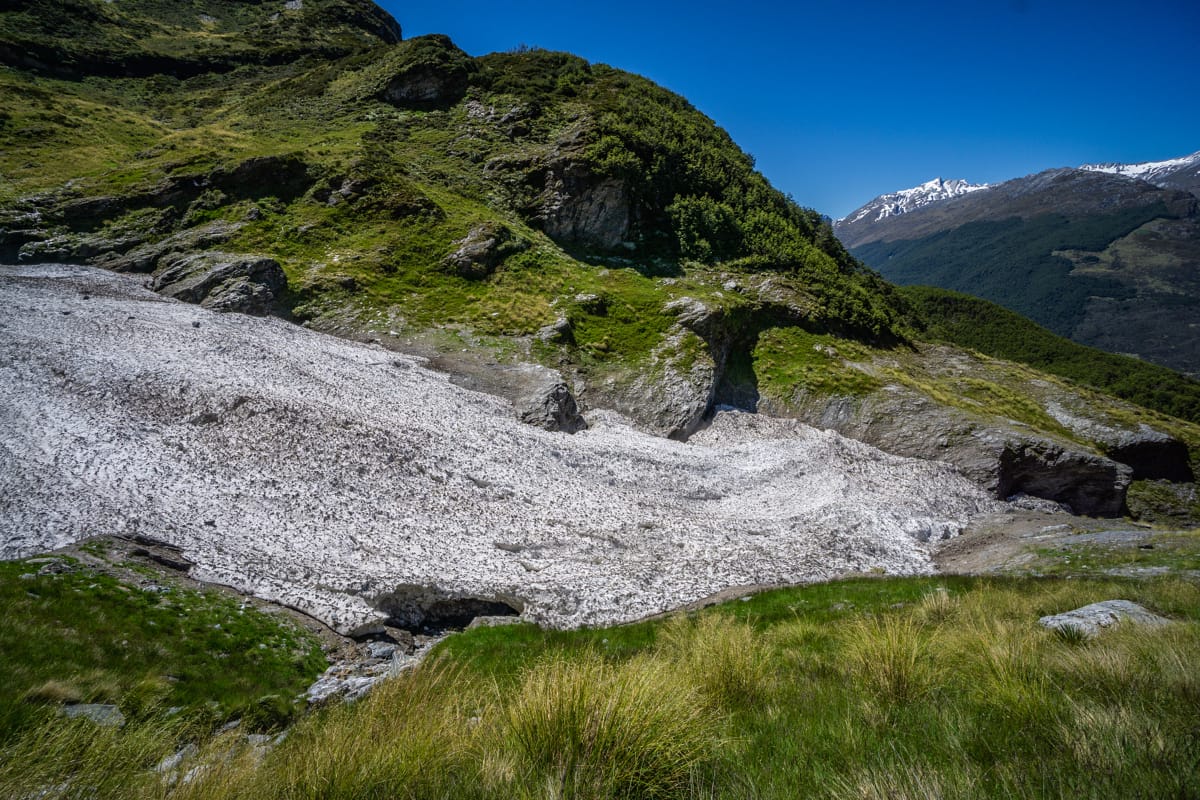
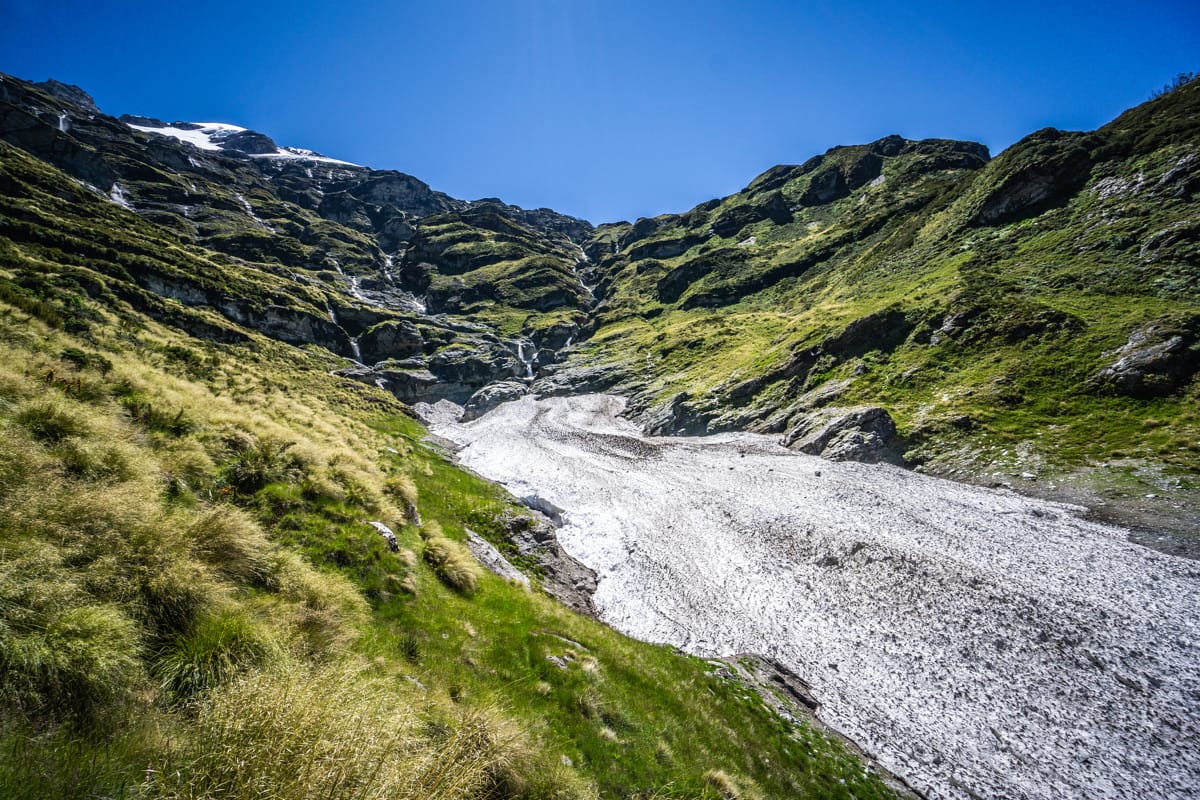
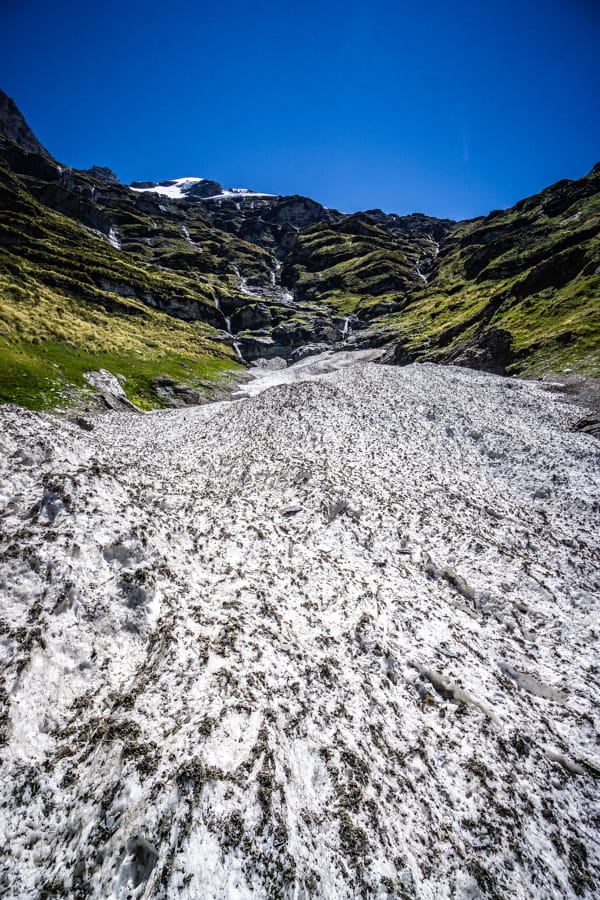
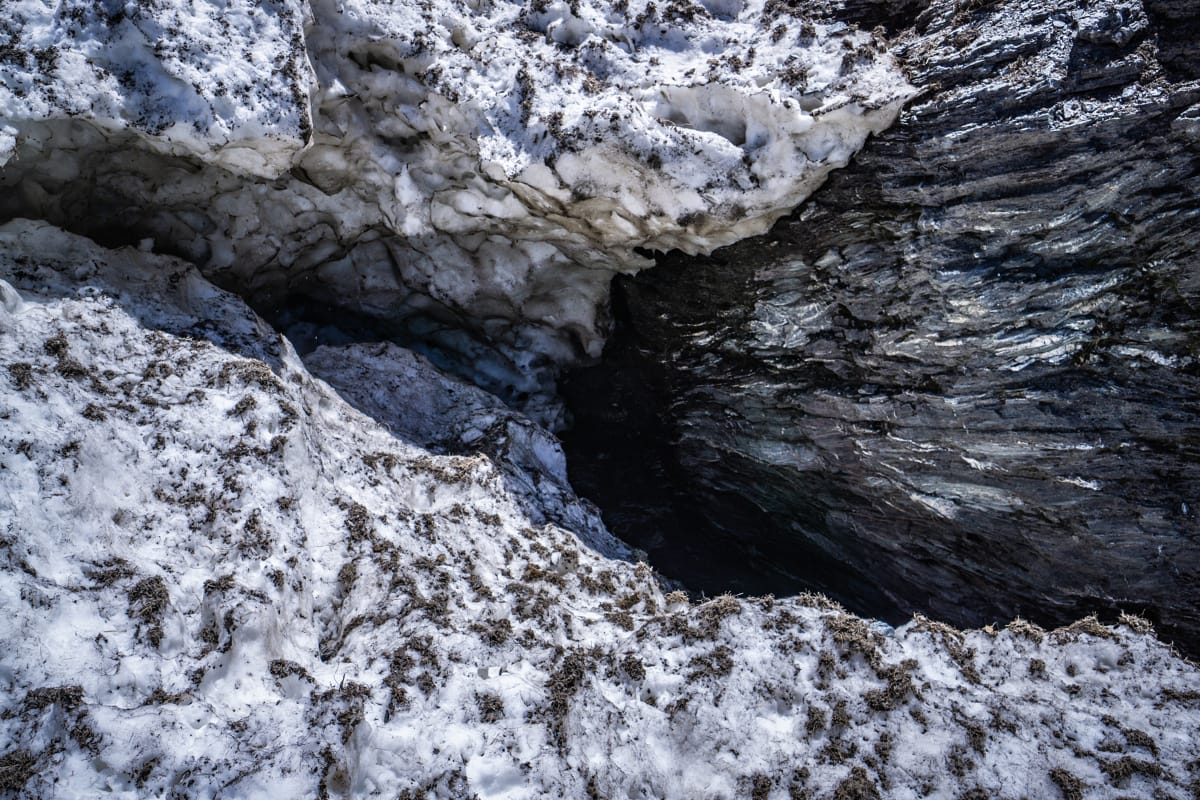
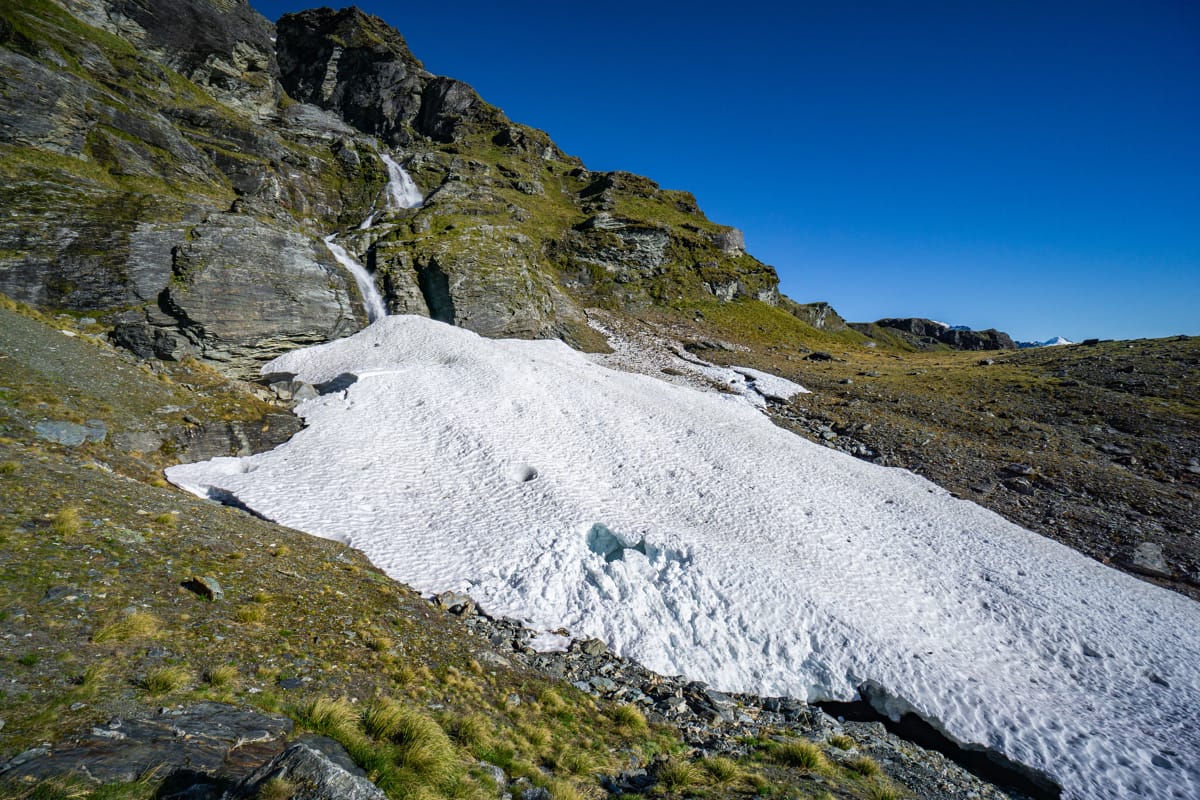
Whilst climbing up the rocks, I noticed an awesome creek-carved snow formation. I don’t think it would have lasted another day or two with the rate of the melt! It was a warm day! I definitely didn’t linger too long underneath it!
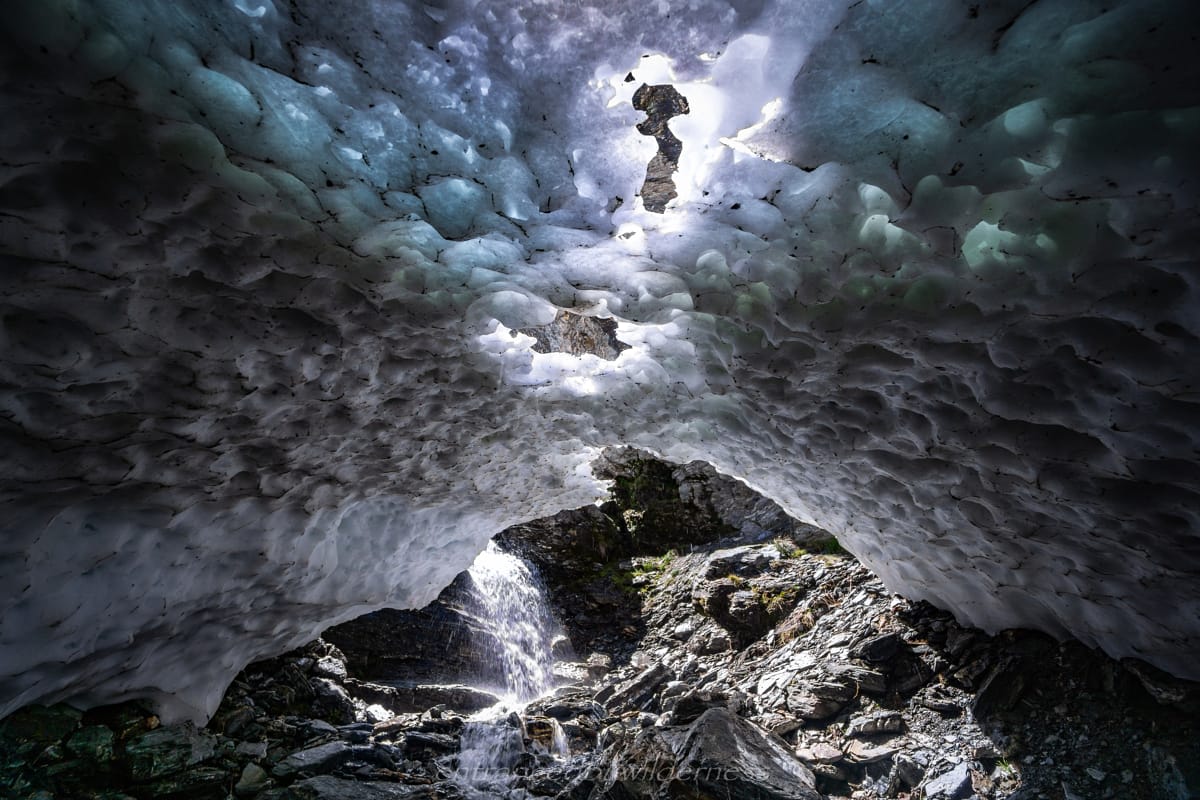
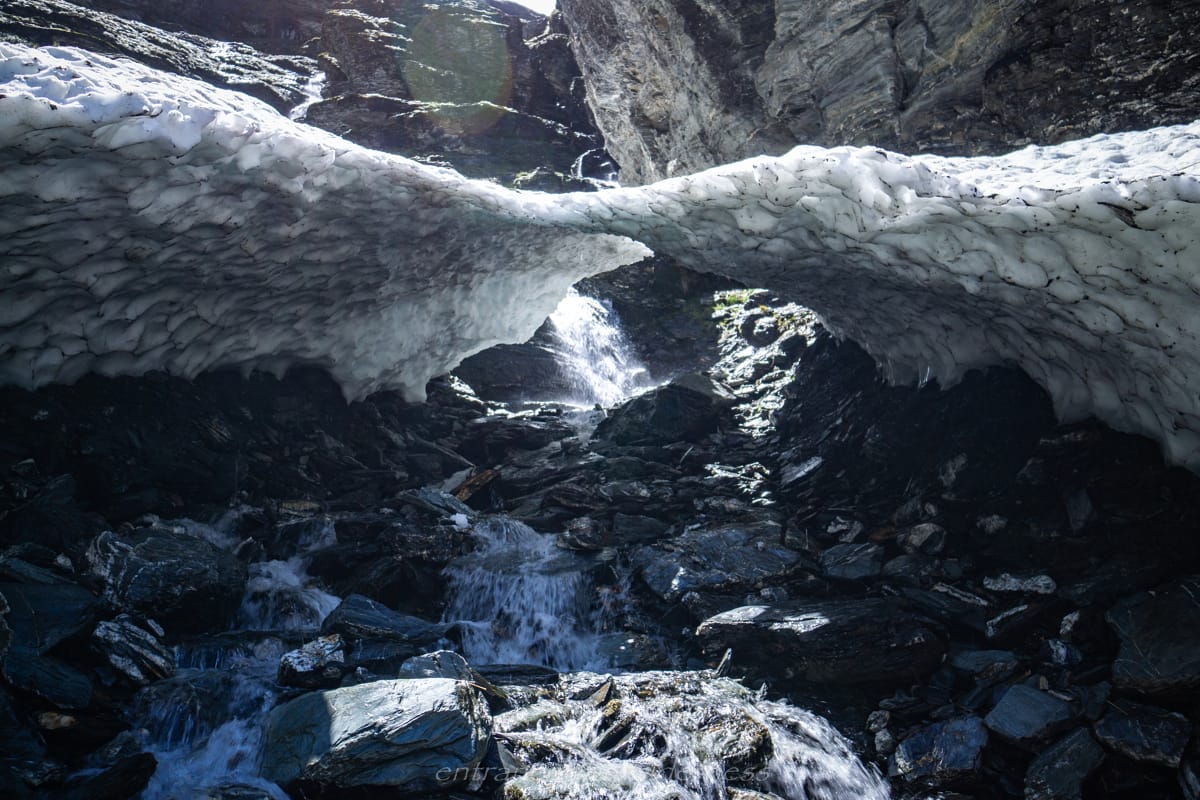
At around the 1400m mark, there was one final climbing challenge. There was a slippery slope that had some water run off that I needed to find a way up and over. It wasn’t too hard, but I definitely took my time to avoid a potential fall.


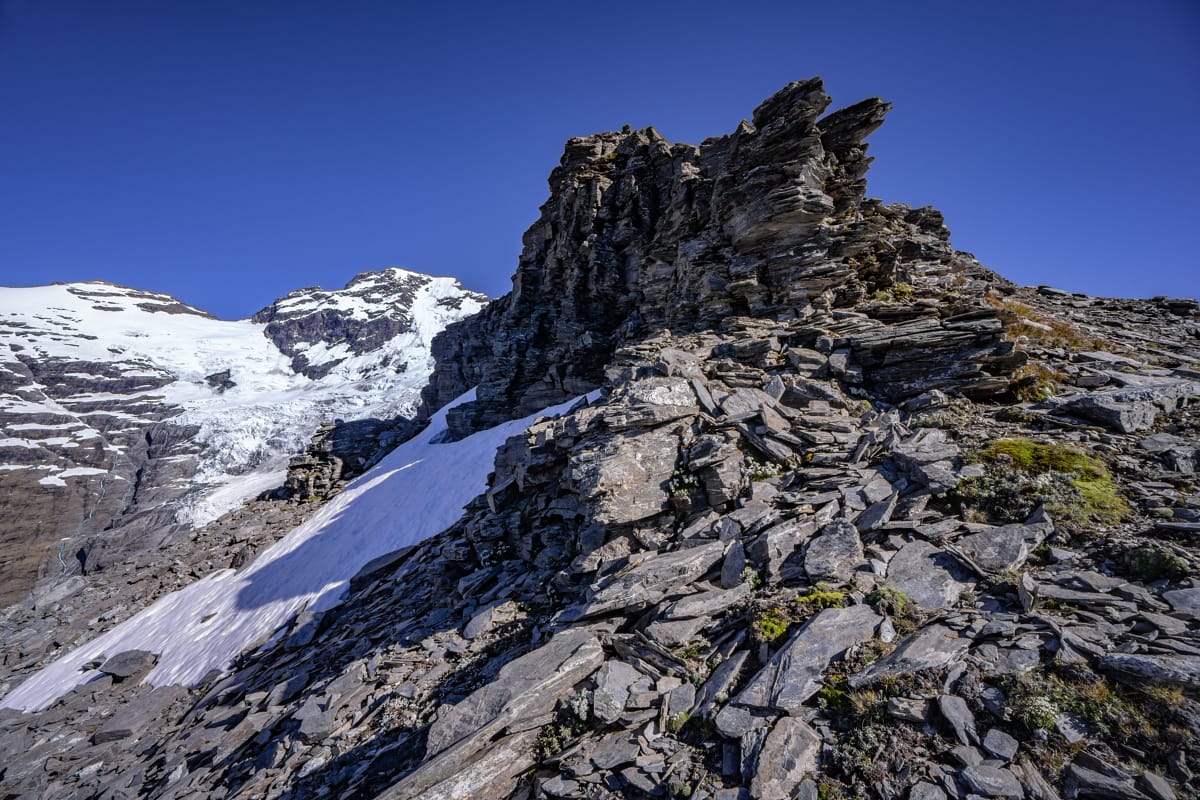
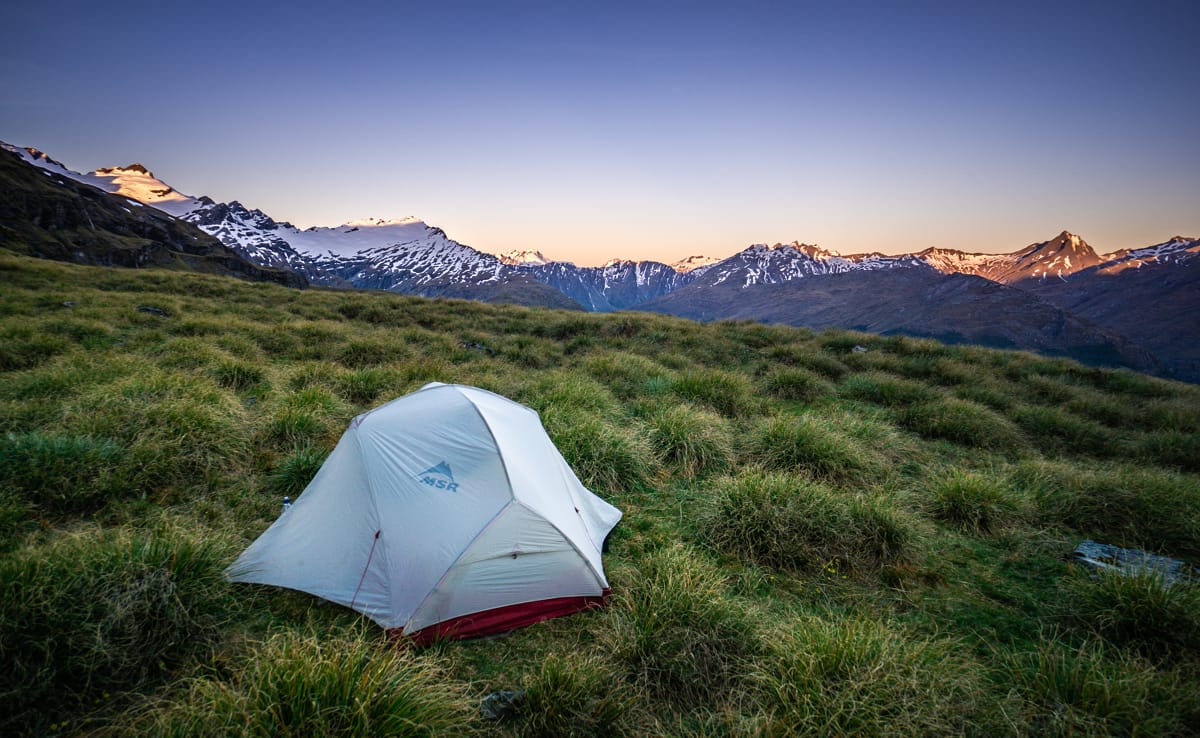
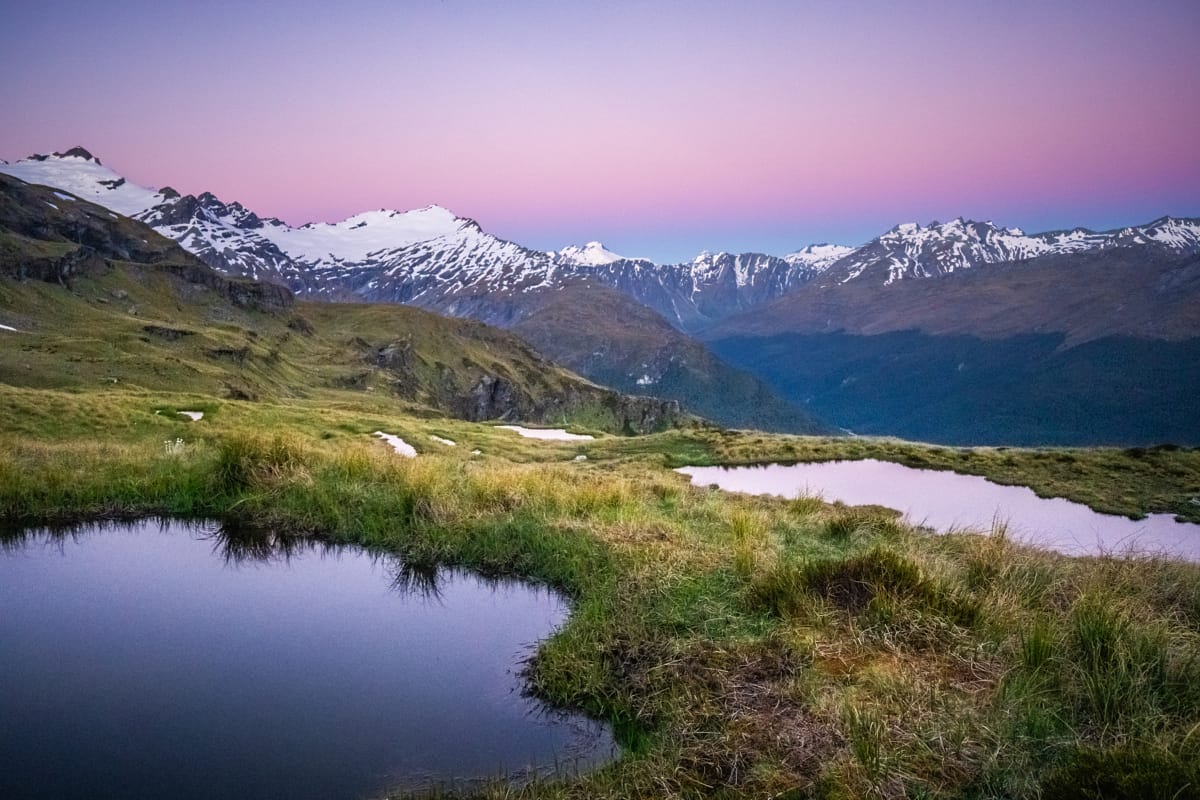
Earnslaw Overwatch
Eventually, the rough slope eased and the terrain became gentle slopes with light tussock and some snow patches. It was around here where I said to myself ‘you know what, this is about as perfect as a spot can get’. It was only about 1pm, but man… easily one of the best views I have seen! The terrain was a little rocky, but with some terraforming removing sharp rocks, it would work for a tent.
Right before I found the campsite, I had passed a nice stream with a quaint little pool. I had thought about jumping in for a dip at the time – and now, I can! It was only a 2 min walk from the campsite back the way I had came. There were two small streams a couple of minutes away on either side of camp, so water was no issue.
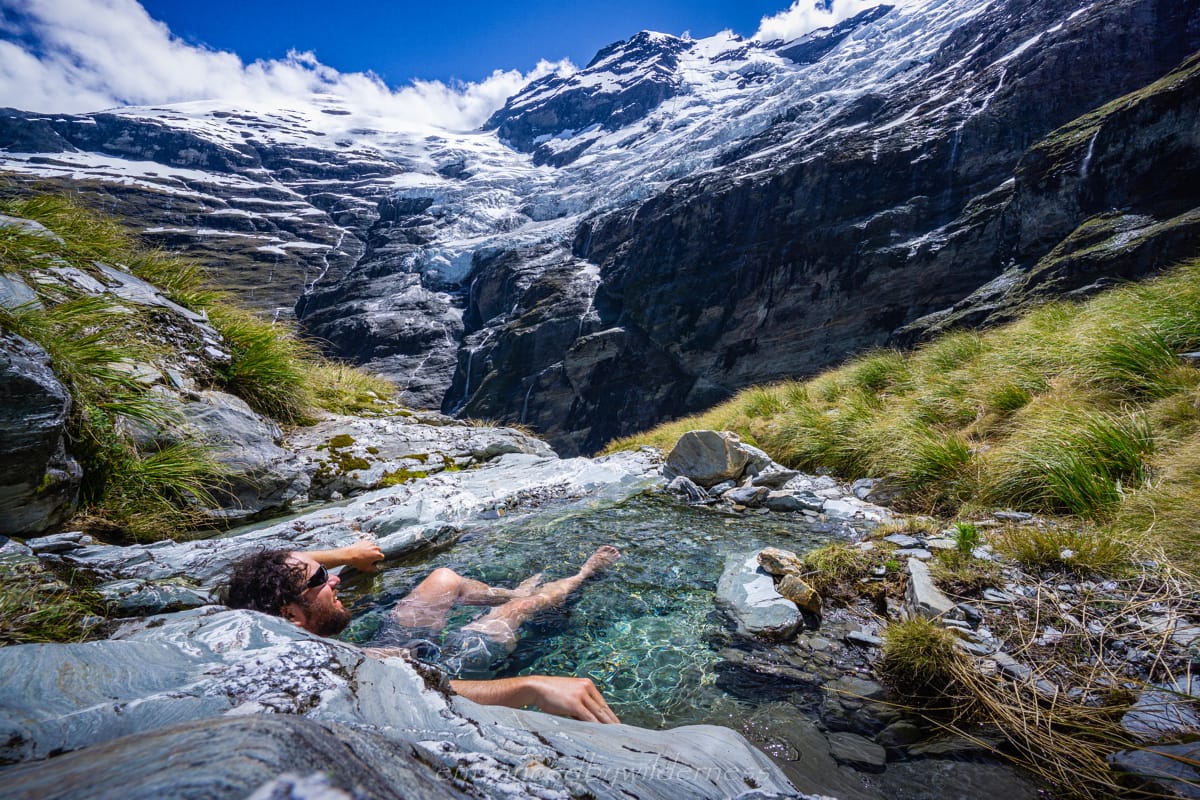
I had a great afternoon chilling out in the water, drinking rum, having an early dinner and planning the next day. I had my nature TV outside to watch, and even witnessed a small icefall from the glacier. To think that a spot like this is within reach from the Earnslaw Burn track and barely anyone comes up here. In the end, I decided to name this spot ‘Earnslaw Overwatch’.
Day 3: Earnslaw Overwatch to Upper Kea Basin Shelf
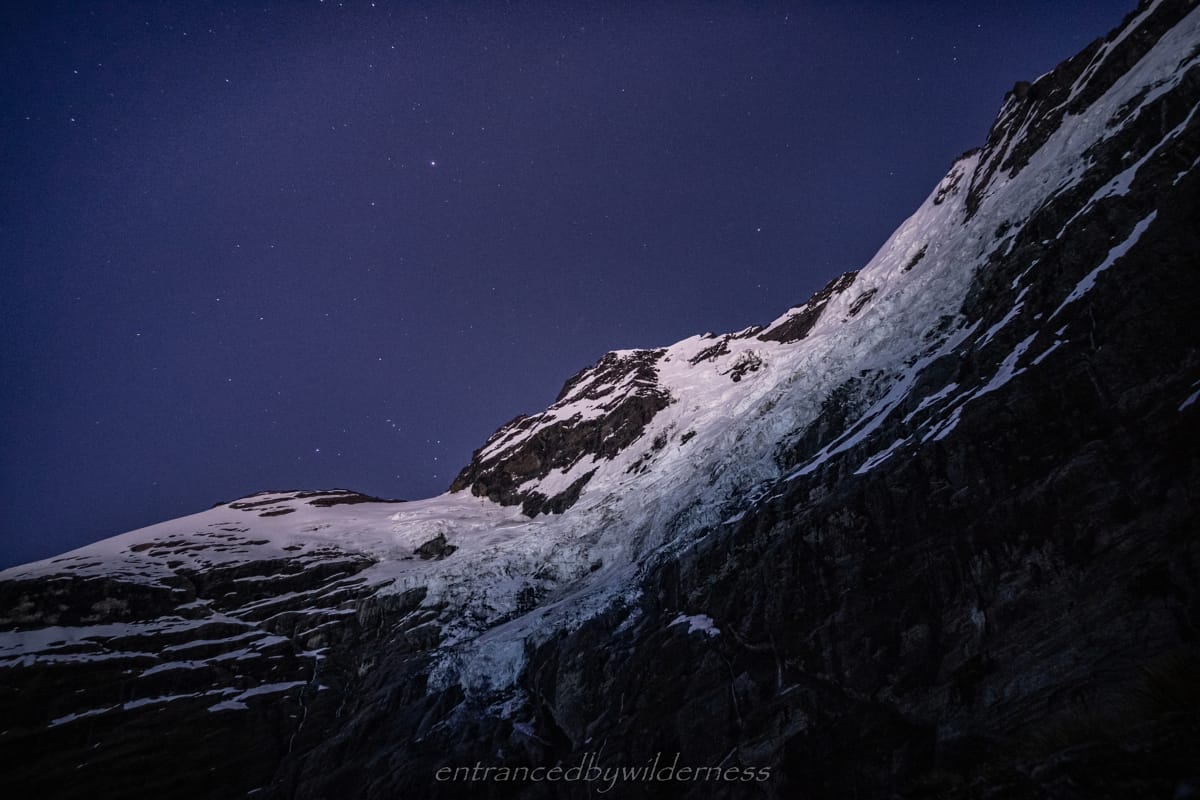
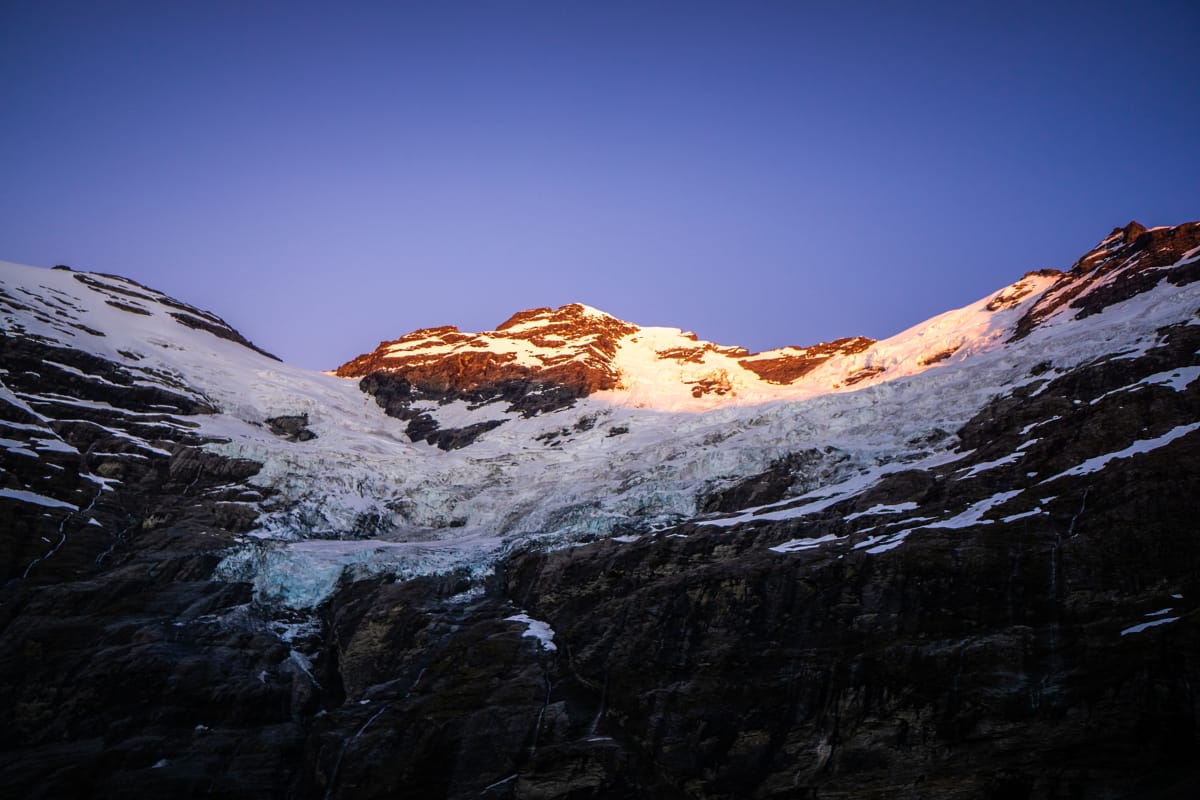
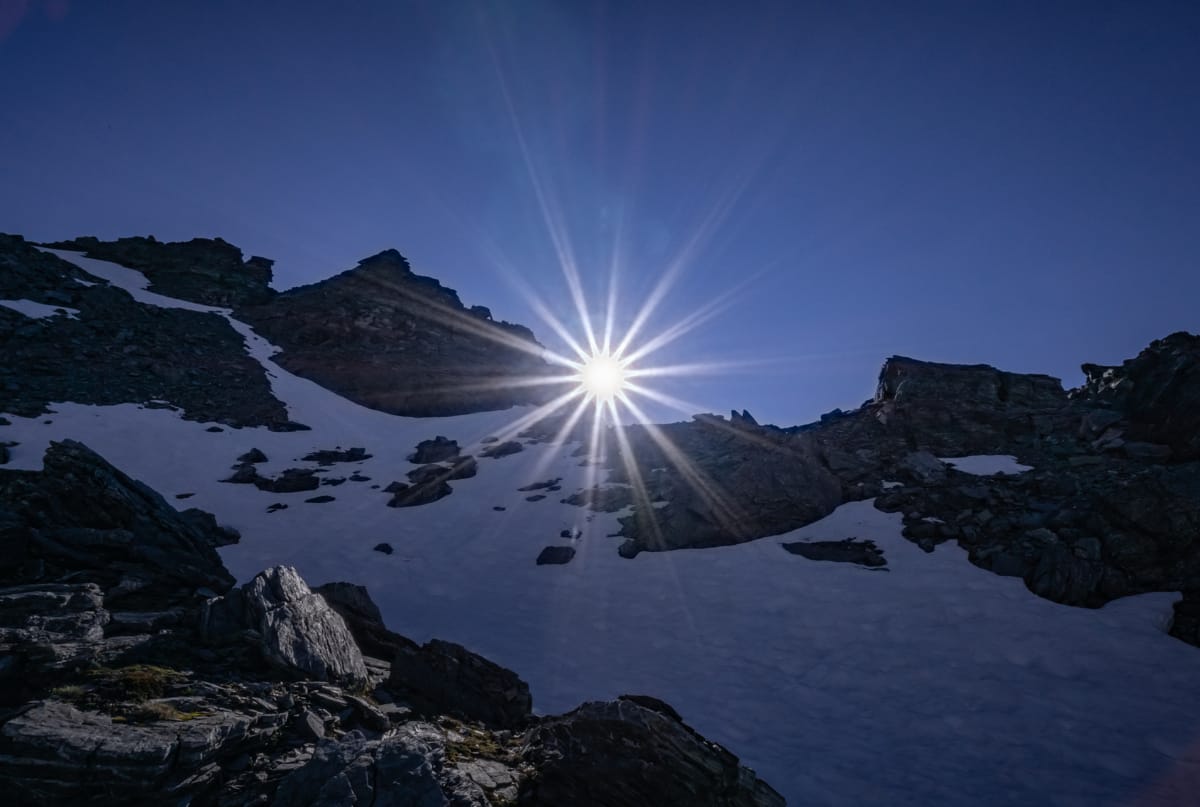
I awoke in the evening early to a starry magical sight. I made sure to snap a few shots of the awesome skies above the glacier. By the time I slept more and woke up, it was about 8am and time for me to make a move! The weather was holding strong, no rain or wind – the forecast was holding up!
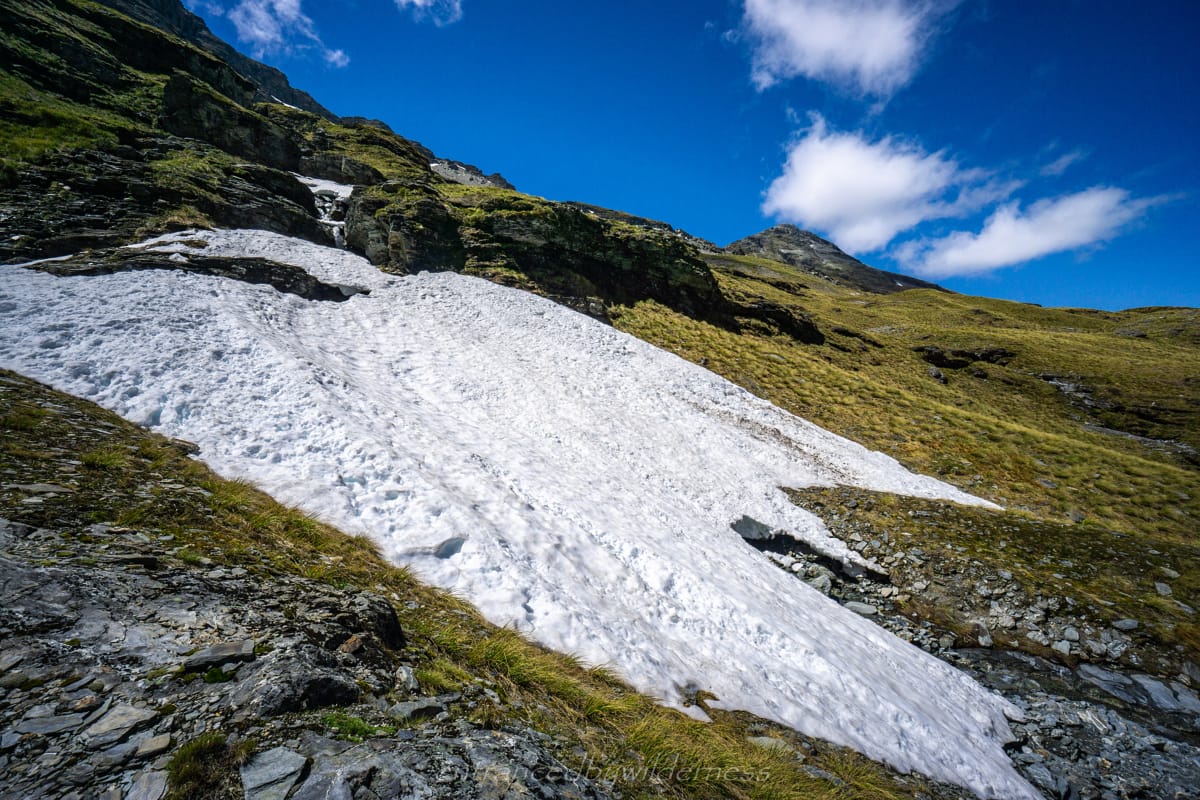
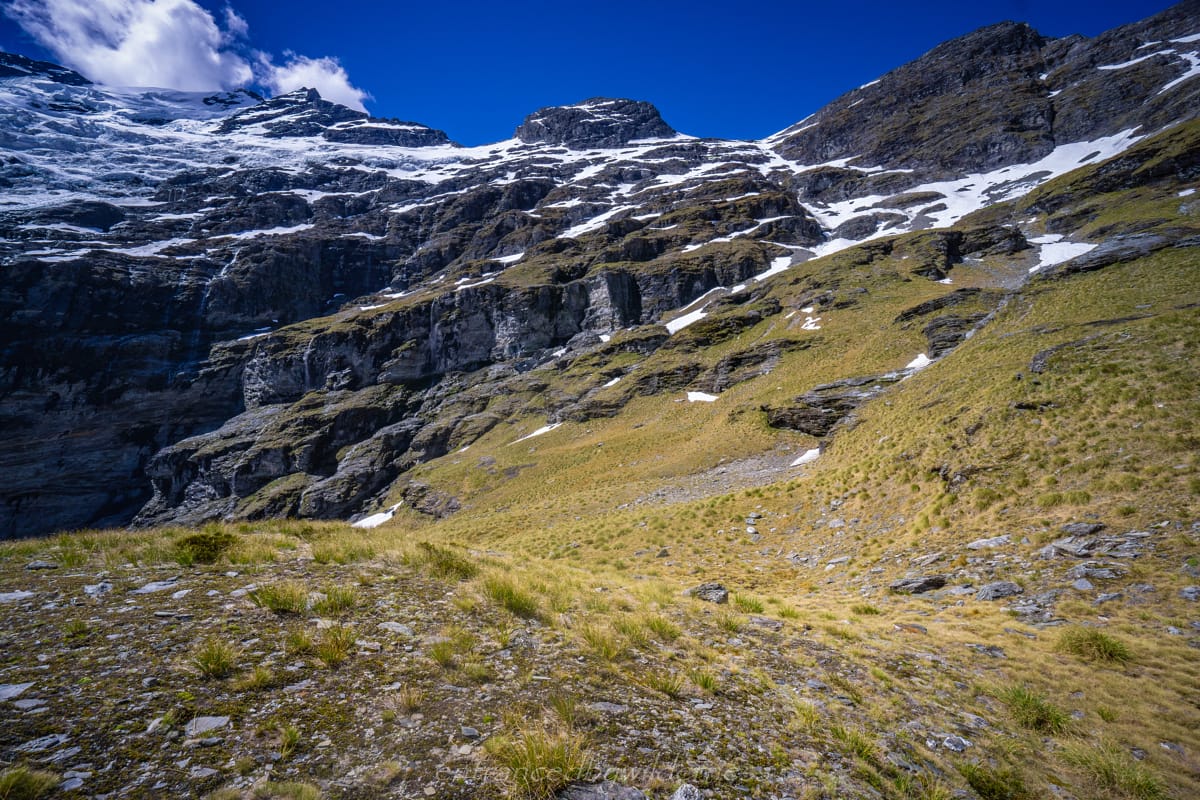
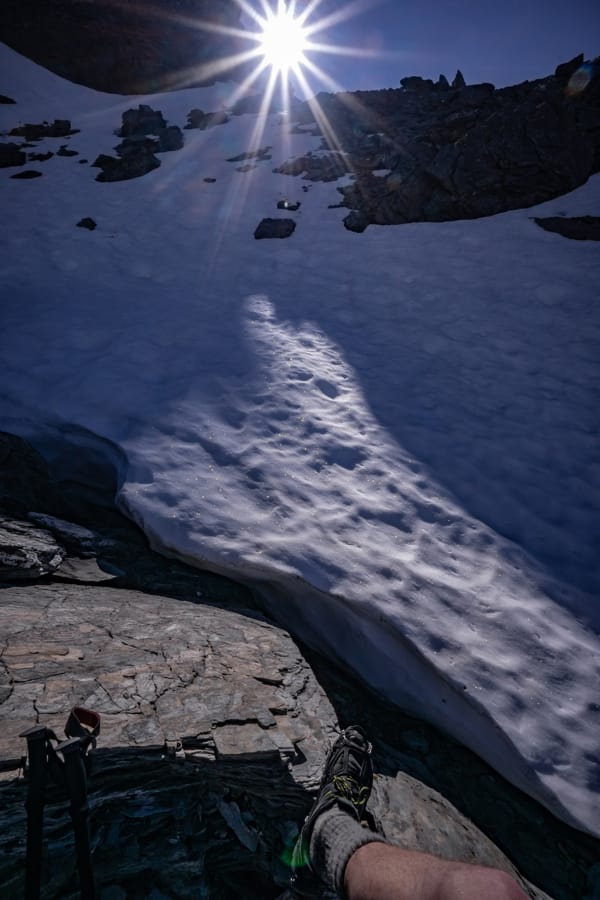
The final stretch of climb to the ridge near Lennox Pass was pretty easy, with a couple of snow patches to cross.
I ended up using my microspikes briefly because of the slope angle, but they really weren’t required, as I could have walked around the patch.

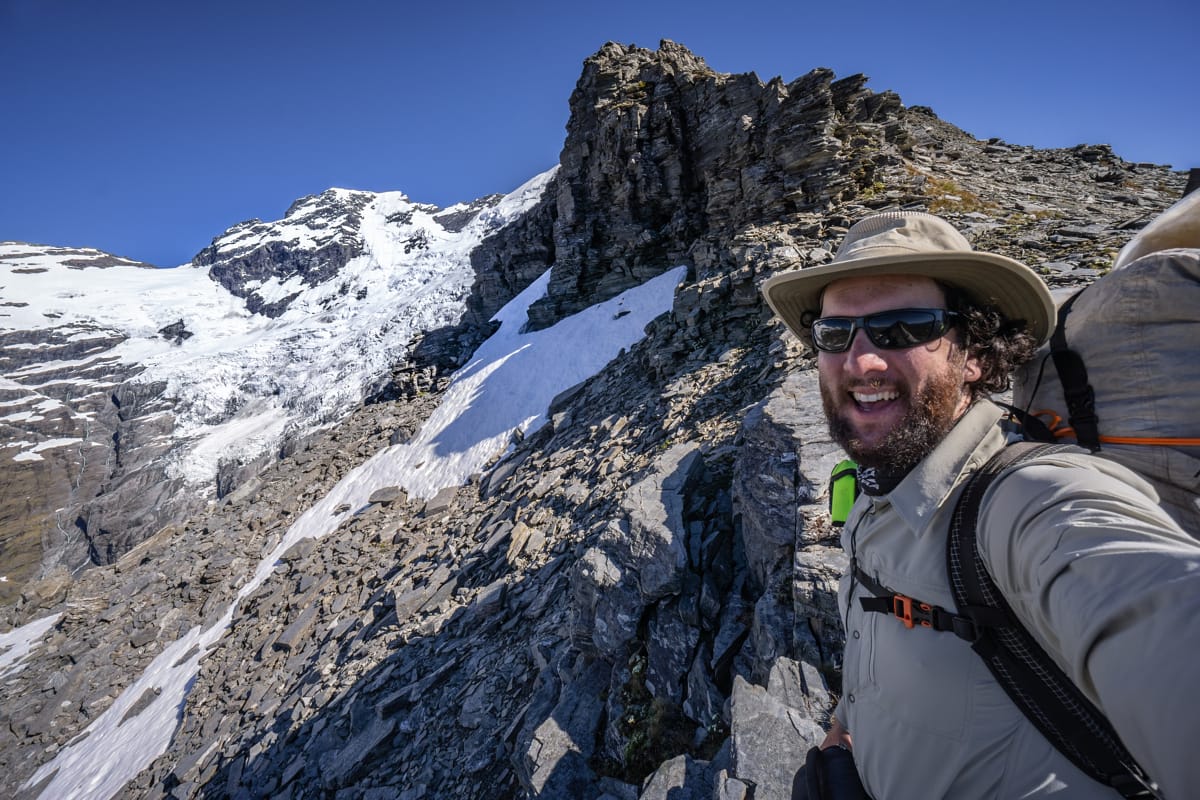
(near) Lennox Pass
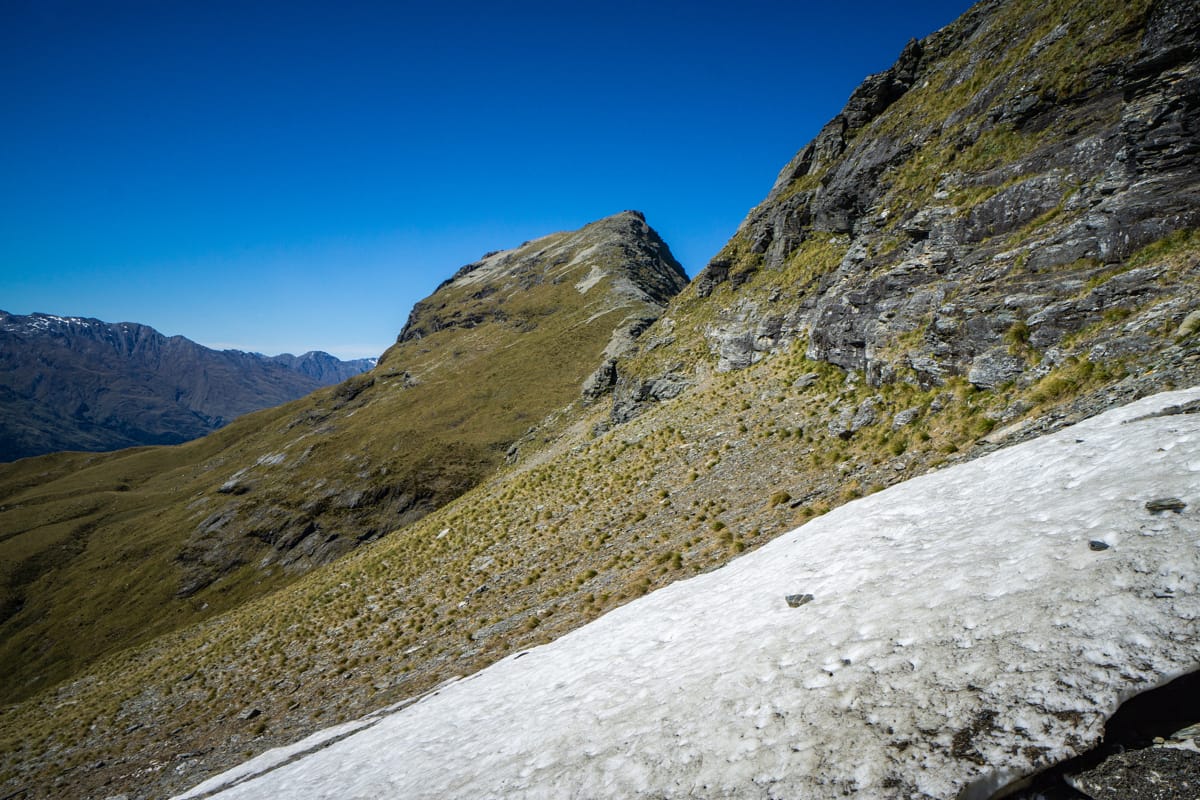
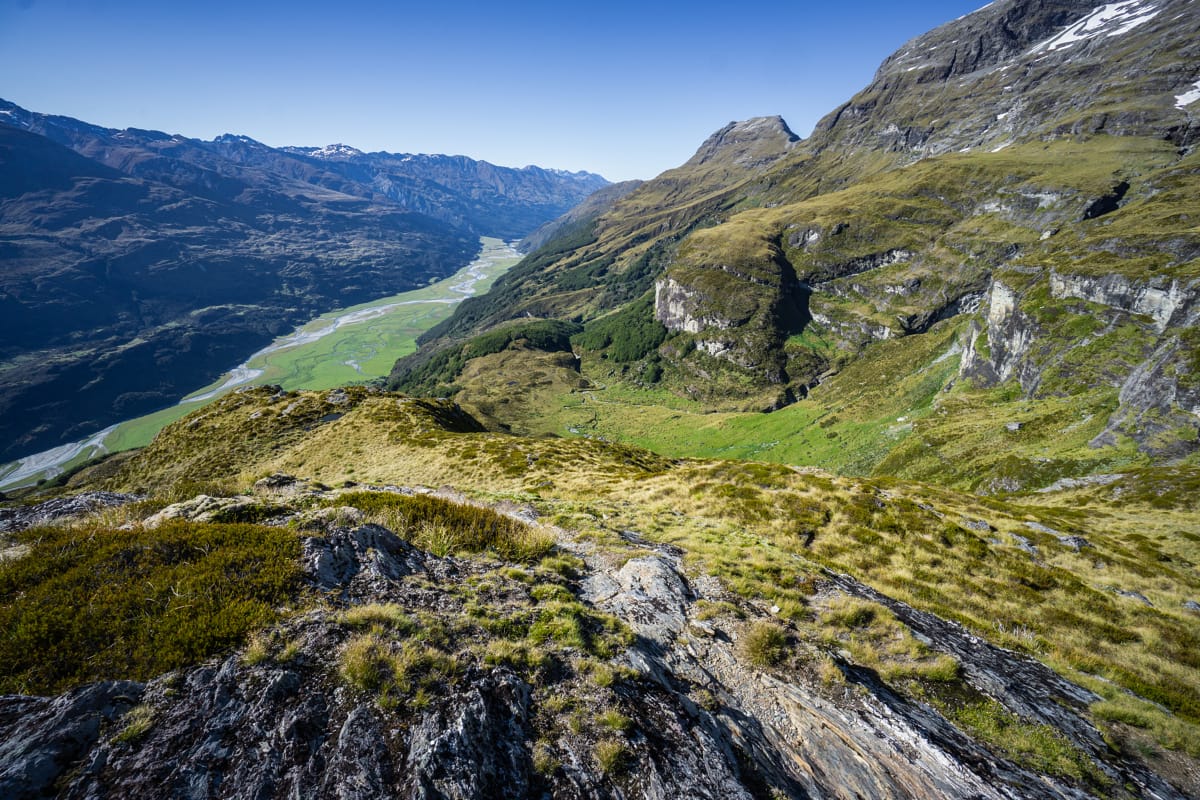
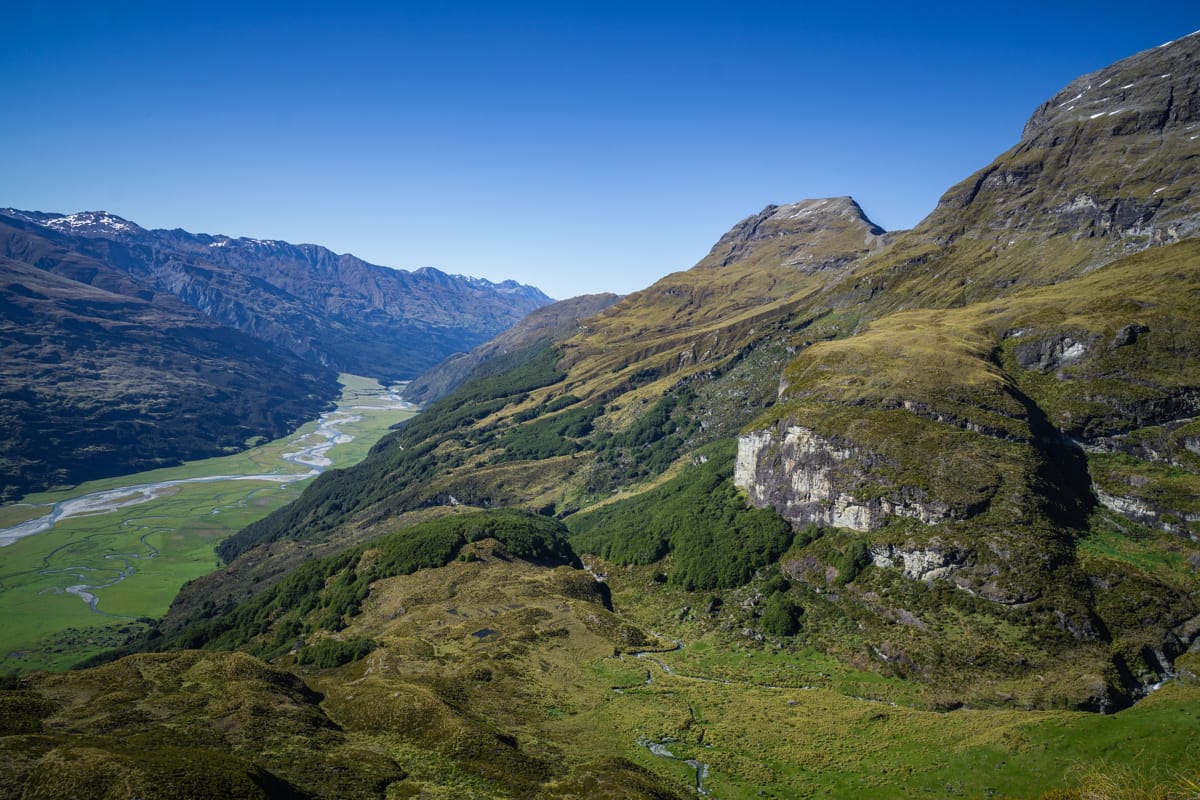
Eventually I came to the ridgeline between Peak 2026 and Lennox Pass. It was my final view into the Earnslaw basin and valley, as I turned to face the Rees valley.
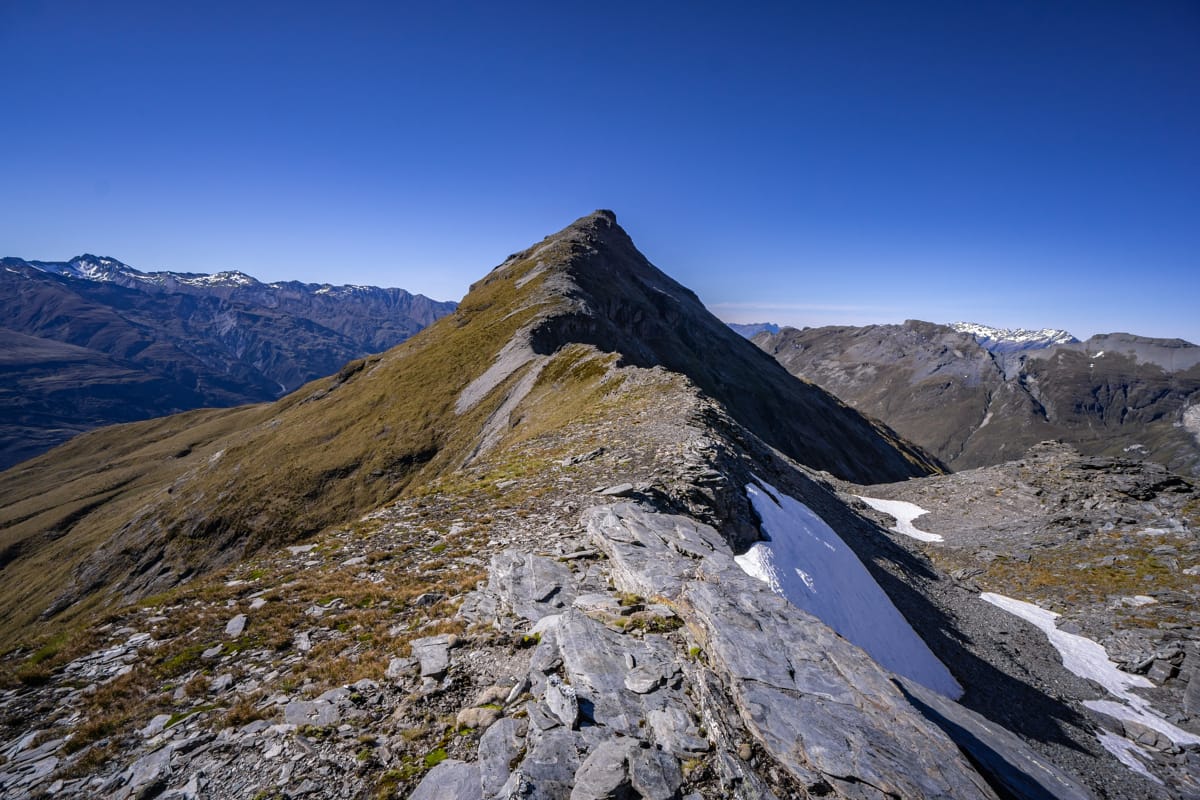
It was here I needed to make a decision for a route direction. I could follow the scree ledge to the left and head down a steeper section that way, or swing to the right toward Lennox Pass and take a (more likely) easier slope. Taking the challenge as usual, I went to the left.
Overall, this wasn’t a terrible decision, but it was very challenging and there was one section I was stretching my body length to lower myself with limited footholds. It is a very hard slope to read from above, as the rock strata slopes toward the valley. Hand and footholds were hard to come by. Next time, i’d probably take Lennox Pass here.

Descending to Lennox Creek
After the short steep descent, the terrain eases a bit and becomes more manageable for awhile, at least until around the 1400m contour. This is the point where I was considering the terrain ahead of me. I could either stick to the 1500/1400m contour, following the shelf around to Lennox Creek. However, the contours there looked steep briefly. I then thought, ‘what if I can get through the bush to Kea Basin around the 1000m contour?‘. I decided to give that a go, seeing that I could climb back up and around the top of Kea Basin if it failed.
This turned out to be perhaps not a great decision initially! The vegetated section was no joke. It was full of speargrass and other typical spiky bushes, and there were many cliffs and ledges to skirt around or drop off (sometimes into deep vegetation).
Lennox Creek
I ended up losing my phone in the bushes after one of my drops and spent probably half an hour finding it! Luckily I did after backtracking and I could resume. By this point, my legs were so battered from speargrass that every touch stung in pain. This was the one hike I wish I had gaiters for! After attempting to stick to some some creeks for solid ground to avoid vegetation, I made it to Lennox Creek. Walking on the glacial debri river was much more refreshing than the crap I just went through haha!
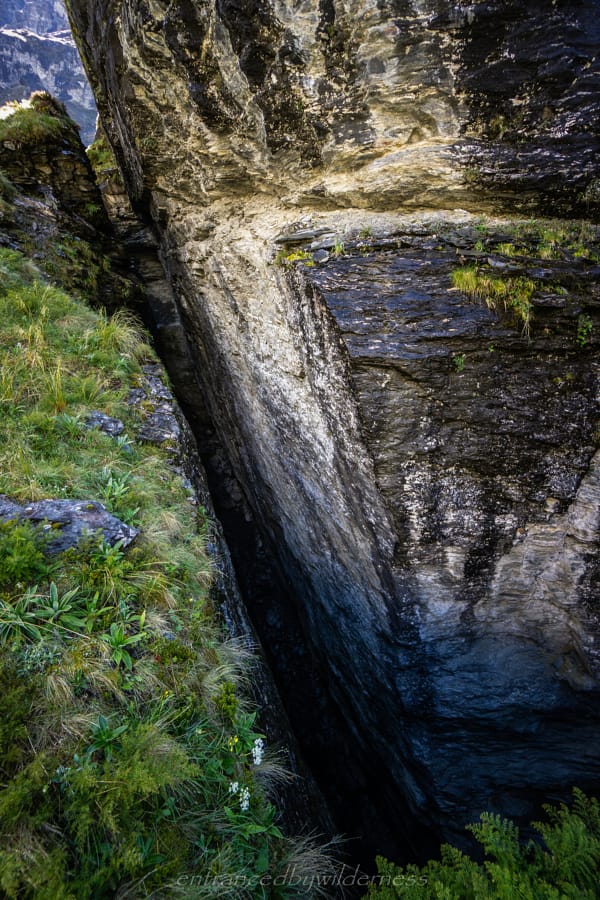
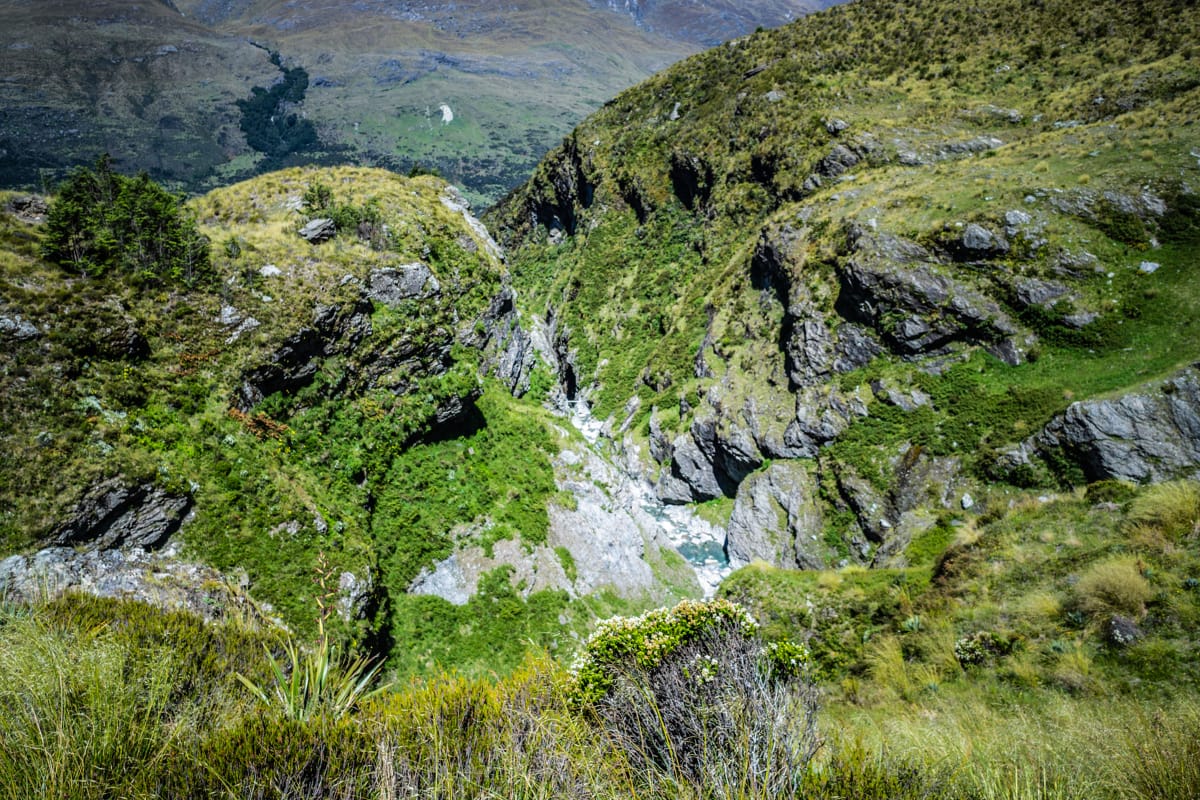
From this section I descended a little bit more until i reached the point near where the Kea Basin drains into the Lennox. Looking down Lennox Creek gorge was epic – some serious water flow and steepness in that section – definitely not heading that way!
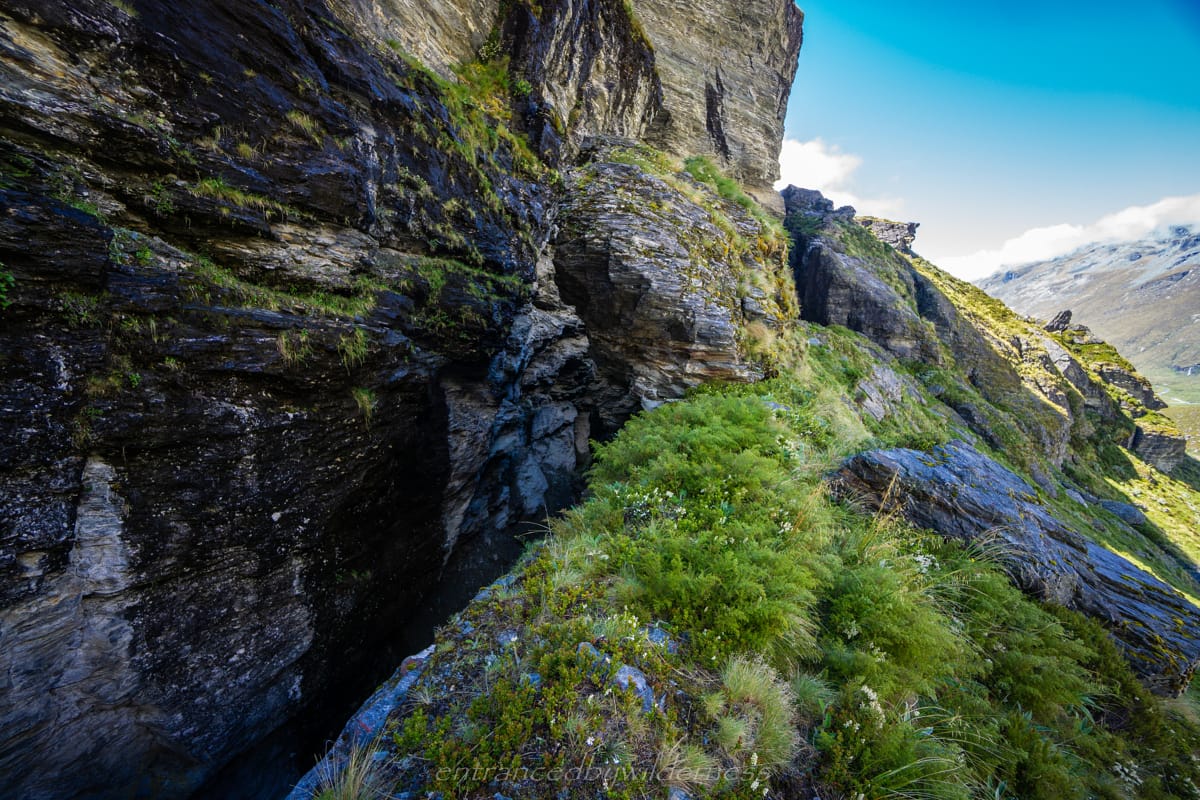
I ventured as close as I could get to the Kea Basin creek, but it was too steep to venture into and hike up. I decided it wasn’t worth attempted and disappointedly made my way back up to where I crossed the ice. From here, I followed some deer tracks up a small dirt cliff and through dense brush (can be seen as the shadowed section of the first photo in the previous three).
Ascending to Upper Kea Basin Ledge
The next section was a lot of up, up, up and regaining all the elevation I lost to check out the ‘shortcut’. By this point, I was pretty exhausted, and ready for somewhere to camp. I knew that the flat ledge was in my sights, and had to just push on toward it. The terrain was very tough here. It was largely moist moss and grass that gave way when only thin. I ended up having to climb up the sides of some low-flow waterfalls.
On one of these climbs (see on map at around the 1200m contour), I only had a hold for no more than two fingers – and when you have a raft hanging of your pack limited grip, it became tough! I had to climb in incremental slow maneuvers to avoid a potentially fatal fall into the rocky gorge below. This was actually probably in the top 5 most sketchiest things i’ve done on a hike. If I had a lighter and smaller pack, I think i’d have been more confident here, but it was hard with balance. After finally getting to the top of the terraced slopes, I made it onto the ledge!
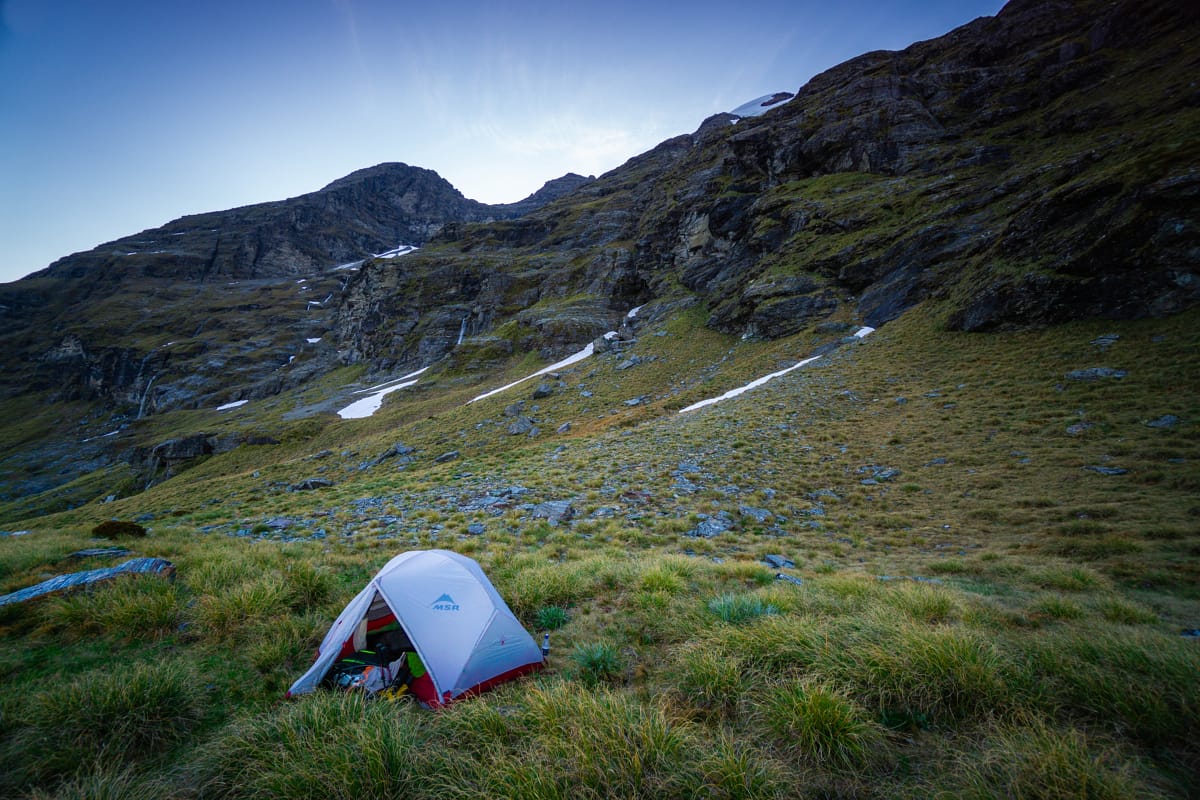
Upper Kea Basin Ledge
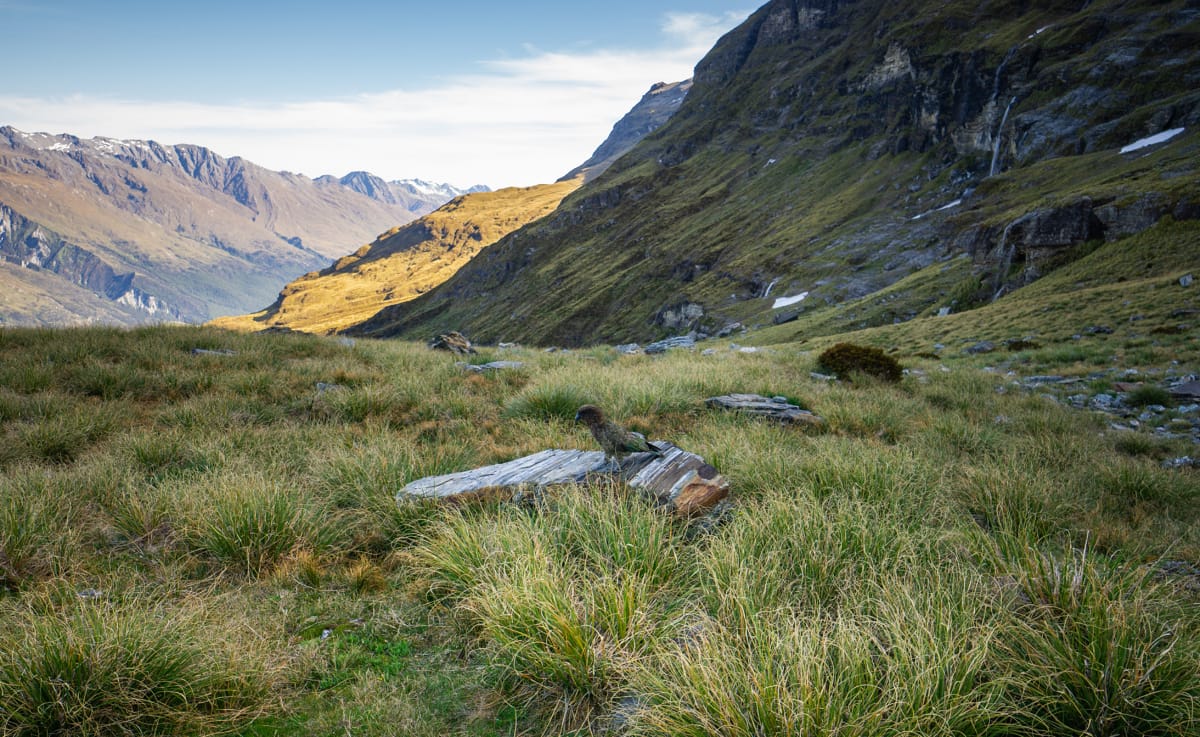
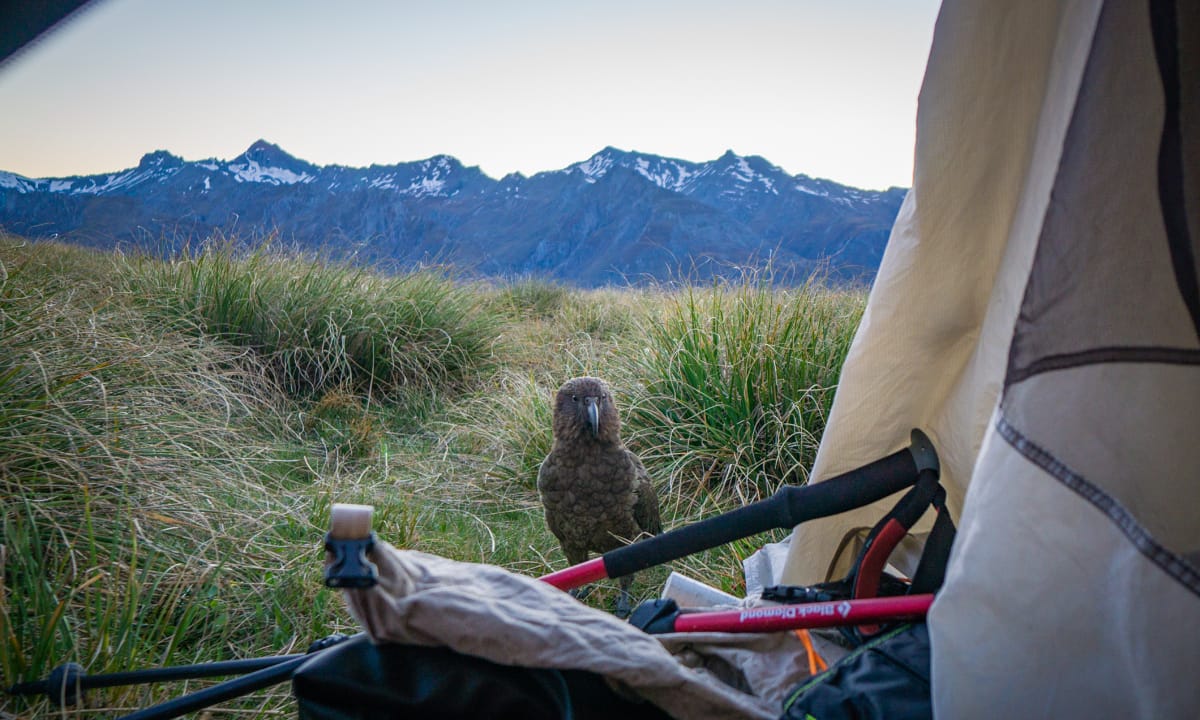
The shelf wasn’t exactly flat due to the tufts of grass, but I found one decent not-too-lumpy spot. I did have to pull out one tuft – not exactly leaving no trace! However, I did replant it when I left the next day. It wasn’t Earnslaw Overwatch worthy, but still a decent find and I was happy to be off my feet. It wasn’t too long whilst I was setting up, before I was joined by company. A single kea paid me a visit. To be fair, it was just doing it’s own thing eating the roots of the moss (what they naturally eat). I was thankful to see that, as tourism has a huge impact on keas. This one was still at least part-wild!
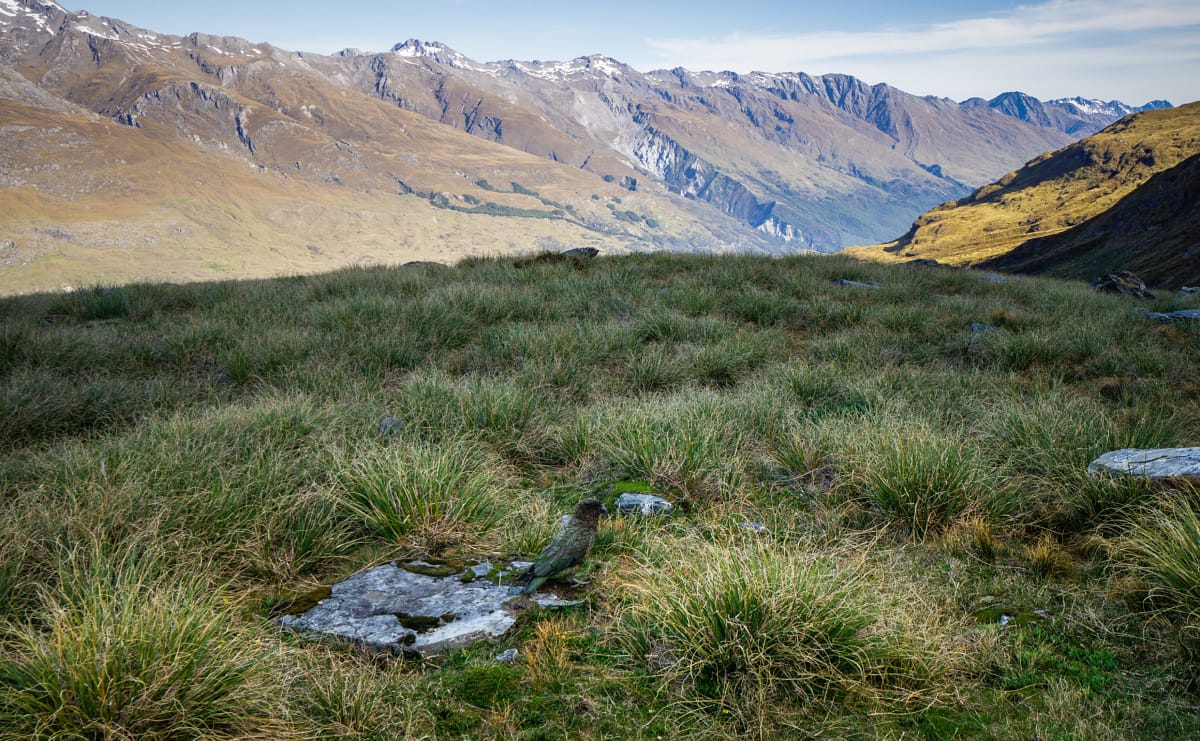

Later on, a couple of other keas came. These ones were more curious, and kept trying to bite my tent rope. A little experiment was now on the cards for me, out of curiosity. I was curious to know if they wanted food from me, or something else. I assembled assorted items on a rock including a pea and piece of corn, and a section of cord. As I expected, the kea went immediately to the cord and began to fray it into individual strands within seconds. Was it a game? Was there a purpose? Not sure.
Water at this camp was present, but only in stagnant tarns or via melting snow. The stream I had passed was accessible, but at least a 15 minute walk away. I decided to just melt the snow as I didn’t need loads of water.
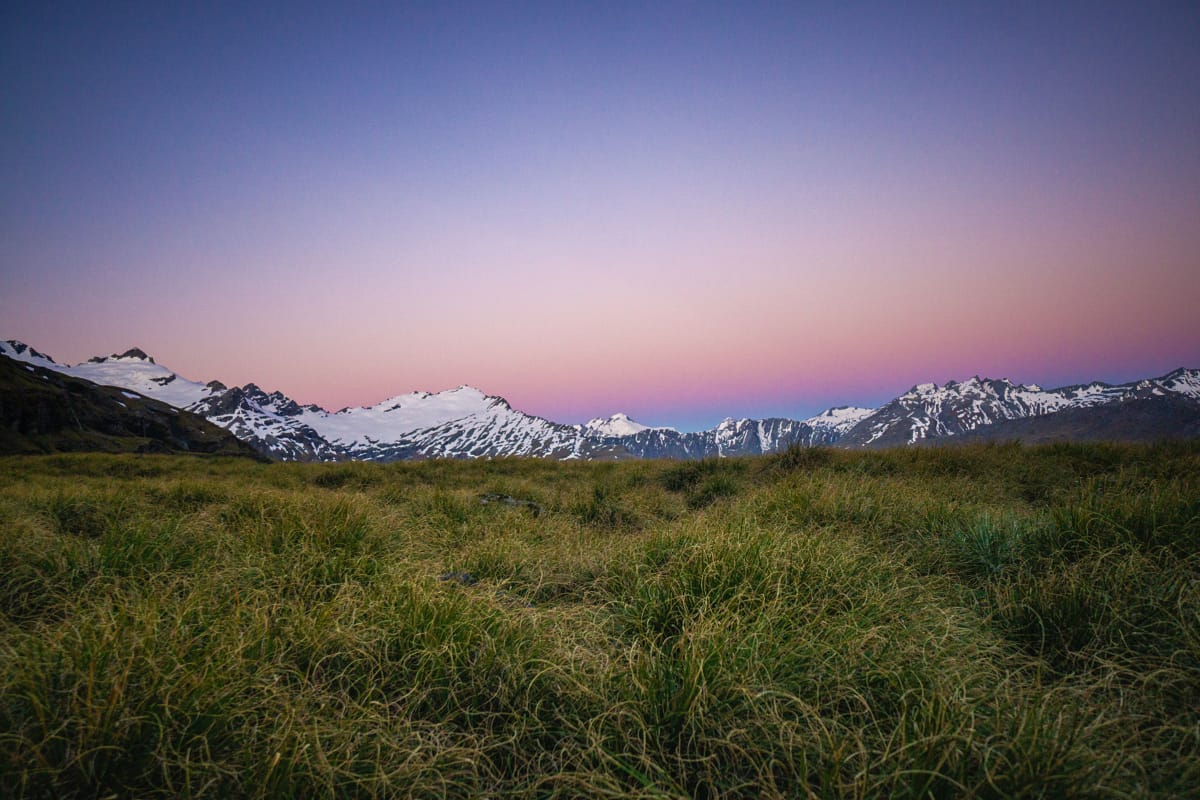
The sunset that evening left a nice hue in the sky, I made sure to seek the tarns out for some photos.
Day 4: Upper Kea Basin Shelf to the Rees River (and back to car)
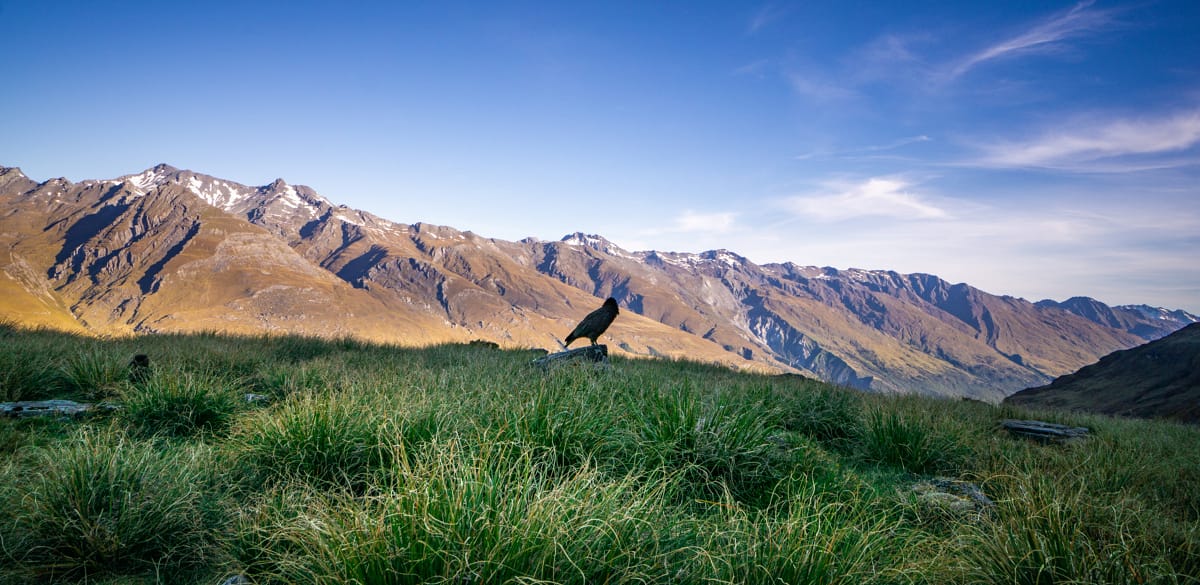
‘Oh good morning!’
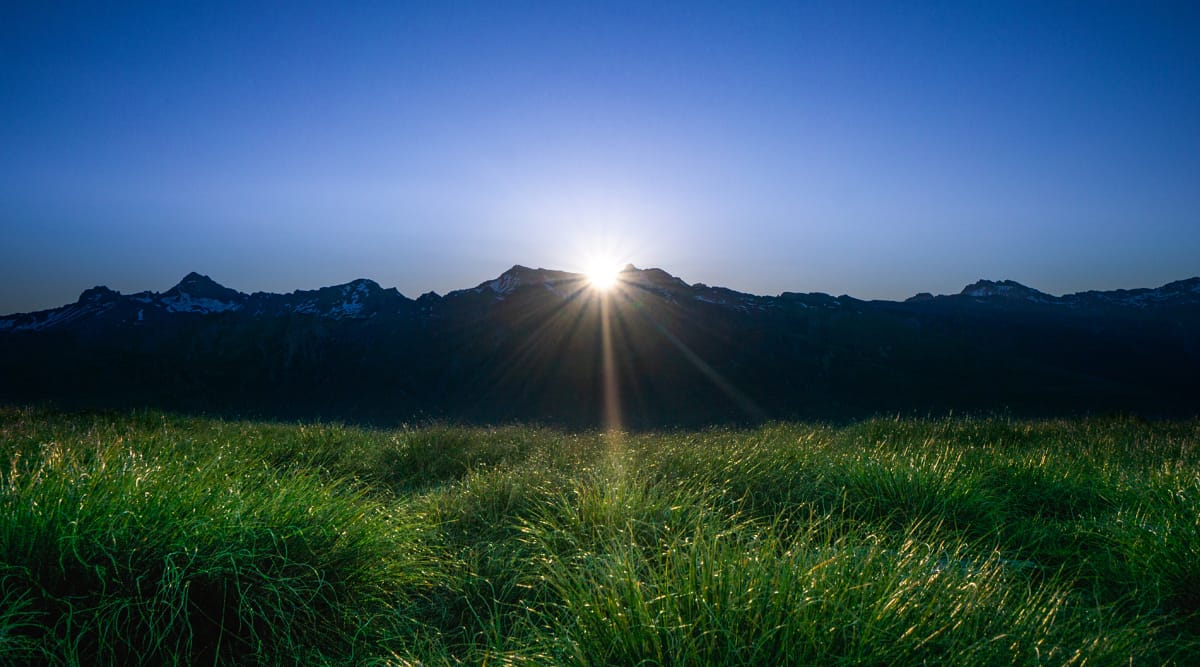
As I opened my tent I immediately had a friend visit. This was the ‘cocky’ kea that kept going for my tent ropes. I slept in a bit until the sun came over the mountain and warmed everything up. It was christmas morning, and I the first christmas I was without family – certainly a weird feeling! At least I got to share it with a parrot haha!

Today, the hiking stretch should be easier than yesterday. I only needed to continue to traverse around the top of Kea Basin, and descend the far side slope into it (inaccessible from any other way). It was mostly flat here with a few creek crossings. It sure was warm today! I was already longing for a swim in the Rees River.
Once i reached the large tarn directly north of Kea basin, I managed to find a rough cairned trail. This must be the way to Esquilant Bivvy Hut above near Wright Col. I made a mental note to consider hiking that one day.
Kea Basin
The trail was mostly easy to find aside from some vegetated sections in the basin itself. Here, speargrass made itself more present again, so even a rough trail was welcome! I ended up running into a group of international hikers who had camped in the famous rock bivy in the basin. They had come down from Esquilant Bivvy hut the day before and said it was awesome. It seems I wasn’t the only one looking for a nice quiet christmas getaway!
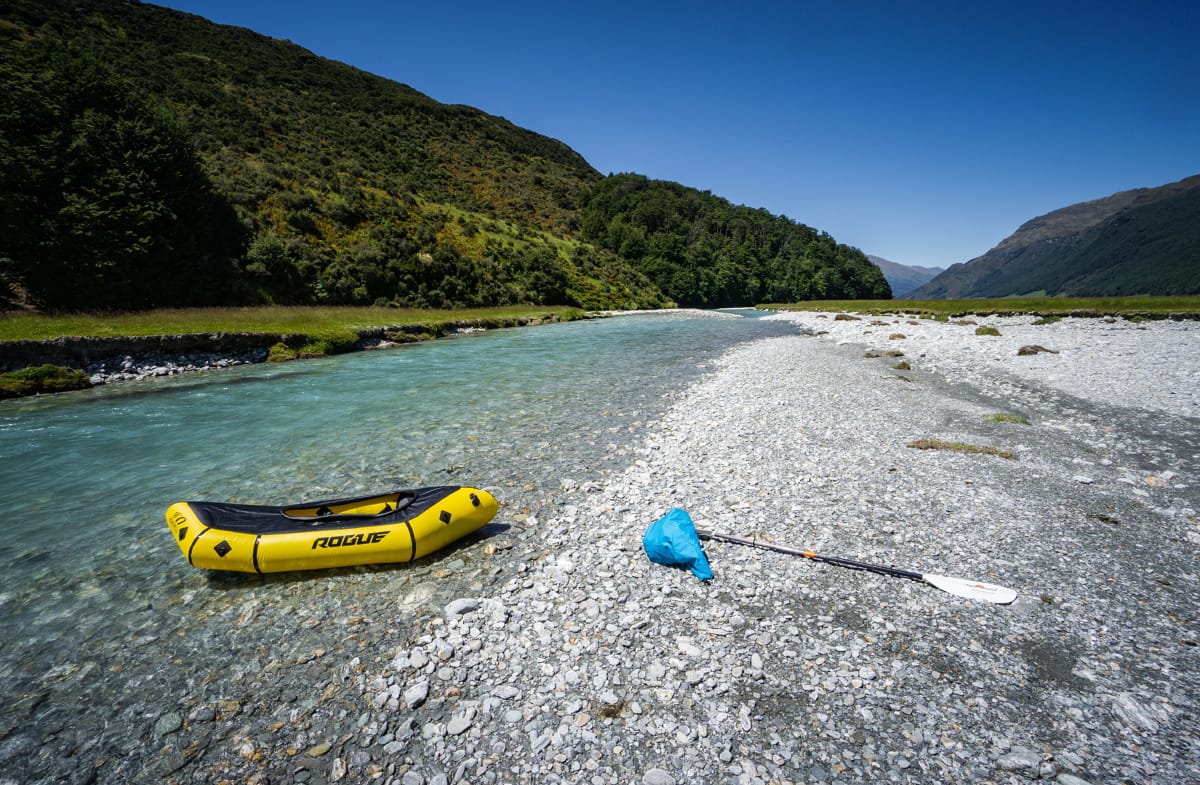
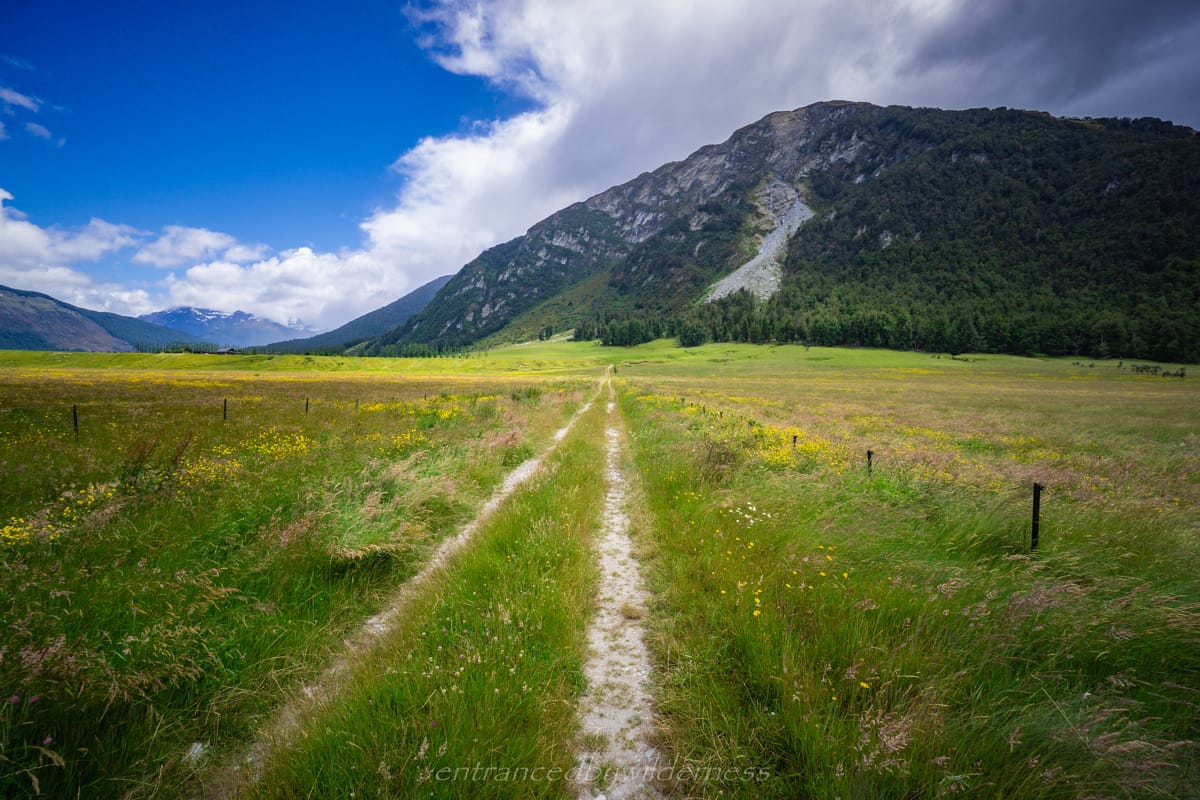
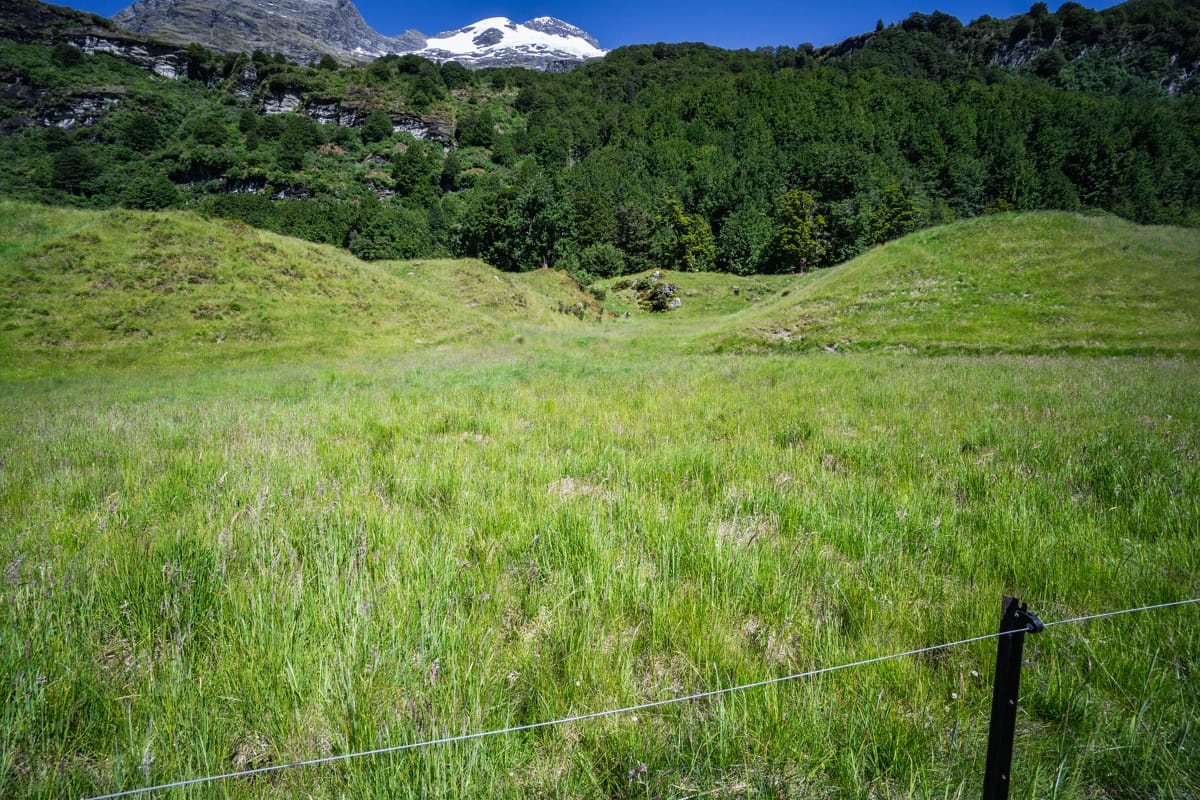
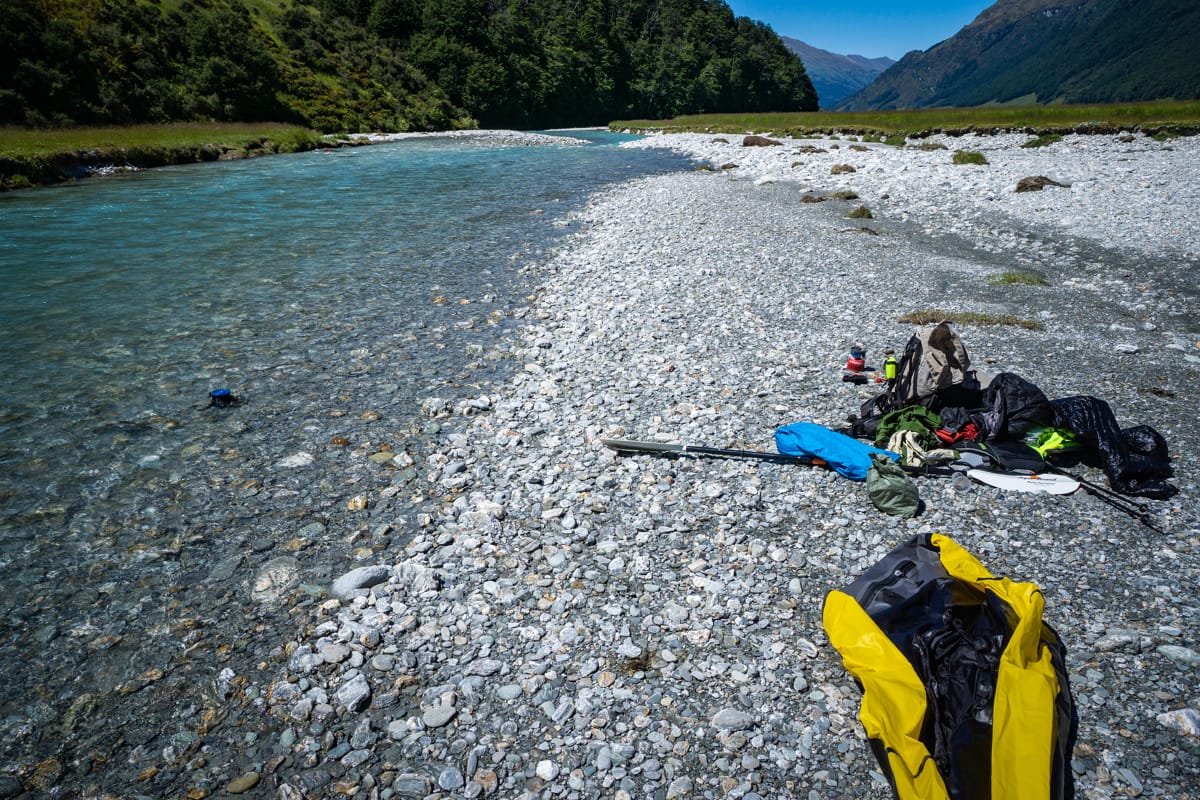
The final hiking leg, was heading down through the forest to the Rees Valley floor. The trail ends at the forest line, and you soon end up in a grassy plain with a few fence lines to cross for about 600-700m to the river itself. From here you can cross the river to the Rees Track on the opposite side, or raft (more fun!).

This was the moment I was waiting for! After lugging my packraft around 2600m of altitude gain over the course of the hike, and descending much the same – it was time for my arms to do the work! It’s not really that heavy in total, but combined with all other gear, it is cumbersome.
Rafting
There was no water in the final stretch of trail once you’re in Kea Basin, and I didn’t visit the stream there, so I was running out of water. I boiled some of the river water and let the pot cool down in the cool water before bottling it. After stowing my gear in the pontoons and blowing up the raft, I was set to go. Man, was it a lovely warm nice day! Was in my moment for sure!
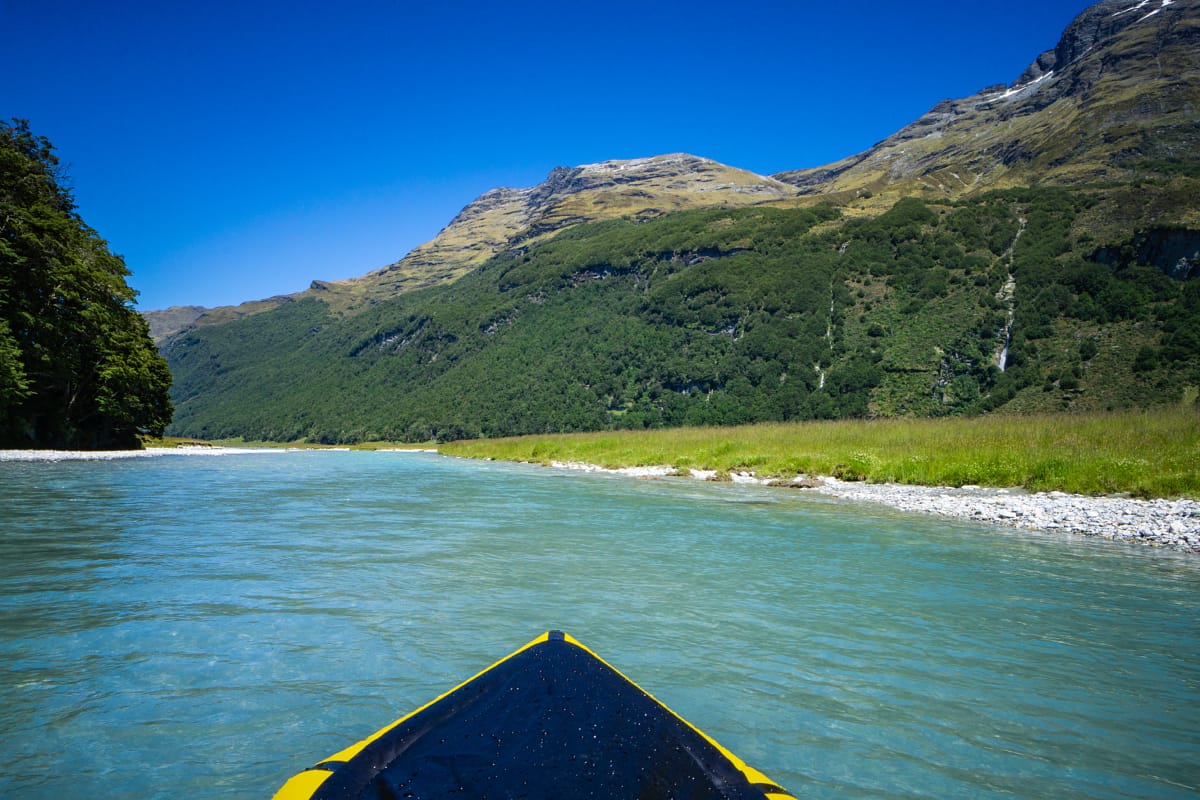
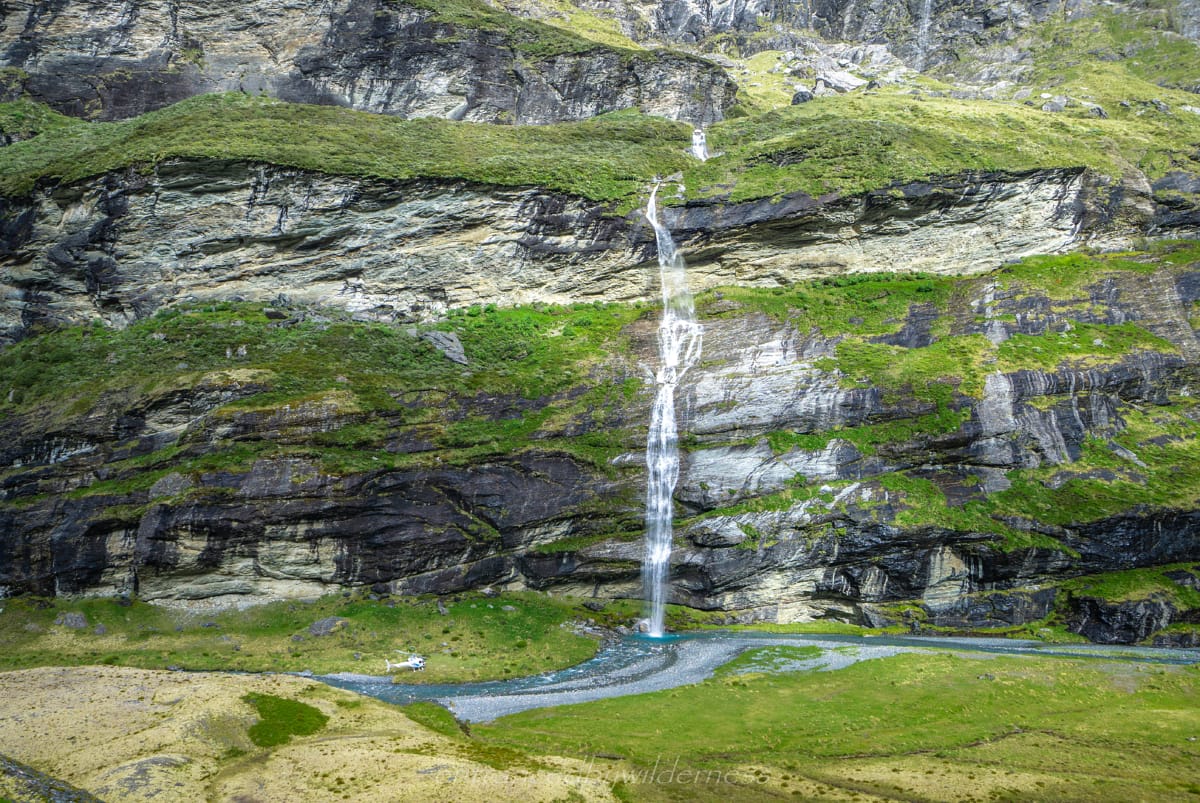
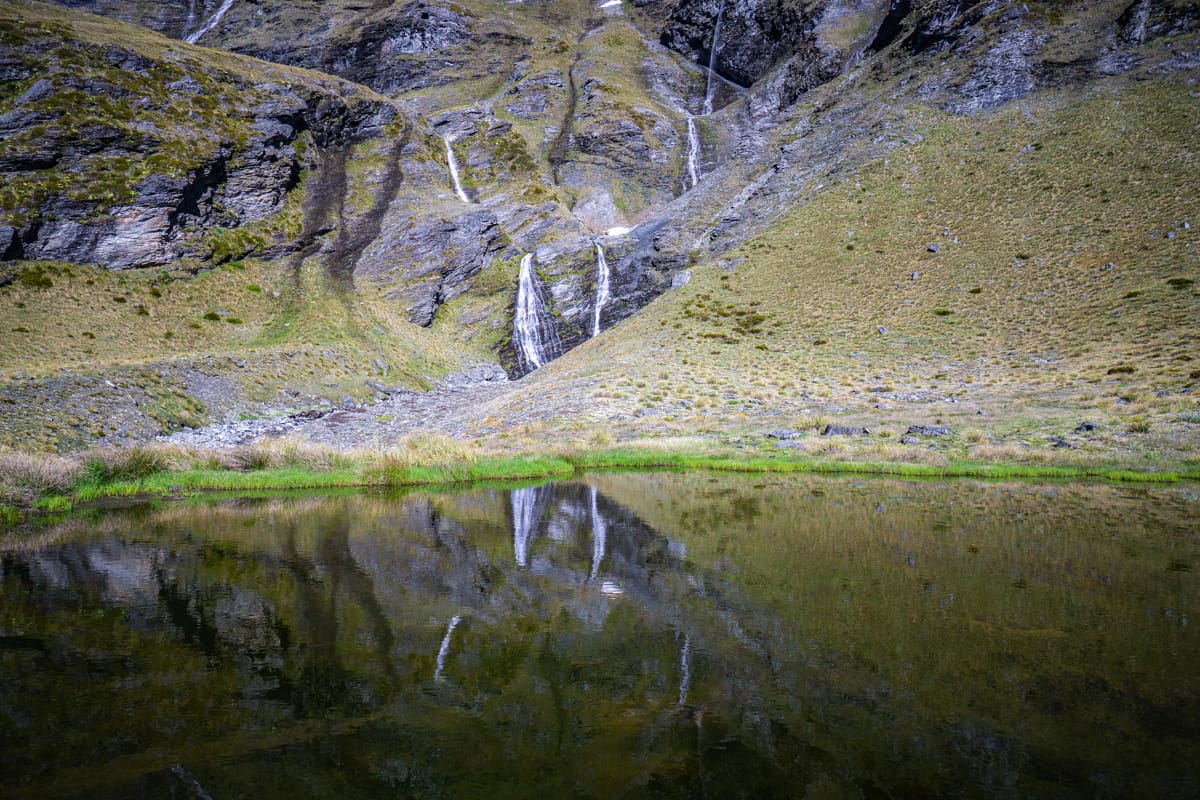
Paddling past Lennox Creek Falls was pretty iconic for me, as I had crossed that stream two days earlier and had an epic view of the entire side of the hike I had just done. The photo below I took on my raft and shows the main areas. I passed a few hikers who I had seen earlier at Kea Basin. Selfishly, I absorbed their inner envy as they watched me effortlessly drift whilst they hiked on a rather boring looking trail.
Class I Rapids
Most of the rafting was on Class I rapids from entry point until just before Cone Hill. This section had no real obstacles aside from a few boney section in the braids. The section at Cone Hill closes in a bit and it’s quite obvious to the start of the Class III rapids where the river narrows and steepens.
There is an eddy I pulled off in before entering as I scouted out what was coming up. My initial thoughts were to portage around it, as I didn’t bring a helmet and was alone, but it wasn’t really feasible with ease with all the boulders and carrying the raft. If you packed it all up, you could get around though. I decided to just have a crack and get some experience!
Class III Rapids
My heart was racing as I entered the first rapids. I knew what line I needed to take, but within seconds of entering I was pushed into the centre boulder and the force of the water flipped me quickly before I could react. I quickly got my legs facing downstream and hung on to the raft in front of me. My feet hit a rock and I managed to just have time to push the raft quickly on the small boulder, and pull myself briefly out of the stream.
After catching my breath, I set the raft on the side of the rock and got back in whilst pushing off back into the next rapids. This time, i didn’t fall out and performed some wild backwards maneuver to stay afloat! I screamed in exhilaration as the adrenaline pumped through my body! ‘You got me once river – not again though!‘ There were a few more tricky rapids including a decent sized hole, but the big drops I had passed.
Class II Rapids
This section lasted about 1km, and after that the stream turned into Class II rapids with awesome wave trains. This was the best section i’ve paddled to date (in my fairly limited experience). It’s one of those times where you can’t help to be vocal with the thrill! I was sure to find a nice spot to jump out in for a swim. The water was a perfect temperature in the 30ºC+ heat.
Eventually I began to near the location of my car, and eyed out a good exit point on the rocky shore. With a short 3 minute walk with raft in hand, I was back to my car to lap up some needed water. Sadly, I didn’t get any photos of the rafting section after the first part. Rafting and photos don’t really mix well!
Summary
Highlights:
- Earnslaw Glacier – it’s a really epic hanging glacier and in one of the most scenic basins i’ve seen.
- Earnslaw Basin – the entire basin setting I would place in my favourite list of New Zealand attractions. It’s no wonder helicopter flights here charge almost $1000 to visit.
- Earnslaw Overwatch campsite – just an epic view!
- Waterfalls – Turret Falls was my favourite, but there are many others worth noting too. Lennox Falls is the largest, but the hardest to access.
- Lennox Gorge – A helicopter flight here would be awesome to see this area further.
- Rees River rafting – A great mix of Class I, II and even III rapids.
- Challenges – There were many challenges I faces on this route, and most of them were awesome.
- Weather – No wind, no rain! The forecast held up.
Shortcomings:
- Risk – There were a couple of times I felt at ‘risk’ on the trip where I wasn’t 100% certain of my ability without danger. Overall, nothing bad happened, and I wouldn’t say I got lucky – but i probably could have done it with a second person for added safety.
- Speargrass – Nothing more needed to be said here – leaves made of daggers!
- Earnslaw Burn Track (forest section) – Not really an interesting hike, though the end reward makes it worth it of course.
Your Donation Really Helps!
In order to support the travelling and hiking community, I spend many hours per week or month to adequately document all information and advice for prospective visitors, accompanied by a (hopefully) entertaining insight into my personal experiences. This service is, and will remain, free. However, running a non-profit website and spending time creating content comes with financial and personal costs.