
The Five Passes Hike – Five Ascents, Five Descents! The Ultimate Paradise for Experienced Hikers!
18/10/18 ~ 23/10/18

Introduction
The Five Passes hike is one of New Zealand’s best multi-day spectacles. This post is aimed at providing comprehensive information regarding the hike, and providing my own experience as inspiration, or a guide for future hikers of this amazing trail! Information in this post is free to use. If you use the information, please donate any amount of your choosing at the bottom. This particular blog post took two weeks to create and is not monetized in any way.
Location
The hike is located on the South Island of New Zealand near Queenstown and Glenorchy. It lies in Mt Aspiring National Park, and on the edge of Fjordland National Park. The trailhead begins and ends at the Routeburn Shelter carpark – where The Routeburn Track great walk starts. This is a drive that takes just over an hour from Queenstown. There are plenty of shuttle options available too if you don’t have a car.
When to Hike?
The track would be mostly snow-free during summer and most of autumn, making it ideal for regular hikers at this time. For experienced hikers looking for a challenge, this track would be ideal mid to late spring when there is still snow. It’s important to remember that the seasons are going to produce different conditions every year – check conditions before hiking!
Length of Hike
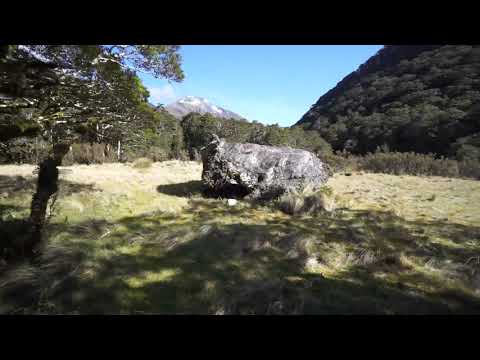
The hike is approximately 66km long, and could take anywhere between 3-7 days (depending on fitness, season and conditions). I thought I’d finish in 5 days when I did it in October (knowing the snow conditions present), but it’s harder than the distance would suggest and took 6 days (although two were half days). Add time with snow or adverse weather conditions. In summer and autumn, the trail would take 3-5 days. In winter or spring, 5-7 days (in favourable conditions). Add a day for every lake-side trip.
Experience Level
The Five Passes hike is aimed at experienced hikers only with navigational and potentially snow skills. There is deep snow often in winter through to spring on Fohn Saddle and Fiery Col. GPS navigation using an offline topo map is ideal, along with backup paper maps / trail notes.
What are the ‘Five Passes‘?
The Five Passes route is often variable between different sources. However, it generally includes Sugarloaf Pass, Fohn Saddle, Fiery Col, Cow Saddle and Park Pass. Fiery Col and Fohn Saddle both reach just over 1500m, with Park Pass and Sugarloaf Pass reaching just over 1100m. Cow Saddle is not overly noticeable when hiking clockwise, but it’s a short climb up in the reverse direction. Adding all the passes together on the hike (including two Sugarloaf Pass climbs like on my route), this is just over 4000m of total ascent!
Accommodation
There are no huts on this route and you must bring a shelter with you. A couple of rock bivouacs are present to use for shelter also. The two most notable and known ones are at the end of Beans Burn (below Fohn Saddle) and one at the start of Rock Burn (below Park Pass).
Modifications
There are several alternate ways to hike this trail, but I have yet to complete these routes. If you have multiple cars, you can start and finish at both Sugarloaf Pass and Lake Sylvan – this means you only have to go over Sugarloaf Pass once (although you have to climb up a third of it on the Rock Burn track anyway).
A shorter ‘Four Passes’ version skips Sugarloaf Pass, and can be accessed from Lake Sylvan trails or via Chinaman’s Bluff (across the Dart River – need to boat across). In summer, you can access Lake Nerine or Lake Unknown as side trips to extend the length of the trip. I’ve also seen an expert route leading from Park Pass to Harris Lake on the Routeburn Track.
Cost
Aside from what you bring with you, the Five Passes hike is FREE!

Trail Overview
Please note, the below trail suggestions are intended for outside of the winter season
Terrain Type:
- Flat
- Mostly flat with some hills / moderate climbs
- Hilly with moderate climbs
- Hilly with steep climbs
- Consistent steep climbs
Trail Condition:
- Path, marked
- Graded trail, marked
- Rough trail, marked
- Poor condition trail, partially marked
- Unmarked no trail (backcountry)
Experience Level Required:
- No hiking experience needed
- Some hiking skills recommended
- Hiking experience required (some potentially dangerous terrain)
- Hiking experience required / additional safety equipment advised
- Only experienced professionals should attempt
Important Notes:
- Experienced professionals to attempt in winter only.
- In spring, safety equipment is likely to be required (ice axe, crampons/microspikes).
- At least one group member should be carrying a PLB due to the Five Passes hike being a backcountry trail.
- There are no major river fords under non-rainy conditions. Although an upstream crossing of the Beans Burn is required to avoid a deep crossing, near where it joins the Dart River. Also, the Rock Burn near the Rock Burn Shelter requires a generally shallow wade.
- Hazardous fords likely after heavy rains (Beans Burn, Rock Burn and multiple fast-flowing seasonal streams).
- Water is available throughout the hike via side streams (both seasonal and permanent). I didn’t need more than 1L for the entire hike. 2L may be needed for some people for pass climbs. If camping on passes and using lake water – boiling or filtering is ideal.

Maps
I navigated using Wilderness.co.nz’s version of this hike (the only GPX file I found). Their route however didn’t appear to be recorded (rather estimated after it seems). It was awkward to navigate within some sections (like Park Pass, or Fiery Col). Although my version is inaccurate in some areas (e.g. where there was snow cover, or misadventures like on Park Pass), I describe these inaccuracies below in my description of the hike. Most of the route depicts the actual route, or close to it.
This is a GPX file of my personal hike experience following my exact route. Note, this should be used only as a guide, as there were times I was not on any trail (conditions will vary). To use the file, download the GPX file and import it into an app such as Backcountry Navigator.
GPX file download here: Five Passes Hike
Click on the maps below to expand and download


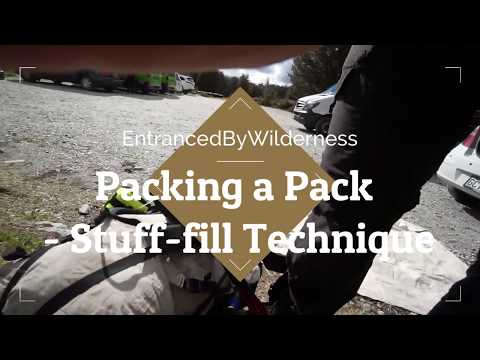
My Gear

The two videos below were made right before to my Five Passes hike, and describe the reasoning for my gear choices and how I managed to pack all the gear efficiently.

The Hike
Day 1 – Routeburn Shelter Carpark to Dart River Flats
Routeburn Shelter Carpark
I drove out from Queenstown in the morning to Routeburn Shelter, which took just over an hour. Packing my gear there took some time, but I started hiking at 10:35am.
It took 10 minutes following the Routeburn track to reach the Sugarloaf Pass junction and veered off to it. It was immediately nice to get off the gravel highway and onto a rough forest trail. This was the start of the Five Passes hike.


Sugarloaf Pass
The ascent is gradual at first and then gets steeper. There are a lot of landslips and tree roots to scramble over. The last half hour is alpine marsh once you break out of the forest. By this point, I was sweating profusely as it was at least a 600m climb.


I reached the top of the pass after 2 hours since leaving the carpark. The top was like walking on a giant sponge cake of moss, with mud as the cream. There were potential camping sites here, but maybe in summer when the snow melt evaporated.


Heading down the other side, it didn’t take long to reach the forest line. This side was even steeper than the southern side, but again, had plenty of roots as footholds.
Rock Burn
Reaching the Rock Burn track turnoff, I headed to the right. This would take me towards the Dart River, which I’d start heading up later. Along the way, I met an old-timer doing trail maintenance by sawing blowdowns (tree falls from storms) that blocked the trail. The maintenance certainly was noticeable! He cocked his head when I mentioned I was heading towards Fohn Saddle. He probably thought I was a bit crazy doing it at this time of year.


It was a further 2 hours and 20 minutes from the pass until I reached Lake Sylvan turnoff trail junction (4pm). Here, there is potential camping by the Rock Burn (and a shelter). However, I wanted to cross the stream before I camped.


There is a bridge over a deep gorge where the Rock Burn flows through, however, the trail was in poor maintenance on the other side and required bush bashing to get down to the bank. Even then, I still needed to wade through part of the stream around tree falls. In hindsight, I’d have just forded the stream from the campsite – it was only knee-deep for the most part. I was now on the grassy flats next to the Dart River.


Dart River
At 5:30pm I ended up camping on the flats, right beside the Dart River. There wasn’t a rain forecast for the evening, so I didn’t feel any risk of water rise. As any place in NZ with fresh water, it was a sandfly haven and I resorted to the shelter of my tent to relax and cook dinner. It was also here I realised I forgot to put my inner soles back into my trail runners – I was wondering why it felt weird in them. Should be interesting over the next few days!


Day 2 – Dart River to Split-Rock Bivy
Dart River
At 7:50 I set off north-west up the Dart River towards the Beans Burn. This section was fairly easy, with only one major blowdown and a generally flat trail. The hardest part was finding the trail sometimes when it turned into forest – this section is not really marked in all areas.


I had read trail notes from Moirs Guide saying that the Beans Burn needed to be forded upstream (though varied as the stream changes shape all the time). When I hit the edge, where it met the Dart – it was deep, at least a metre and a half.


I bush-bashed through the forest and tried several other sections upstream – all were too deep. About 300m upstream (see map) was a shallower faster flow section that was easy to cross, knee-deep.


Lower Beans Burn
Now I was on the Beans Burn track – this is where things were a bit slow and gnarly and it took me longer than anticipated. There were lots and lots of small blowdowns.


The Beans Burn track was beautiful in this next section, with deep blue waters and a nice bridge.


I had lunch in this section, savouring the views. Briefly, I sometimes lost the trail upon reaching a couple of, what I call, ‘fern mazes’. Crown ferns can be huge, and weaving between them to find markers is an interesting experience.


There was a fresh huge avalanche path, coming from Peaks 2002/2046 (below Mt Sarpedon) to the left side. This allowed for a nice view of the waterfall (142m) on the opposite side of the river. Right after this section was another confusing fern maze and grassy area. There’s a white marker on a tree which is the last marker I saw, but the trail does go downhill further before another orange marker can be spotted.


Upper Beans Burn
The next gentle uphill section involved lots of small stream crossings – all but one were simple rock hops.


Once clearing the forest, the valley changes into shrub/tussock. This section had no markers aside from bait trap trails on either side of the river. The left side of the river seemed better here. In some parts you could just walk in the gravel beds of the stream, others I needed to get up into the shrubs further up the bank. I questioned my route in this section and wondered if the right side was easier. (*2021 update: cross to river left here after 800m elevation – you should have easier scrub on this side to the bivvy)
The last stretch was walking the tussock flats across a few braids of streams, towards Split Rock bivy. This is a marked bivy on the map and was my destination for the night.


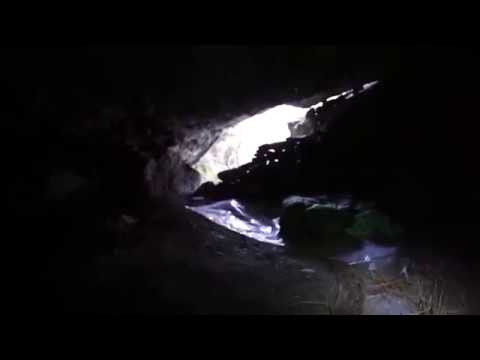
Split-Rock Bivy
Arriving on the left bank to the bivy, confusion faced me as to where the bivy was! I had only seen a couple of crappy spots. Re-reading my trail notes, I discovered it was on the northern side of the outcrop – facepalm!


There was a shallow stream to ford to get to the right bank, and then shortly after, back over to the left bank once around the rock. At last, at 7:30pm – the grassy campsite and rock bivy was finally reached!


I chose the higher cave, as it just felt cooler and a fire up there would be sweet. It wasn’t super flat, but not a problem. In total, you could fit 4-5 people comfortably between the two caves, maybe 2 more uncomfortably (hard to say as I was alone).
I gathered some firewood from around the campsite to replenish the dry stores I’d use that were left there already. Luckily, there were several blown sticks etc. I could imagine you’d need to venture far from the bivvy to get firewood in summer. It could be wise to collect some earlier whilst hiking there.
Night fell, and I had my epic fire going with dinner, rum and some black metal playing to fit the moment. It was one of the best places I have ever camped!


Day 3 – Split-Rock Bivy to Olivine Ledge
I slept in somewhat in my cave camp. ‘No morning light would awaken me‘, I thought to myself!
At 8:20am, I was good to go and set off further up the Beans Burn. A barefoot creek crossing was immediate – I didn’t even put my shoes on when leaving knowing the stream was the first thing to get across. After crossing, there was only a further 2km to go up the valley. Here, I needed to veer up the left slope and onto the second climb to Fohn Saddle.


Fohn Saddle Ascent
There was no obvious way up the steep long tussock slope. There were incoherent rock cairns now and again. It felt they were often marking two separate routes, but incompletely. I ended up just sticking to the skinny rocky stream flows as best I could, whilst also following the easier contours.


I hit the main snow-line at 1240m, and still had a further 270m or so of climbing until the pass. The snow was soft, and I postholed my way through it. My microspikes were used because my tread was thin and it was easier to punch in firm steps without an awkward slide.
I ran into a snow-covered bait marker, telling me I was probably close to the actual trail. It was around here when the rain came and my vision became limited.


I navigated using my GPS and made it into Fohn Saddle sometime around 1pm. Sadly, I couldn’t see much in the ways of view here, including Fohn Lakes. I could see the immediate mountains though.


At the saddle, I veered left and headed up the side. Once this short climb was done, I could see where the small lake would be (I could only see a bit of a blue pool from all the snow).


Fohn Saddle Descent
I attempted to navigate through this flat section without falling through the snow into the lake and make my way to the far side. Here, I would follow the river valley towards the southwest side of the Olivine Ledge.
Little did I know, there was a huge steep-sided ravine here after the snowline ended at 1320m. It ran from the top of the mountain down cutting a wedge in the plateau. I didn’t see it due to the limited visibility and found its edge. After consulting my topo map, I could see the notched valley – I missed noting it previously!


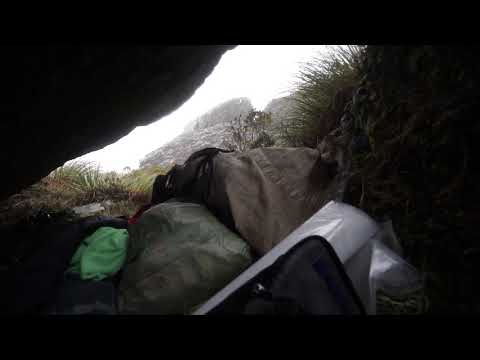
Olivine Ledge
Thankfully, there was a crossing point around the 1240 contour which led me onto the ledge. You probably could cross much higher at the 1600m mark, but I really couldn’t tell.
At 3pm I found myself having a late lunch under a rock overhang. Here, barely out of the ongoing light rain, my next moves were being pondered over.

The question loomed – ‘Do I aim to get over Fiery Col today as well?‘. I decided it was not worth the risk with the limited visibility, and the rain didn’t look to end soon. Sadly was nowhere to put up a tent on this ledge, as the shrubs and grass were too bulky between all the boulders.
I scouted around the rocks for potential bivouacs. There was one that seemed alright – it was shallow and not entirely weatherproof, but it would suffice. I did have to rearrange some flat rocks and strategically make use of moss to soften the area. It turned out ok I think!


Day 4 – Olivine Ledge to Hidden Falls Creek Camp
Olivine Ledge
I slept well despite the not-so-perfect rugged sleeping location under the rock. The decision to camp early paid off, as the skies were clear and the day looked great! Hurrah! Whilst packing up, I had some company. A group of three Keas were curious about what I was doing and were hanging around – no more than a metre away.


After only about 1km of hiking, I reached another deep ravine. I’m very glad I didn’t hike on in the low visibility clouds from yesterday, and not see where to go here. At the higher end of the ravine was a spectacular waterfall cascading down off one of the lower peaks of Mt Tantalus.


Fiery Col Ascent

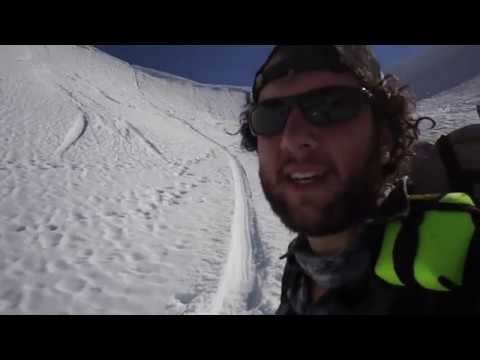
I ended up getting close to the base of the waterfall, before beginning the ascend of Fiery Col. The climb up Fiery Col on this north-western side is fairly easy in terms of gradient. I was back in the snow-line after the first 100m of climbing, with a further 300m or so of snow hiking.


The evaporation and condensation of all the ground moisture began making huge clouds of mist, and periodically produced limited vision. These didn’t last for too long though.
Most of the way, I was just following the Chamois (Goat/Antelope-like animals) tracks, as they seemed to be picking out the easiest way. This was one trick I used when hiking the PCT in the snow for navigation – the local animals know the terrain! It’s not that the climb was remotely difficult, but sometimes picking out snow gradient changes is hard when all you see is white – the hills and shadows all blend in together.


Although you think you’re nearing the top of Fiery Col – it’s deceiving, and many false summits had tricked me. Eventually, I arrived at the top at 10:20am, taking 2-3 hours since I left the ledge. It was a little intense arriving at the summit. The snow never flattened out, but rather… just ended as a cornice! I certainly felt a wave of adrenaline hit, as I didn’t expect to suddenly see over the edge to a steep almost sheer drop, and with views into the next valley.


Fiery Col Descent
I was wary of the avalanche risks here, the first part that was a little concerning of the snow sections I’d done so far. Over the edge of the cornice was a huge deep slab of snow. I had to chip out a section of the cornice so I could gently slip down onto this slab.
From here it was about an 80 degree angle slope initially, but easing into a gentler slope further down, and with no rock obstacles. This meant it was GLISSADE TIME!!!


The first slide was fast as it was so steep. I almost had enough speed to keep going, but needed to walk a few steps on a gentler slope to reach the next slide. This one was EPIC! I must have slid at least 110m down the slope, probably making it the longest I’d have done (I did some big ones on the PCT). There was a final short slide before I had to stop the slide. My ass started to hurt from the friction haha! Worth it!


It was interesting noting the changes of rock colours once coming over Fiery Col. Most of the time I had seen grey schist and green olivine, but now surrounding Fiery Col, there was a vibrant orange rock type.


Avoiding Ravines
When looking at the topo map, the next section looked to have several potential routes to descend the rest of Fiery Col and into Cow Saddle. Most info I read said this was straightforward to navigate. However, when I was there, the terrain was much more harsh than the map indicated. There were steep snow-covered cliffs on my left (below the main peak of Tantalus), a huge ravine slightly to the right in front of me and a ‘hidden ravine’ on the left (I say hidden, as it’s not obvious on a topo map).
The only real route I could take was just to the left side of the wide gaping ravine on the right (beginning at the 1400m contour), but too far to the left I’d reach the other ravine. Around the 1100 contour right between the two streams is a suitable place to cross the ravine on the left. This leads you onto the tussock flats just below Cow Saddle.


Cow Saddle
Cow Saddle was recommended as a place to camp as indicated by my information sources. However, it’s not ideal at this time of the year. It felt like ‘the dead marshes’ from Lord of the Rings! Lots of wet tussock marshland and pools of water. I remember yelling ‘fucking tussock!!!‘ on repeat to myself every time I stumbled or tripped on the long grassy tufts. I had a laugh to myself about it after I got through it haha. It was around 12pm by this time and I settled for some lunch.


Hidden Falls Creek
After Cow Saddle, I followed Hidden Falls Creek downstream. I started on the left side, but switched over to the more open right side. This side was generally easier for me, as I didn’t want to forest hike. This allowed me to skip the first forest section, but around the 800m contour, I ran into difficulties and had to bushbash up to the trail on the left side of the forest. I DO NOT advise this as it was horrible haha! (*2021 update: Stick to river right until somewhere around the 700-720m contour – the deer track on river left isn’t reliable).


From here, it’s an easy forest stroll towards Hidden Falls Creek camp located around the 770m contour.


Hidden Falls Creek Camp
This was one of the most beautiful campsites I’d been too, with almost all surfaces being moss/grass and it was mostly flat. There was a fire pit and dry firewood store under a rock (however, be sure to replace it if you use it). The stream is a 50m walk away, and I made use of it to wash off and do some soapless laundry. I dried my clothes by the fire and enjoyed a tasty dinner with some rum – feeling refreshed!


Day 5 – Hidden Falls Creek Camp to Rock Burn Camp
As I was almost ready to leave in the morning, a couple strolled into the campsite. Bobo and Matt from the town of Wanaka. I had thought I was alone the whole hike, but they were behind me doing a shortened ‘three pass’ version of the hike (skipping both crossings of Sugarloaf Pass). They were grateful for the steps in the snow and the dig-out I made in the cornice.
We ended up hiking for a little bit together attempting to reach the turnoff in the forest towards Park Pass only 1km ahead. The trail here was rough to follow, and we did briefly lose it at times. They were going to have a breakfast break, which I had already had. After separating, I ended up giving up trying to stick to the trail and make way for Park Pass – thinking I’d hit the trail heading up anyway. Boy was I wrong!


Park Pass Ascent
The ridge up to Park Pass is also a little deceptive using a topo map. It appears as one spur with a fairly obvious gentler climb along its ridge. However, there are actually two ridges with gulleys in between. I was stuck on the far left side heading up to the pass. There wasn’t a way to get across to the right side due to the rugged forested terrain and rocks. I ended up making my way up climbing mostly moss and tree roots until about the 940m contour where I reached the trail finally. That took a lot of effort.


At the 1170m contour, the forest ended and turned into open tussock. There was a 100m climb still to go before reaching Park Pass at 11:15am. Park Pass was well below the snow line at only 1176m and was completely free of snow. There is potential camping here by the shallow lake, though not perfect. It would be good for starry views at night, but I was happier at the camp in the valley. For some reason here, my trail stopped recording using my app, and I had to resume recording on top of the pass (note the gap in the map).


Park Pass Descent
The way down the southeastern side of the pass was easy, eventually reaching the second rock bivy site (the largest rock visible). It’s not as good as Split-rock bivy, but certainly would keep you dry unless the wind was blowing rain toward the pass and under the overhang.


Following the stream here for several kilometres leads you to a decline through a short forest section. Right before this section, I fell into a puddle of ‘quicksand‘ mud! I washed my legs in the stream right below this section where there was a nice pool to wade in and have some lunch.


Theatre Flat
At 2:30pm, I reached Theatre Flat – a large open tussock section. Here, there are campsites under some of the vegetated sections. However, I didn’t see any obvious good sites just heading straight through the grass. I planned to camp right before Sugarloaf Pass that night.


Rock Burn Track
After Theatre Flat, there was a swing bridge across to the right side of the Rock Burn, and then a gentle downhill hike. This trail was much easier than the Beans Burn trail and had few obstacles aside from a couple of seasonal stream crossings. There were also plenty of potential campsites on this stretch.
The best area I came across was around the 700m contour, and was where I ended up camping at 5:45pm. Bobo and Matt caught up to me here after I made my tent. They had found the trail heading up Park Pass it turns out. Lesson learned – no shortcuts! They had to push on with their shorter 3 day hike and make it to their car (parked at Chinaman’s Bluff – they had packrafts to get across the Dart River).


Day 6 – Rock Burn Camp to Routeburn Shelter Carpark
I left camp early at 7:20am and had a few kilometres to go before the ascent of Sugarloaf Pass. This section was mostly easy with a small seasonal stream ford, and the odd blowdown to cross.
I reached the turnoff from the Rock Burn track to the Sugarloaf Pass track at 8:45am and started the steep climb up. Damn, Sugarloaf Pass was a bitch haha!
I reached the pass at 9;30am, and went back over the sponge-cake marsh and back down the other side. At 11am I was at the carpark – not bad timing!


Review
The Good:
- The scenery was top-notch, especially out of the forests
- Snow hiking added a nice challenge
- Blue water in the streams
- The waterfalls were great (though many were far away)
- Fohn Saddle and Fiery Col were the two best viewpoints and passes
- Rock bivvy cave camping was awesome
- Remote in nature feeling, with no hint of civilisation (aside from a couple of bridges, bait traps and the occasional jet boat on the Dart River)
The Bad:
- The rock cairns were useless and confusing more than anything – it felt like they were everywhere and random. I wouldn’t use them for navigation!
- The tree blowdowns got in the way, but that was me attempting the trail early before it was maintained
- Sugarloaf Pass was not exactly interesting enough to hike over twice, but it’s part of the challenge all the same!
Overall Thoughts:
The Five Passes hike is the best I’ve done in New Zealand so far in terms of being challenging, having amazing scenery and providing that sense of wilderness remoteness. It’s properties like these, that I long for the most when hiking. Another amazing attribute to this amazing hike is it is 100% free outside of what you bring on your back! This should be added to your ‘to-do’ hiking list 🙂
Your Donation Really Helps!
In order to support the travelling and hiking community, I spend many hours per week or month to adequately document all information and advice for prospective visitors, accompanied by a (hopefully) entertaining insight into my personal experiences. This service is, and will remain, free. However, running a non-profit website and spending time creating content comes with financial and personal costs.
You’re amazing. This blog is amazing. Thank you.
I’m going to do this in the coming weeks with some buddies, will be interesting to see if the Christmas floods affected any of the ravines or if there’s any new slips…
Your photos and this description was great and made me giggle. I’ve read it a few times over the year or so and shared it with friends. I’m re visiting it as I’m back from Australia and back in Wanaka for a few months and hoping I can finally tick it off. Actually planned to do it last February but the area was messed up from the floods. Wish me luck! Thanks for this read. Legend!
Thanks for that positive feedback!
I actually have done it again this past December and there are no notable new slips or ravines etc. I once again had bad conditions on Fohn Saddle, so again, i didn’t get to Fohn Lakes, but we went down into Fohn outlet stream, and then on to the Olivine Ledge after. It’s beautiful in that area, recommended if you get the good weather. Also, there was next to no snow in December, aside from a few patches on the east side of Fiery Col (easy to traverse or avoid though). On this trip, it should be noted we had heavy rain on the final day, and some of the stream crossings on the lower Rockburn came up (the last one before the Sugarloaf Pass turn-off was tricky) – however, this was a LOT of rain, normal rain wouldn’t have done as much.
Also, on Hidden Falls Creek, stay on river right along the scree for as long as possible, don’t cross early onto the deer track like i did (on both trips haha!). Also, cross the Beans Burn at some point once you leave the forest before Split Rock bivvy to avoid an annoying bush bush on river left.
Also, if you want more adventure, consider doing a side trip to Park Pass Glacier. I wrote about that on a blog post called ‘The Serpentine High Lakes Traverse’. It only takes 3-4 hours return.
Good luck with your trip! I wish you all the best and stay safe 🙂
Thanks again for the lovely comment!
It’s an amazing trip, you will love it! I could always keep going back there.
Hi this looks amazing. Thanks for the detail! Would you say this is more scenic than the ROuteburn/Greenstone track? Thanks!
Oh definitely! Five Passes is a total backcountry experience with no man-made influence like on those tracks. I still think it’s one of NZ’s best multi-day hikes because it’s both a backcountry adventure, yet quite accessible (as it never goes into super technical terrain).